How to Keep Your Home Cool With Smart Landscaping

You can beat the heat without breaking the bank. By designing your yard with smart landscaping, you can cool your home naturally. You’ll use less energy and save money on air conditioning bills. Your carefully chosen plants and outdoor features will work together to shade your home and reduce heat gain. You’ll enjoy a cooler, more comfortable living space, and a lower energy bill, all while increasing your home’s value.
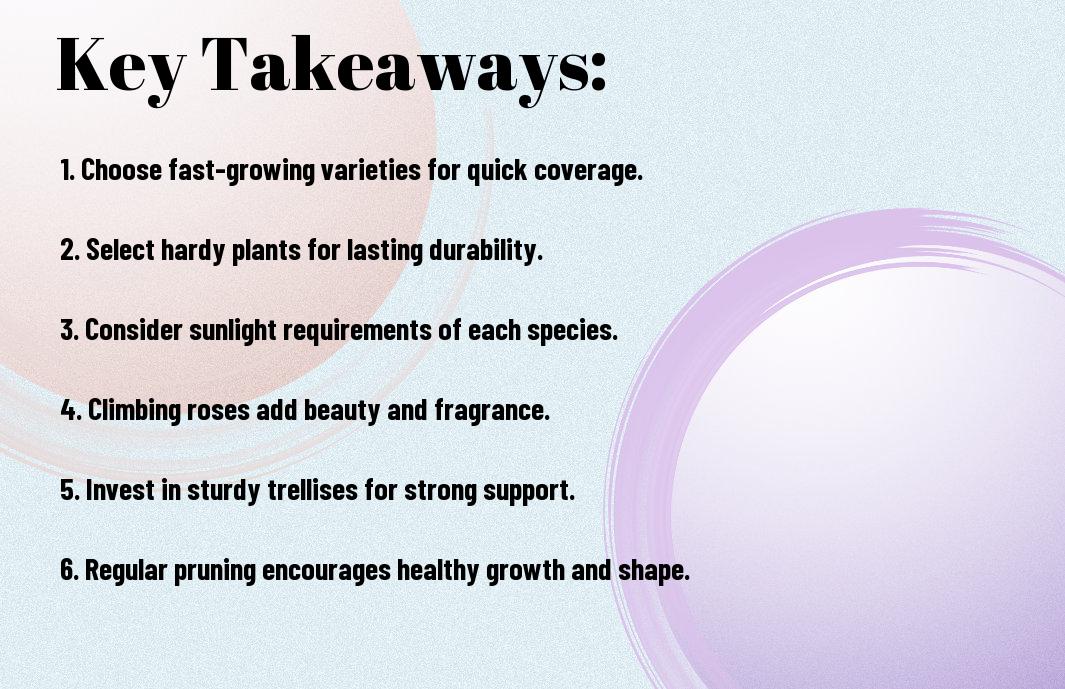
Key Takeaways:

To keep your home cool with smart landscaping, consider the following points:

  • Utilize shading techniques by planting trees or installing awnings to block direct sunlight from heating up your home.
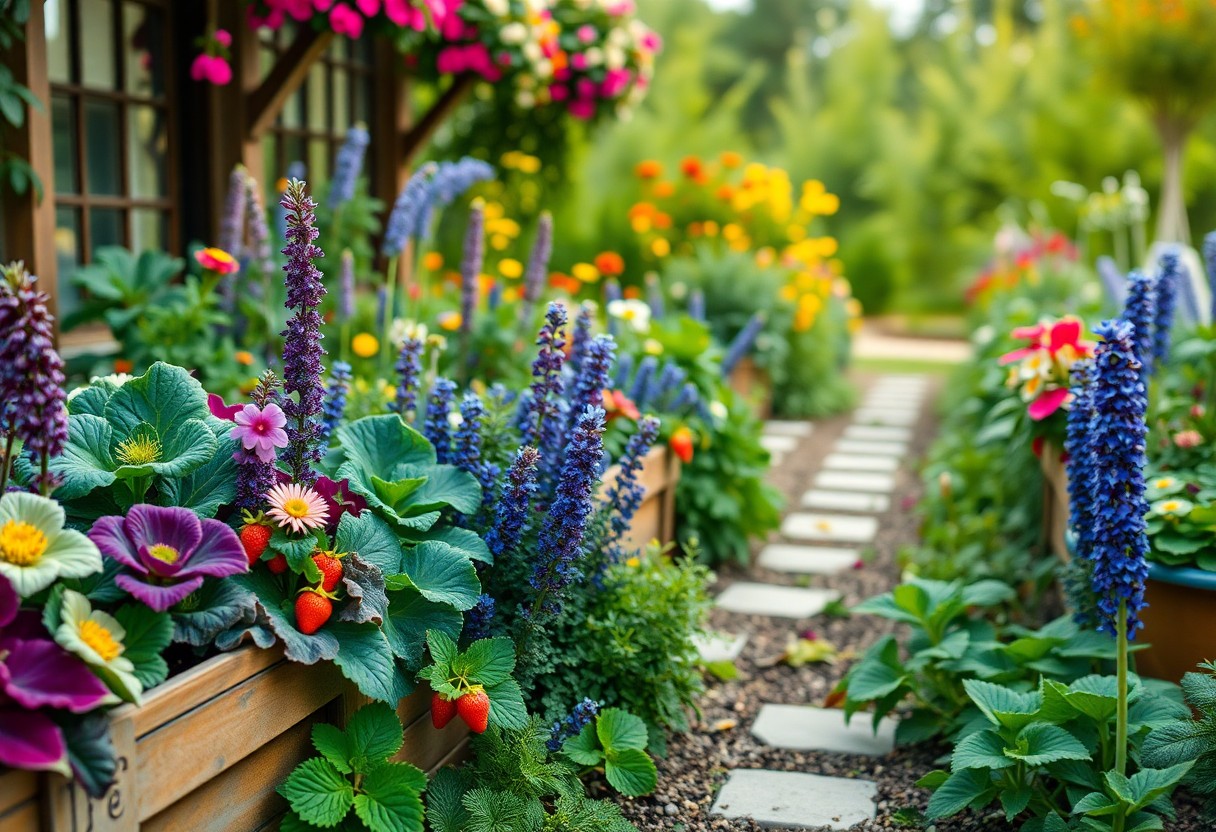
  • Implement evapotranspiration methods, such as planting gardens or lawns, which can help cool the air through the process of water evaporation.
  • Design your landscape to promote air circulation by incorporating open spaces and wind-friendly features, allowing cool air to circulate and reduce the temperature around your home.

Landscaping for Cooling

While smart landscaping can significantly reduce your home’s cooling costs, it requires careful planning. You’ll need to consider your yard’s unique conditions to maximize its cooling potential.

Assessing Your Yard

At the outset, take stock of your yard’s layout, noting the location of trees, gardens, and other features that affect airflow and shade. You’ll use this information to inform your landscaping decisions.

Identifying Sun-Exposed Areas

With your yard’s layout in mind, identify areas that receive direct sunlight, as these will be the primary focus of your cooling efforts. You’ll want to prioritize these areas when selecting plants and designing your landscape.

Hence, you should observe your yard at different times of day to determine which areas receive the most direct sunlight. This will help you choose the right plants and strategies to keep your home cool, such as using trees or shrubs to block sunlight or planting groundcovers to reduce heat radiation.

Effective Landscaping Strategies

It is vital to consider the impact of landscaping on your home’s temperature. You can reduce heat gain and keep your home cool by implementing smart landscaping techniques.

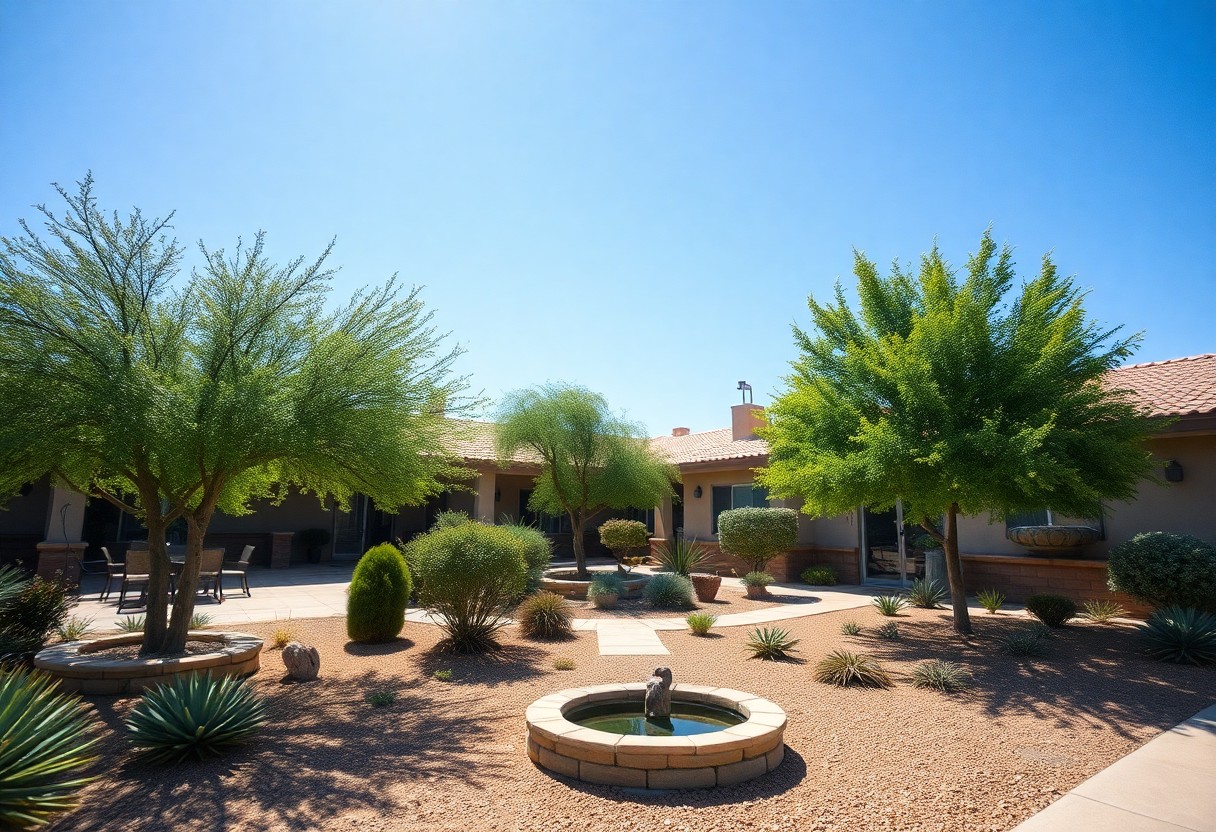
Planting Shade Trees

Among the most effective ways to cool your home is by planting trees that provide shade. You can choose trees with broad leaves or dense foliage to block direct sunlight and reduce heat gain.

Using Awnings and Gazebos

Between the sun’s rays and your home, awnings and gazebos can serve as a barrier, providing shade and cooling your outdoor spaces. You can install them in areas where you spend most of your time.

Further, awnings and gazebos can be customized to fit your home’s style and design. You can choose from various materials, such as wood, metal, or fabric, and add features like retractable canopies or screens to enhance their functionality and provide additional shade and comfort.

Summer Cooling

Despite the scorching heat, your home can stay cool with smart landscaping. You can reduce your energy bills and create a refreshing outdoor space by choosing the right plants and design.

DIY Landscaping Projects

Behind your house, you can create a shade-providing canopy or a cooling breeze by planting trees or shrubs, and you can do it yourself with a few simple tools and some planning.

Low-Maintenance Ground Covers

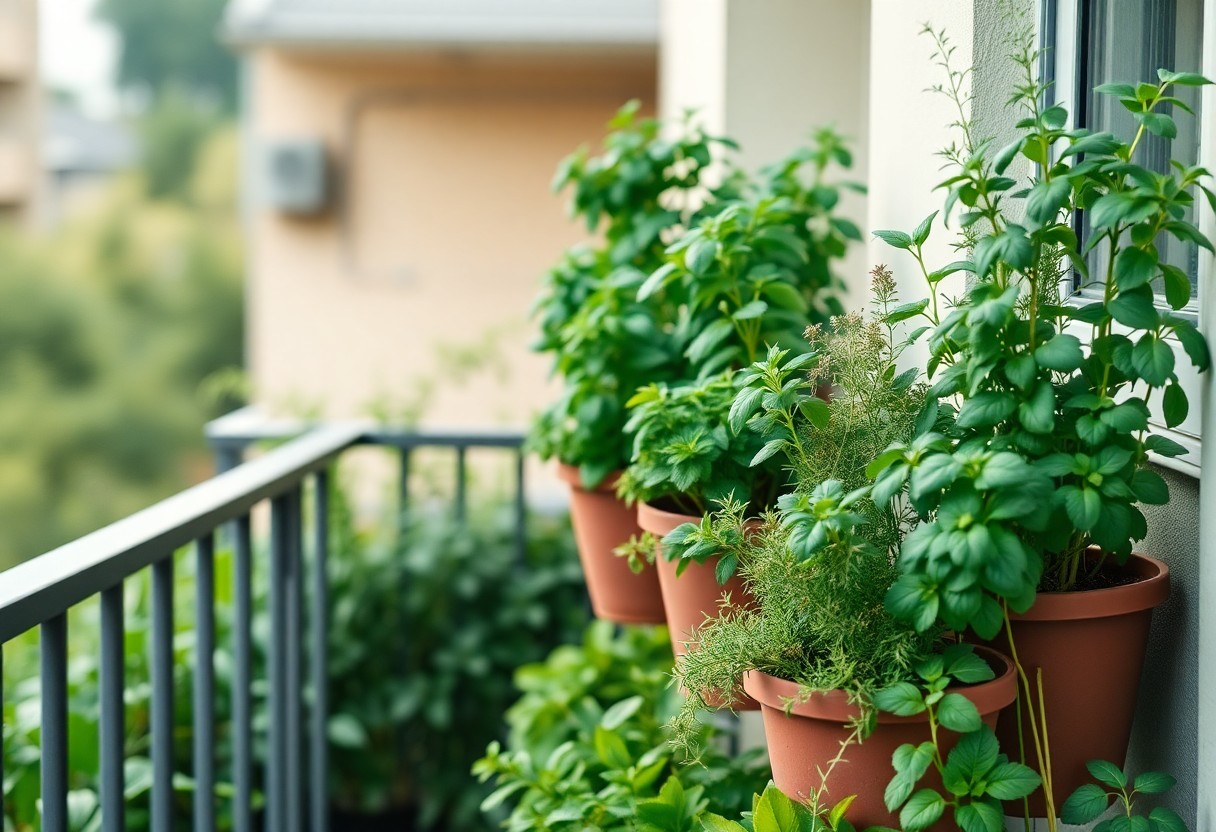
Around your yard, you can use low-maintenance ground covers like succulents or grasses that absorb less water and provide natural cooling.

This type of ground cover is perfect for you if you have a busy schedule, as it requires less watering and mowing, allowing you to enjoy your outdoor space without the hassle of constant upkeep, and at the same time, you’ll be keeping your home cool and reducing your energy consumption.

Smart Landscaping Strategies

All you need to do is make a few simple changes to your outdoor space to keep your home cool. By incorporating smart landscaping techniques, you can reduce your energy consumption and create a more comfortable living environment.

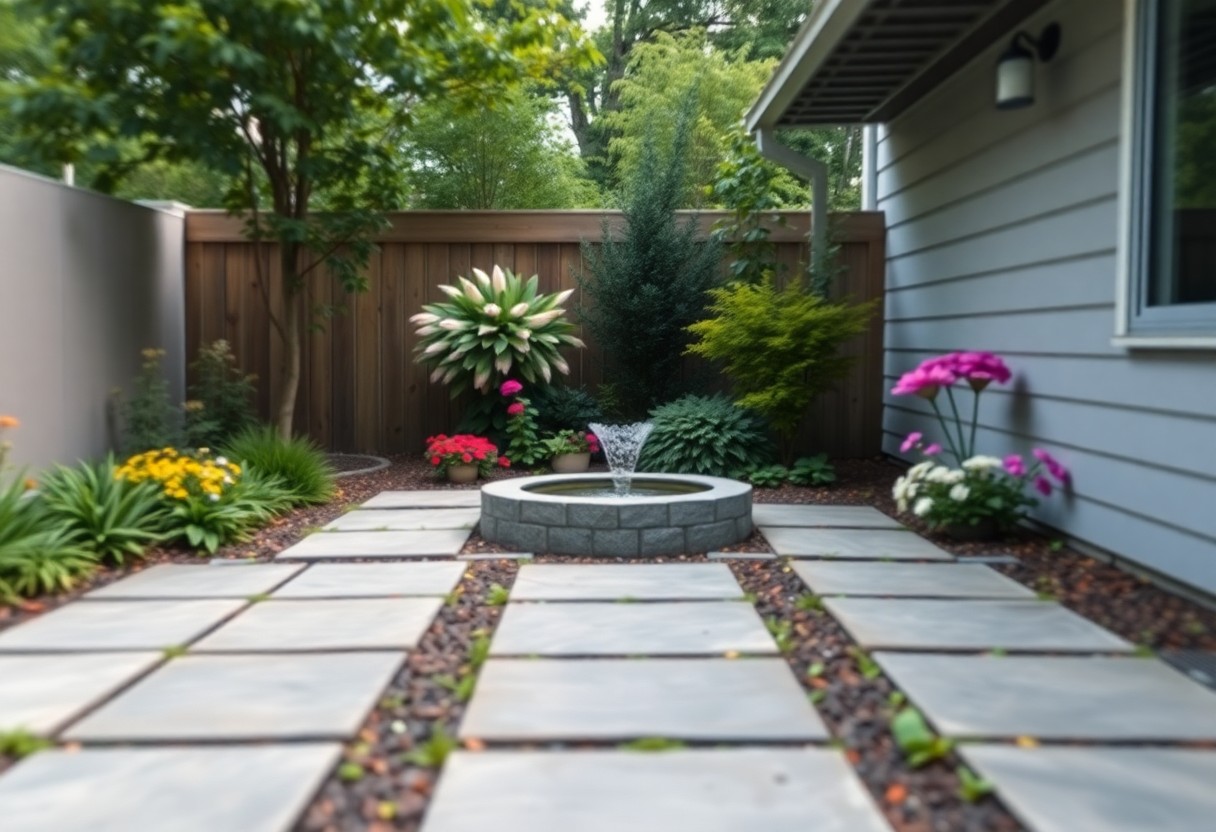
Water Features for Cooling

Similarly, sectioning off areas of your yard with water features can help to cool your home. You can install a small pond or fountain to create a cooling effect, and you’ll be able to enjoy the soothing sounds of running water.

Misting Systems

After installing a misting system, you’ll notice a significant reduction in temperature. You can place misting nozzles in strategic locations around your yard to create a cool and refreshing atmosphere.

But what makes misting systems so effective is their ability to lower the temperature through evaporation. As the water mist evaporates, it absorbs heat from the surrounding air, cooling your home and yard in the process. You can adjust the misting system to suit your needs, and you’ll be able to enjoy your outdoor space even on the hottest days.

Smart Landscaping

Not only can smart landscaping improve your home’s curb appeal, but it can also help keep your home cool. You can learn more about this by visiting Cool Your House With Smart Landscaping to discover the benefits of smart landscaping.

Soil and Mulch Selection

To get started, you need to choose the right soil and mulch for your yard. You will want to select soil and mulch that retains moisture and suppresses weeds, helping to keep your yard cool.

Reducing Heat Islands

Against the heat of summer, you can take steps to reduce heat islands in your yard. You can use trees, plants, and other landscaping elements to provide shade and cool the air.

Consequently, as you work to reduce heat islands, you will find that your home becomes a cooler, more comfortable space. You can use a combination of strategies, including planting trees and gardens, to reduce the urban heat island effect and keep your home cool, which will also lower your energy bills and improve air quality, helping you to enjoy your outdoor space.

Landscaping Strategies

For an effective approach to cool your home, consider your yard’s landscape. You can start by selecting plants that provide shade and absorb heat.

Seasonal Landscaping Tips

For optimal results, start with:

  • planting trees or shrubs

Assume that your yard will be more comfortable with these simple changes.

Energy-Efficient Outdoor Lighting

Around your yard, consider energy-efficient lighting to reduce heat emission. You can install solar-powered lights or LED bulbs to minimize energy consumption.
In addition, these lighting options can help you save money on your energy bills and contribute to a more sustainable environment, allowing you to enjoy your outdoor space while keeping your home cool and your energy costs low.

To wrap up

Drawing together the tips outlined, you now have a solid foundation to keep your home cool with smart landscaping. You can reduce heat gain and create a comfortable living space by planting trees, using light-colored paving, and incorporating water features. With these simple yet effective strategies, you can enjoy a cooler home while lowering your energy bills and enhancing your outdoor space. Your smart landscaping efforts will pay off, making your home a refreshing oasis.

FAQ

Q: What is smart landscaping and how can it help keep my home cool?

A: Smart landscaping refers to the strategic use of plants, trees, and other outdoor features to reduce the temperature around your home, lowering your energy bills and creating a more comfortable living space. By planting trees or shrubs in the right locations, you can provide shade, block winds, and cool the air through evapotranspiration, which can help reduce the need for air conditioning and keep your home cool.

Q: What types of plants are most effective for cooling my home through smart landscaping?

A: The most effective plants for cooling your home through smart landscaping are those with broad leaves or dense foliage, such as deciduous trees, shrubs, and vines. These plants provide excellent shade, absorb carbon dioxide, and release water vapor into the air, which can cool the surrounding temperature. Some examples of cooling plants include oak trees, maple trees, and flowering shrubs like azaleas and rhododendrons.

Q: How can I use smart landscaping to block heat from the sun and cool my home?

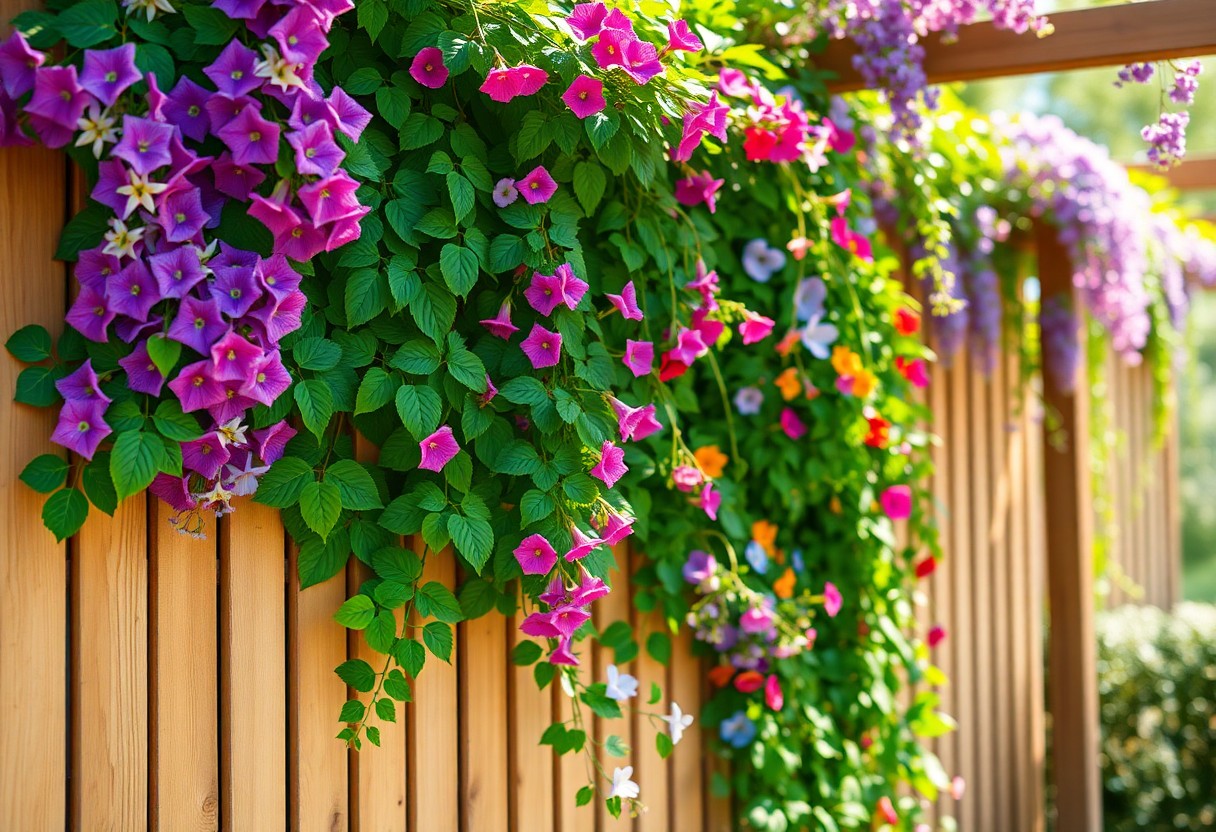
A: To block heat from the sun and cool your home using smart landscaping, plant trees or shrubs on the south and west sides of your home, where the sun’s rays are strongest. You can also use a trellis or arbor to train vines to grow, providing shade for windows and walls. Additionally, consider using a combination of plants with different growth habits, such as tall trees and low-growing shrubs, to create a layered effect that blocks heat and cools the air.

Q: Can smart landscaping help reduce the urban heat island effect and cool my home?

A: Yes, smart landscaping can help reduce the urban heat island effect, which occurs when built-up areas absorb and retain heat from the sun. By planting trees, shrubs, and other vegetation in urban areas, you can help to cool the air through evapotranspiration and shade, reducing the temperature and improving air quality. This can also help to cool your home by reducing the overall temperature of the surrounding area.

Q: How much can smart landscaping reduce my energy bills and help keep my home cool?

A: Smart landscaping can potentially reduce your energy bills by 20-30% by reducing the need for air conditioning and cooling. By providing shade, blocking winds, and cooling the air through evapotranspiration, smart landscaping can help keep your home cool and comfortable, even during the hottest summer months. Additionally, smart landscaping can also increase the value of your property and improve the overall aesthetic appeal of your outdoor space.

How to Build a Vertical Herb Garden on a Balcony

If you’re looking to maximize your outdoor space, you can create a thriving herb garden on your balcony. You can start by learning the basics of A Beginner’s Guide to Creating a Balcony Herb Garden. As you plan your vertical garden, you’ll consider the amount of sunlight your balcony receives and choose the right herbs for your climate. With a little planning, you can enjoy fresh herbs year-round, right in your own home. You’ll be harvesting your favorite herbs in no time.

Key Takeaways:

To create a thriving vertical herb garden on a balcony, consider the following points:

  • Choose a location with the right amount of sunlight and shade to support the growth of your herbs, as different plants have varying requirements.
  • Select a container or planter that is suitable for vertical gardening, such as a trellis or a wall-mounted planter, and make sure it has good drainage to prevent waterlogged soil.
  • Use a well-draining potting mix and fertilize your herbs regularly to promote healthy growth, and consider using a self-watering system to make maintenance easier and more efficient.

Choosing the Right Herbs

Before selecting herbs for your vertical garden, consider the conditions on your balcony and the space available. You want to choose herbs that will thrive in your specific environment and make the most of your garden’s space.

Selecting Herbs for Balcony Conditions

One of the key factors to consider is the amount of sunlight your balcony receives, as this will affect the types of herbs you can grow. You should choose herbs that are suitable for the level of sunlight your balcony gets, whether it’s full sun, partial shade, or full shade.

Considering Herb Growth and Space Requirements

Along with sunlight, you should also think about the growth habits of different herbs and how much space they require. You need to consider the mature size of each herb and leave enough space for proper air circulation and growth.

Further, considering the growth and space requirements of your herbs will help you plan your vertical garden layout. You can group herbs with similar needs together, such as placing tall herbs like rosemary and sage towards the top and shorter herbs like thyme and mint towards the bottom, allowing you to make the most of your space and create a thriving herb garden.

Designing the Garden

Any good garden design starts with a clear plan, and your vertical herb garden is no exception. You’ll need to consider the space you have available on your balcony and the type of herbs you want to grow.

Vertical Garden Options and Layouts

Options for vertical gardens include trellises, wall-mounted planters, and tiered systems, allowing you to choose the best layout for your herbs and available space. You can mix and match these options to create a unique design that suits your balcony and personal style.

Incorporating Watering and Drainage Systems

Laying out a watering and drainage system is vital for your vertical herb garden, as you’ll need to ensure your plants receive the right amount of moisture. You should consider a system that allows excess water to drain easily, preventing waterlogged soil and root rot.

The key to a successful watering and drainage system is to balance the amount of water your herbs receive with the need to prevent excess moisture from building up. You can achieve this by using a combination of watering cans, drip irrigation systems, and well-draining potting soil, allowing you to enjoy healthy and thriving herbs in your vertical garden.

Building the Structure

Many homeowners and balcony enthusiasts are turning to vertical gardens as a way to maximize space and grow their favorite herbs. You can build a beautiful and functional vertical herb garden on your balcony with a few simple materials and some basic construction skills.

Materials and Tools Needed

After gathering your ideas and planning your design, you will need to make a list of the materials and tools required to bring your project to life. You will need a wooden or plastic frame, planters, soil, herbs, and a few basic tools like a drill and screws.

Constructing the Garden Frame and Planters

Before you start constructing your garden frame and planters, make sure you have a clear plan and design in mind. You will need to assemble the frame and attach the planters, making sure they are secure and evenly spaced.

Further, as you construct your garden frame and planters, consider the size and type of herbs you want to grow, and adjust the size and depth of the planters accordingly. You will also need to ensure that the frame is sturdy and can support the weight of the planters, soil, and herbs, and that it is securely attached to the balcony railing or wall to prevent it from tipping over.

Planting and Maintenance

Once again, as you start planting your vertical herb garden, consider learning more about Starting a Balcony Herb Garden for the best results. You will find that with proper care, your herbs will thrive in their new home.

Soil and Fertilization for Herbs

Between selecting the right herbs and planting them, you should focus on using a well-draining potting mix and balanced fertilizer to ensure healthy growth. You can choose organic options to keep your herbs chemical-free.

Pruning and Pest Control Techniques

Maintenance is key when it comes to keeping your herbs healthy, and this includes regular pruning and pest control. You will need to inspect your plants regularly for signs of pests or disease.

Hence, as you prune your herbs, you will encourage new growth and prevent the plants from becoming leggy. You should also keep an eye out for common pests like aphids and spider mites, and use natural methods to control infestations, such as neem oil or insecticidal soap, to keep your herbs thriving.

Light and Temperature Considerations

Keep your herbs thriving by considering the light and temperature conditions on your balcony.

Factor Consideration
Light Most herbs need 4-6 hours of direct sunlight
Temperature Average temperature between 65-75°F (18-24°C)

Balcony Orientation and Lighting Needs

Around the time you’re planning your vertical herb garden, consider the orientation of your balcony and the lighting needs of your herbs. Most herbs require bright, indirect light, so a south-facing balcony is ideal.

Protecting Herbs from Extreme Temperatures

The temperature fluctuations on your balcony can affect your herbs’ growth.

Temperature Effect on Herbs
Below 50°F (10°C) May cause damage or kills herbs
Above 90°F (32°C) May cause stress or wilting

Even with proper lighting, extreme temperatures can still harm your herbs.

Temperature Protection Methods
Insulation Use thermal blankets or straw to keep roots warm
Shading Use shade cloth or umbrellas to filter intense sunlight

As you plan your vertical herb garden, you should take into account the temperature fluctuations on your balcony and take steps to protect your herbs from extreme temperatures, ensuring they thrive in their new environment.

Tips and Variations

To enhance your vertical herb garden, consider the following:

  • using a trellis for climbing plants
  • incorporating self-watering planters

. Assume that with a little creativity, you can create a unique and thriving garden.

Adding Decorative Elements and Themes

Augmenting your garden with decorative elements can make it more visually appealing. You can add your personal touch by incorporating colors, textures, and themes that fit your style, making your garden a beautiful addition to your balcony.

Expanding the Garden and Trying New Herbs

After establishing your initial garden, you can start to expand and experiment with new herbs. You will find that growing your own herbs is a fun and rewarding experience, and you will be eager to try new varieties and arrangements.

Tips for expanding your garden include selecting herbs that thrive in similar conditions and providing adequate space for each plant to grow. As you gain experience, you can try more exotic or unusual herbs, and experiment with different container sizes and shapes to create a unique and dynamic garden that reflects your personality and style, allowing you to enjoy the benefits of your vertical herb garden to the fullest.

Summing up

Summing up, you now have the knowledge to build a thriving vertical herb garden on your balcony. You can utilize your space efficiently by choosing the right plants, materials, and design. With your balcony herb garden, you will be able to grow your favorite herbs and enjoy fresh flavors throughout the year, adding a personal touch to your cooking and enhancing your outdoor living experience. Your vertical herb garden will bring you joy and freshness.

FAQ

Q: What are the benefits of building a vertical herb garden on a balcony?

A: Building a vertical herb garden on a balcony provides several benefits, including maximizing space, improving air quality, and adding a touch of greenery to your outdoor area. It also allows you to grow your favorite herbs year-round, regardless of the season, and provides easy access for harvesting and maintenance. With a vertical garden, you can grow a variety of herbs, such as basil, mint, and rosemary, in a small footprint, making it perfect for small balconies or patios.

Q: What materials do I need to build a vertical herb garden on a balcony?

A: To build a vertical herb garden on a balcony, you will need a few basic materials, including a wooden or plastic planter, a trellis or other support system, potting soil, herbs of your choice, and a watering system. You may also want to consider adding a drip irrigation system or a self-watering planter to make maintenance easier. Additionally, you can use recycled materials, such as old pallets or containers, to create a unique and eco-friendly garden.

Q: How do I choose the right herbs for my vertical garden on a balcony?

A: When choosing herbs for your vertical garden on a balcony, consider the amount of sunlight your balcony receives, as well as the temperature and humidity levels. Herbs such as basil, mint, and cilantro prefer full sun and warm temperatures, while herbs like parsley and rosemary prefer partial shade and cooler temperatures. You should also consider the mature size of the herbs and choose compact or dwarf varieties that will thrive in a small space. Finally, choose herbs that you use frequently in your cooking to ensure you get the most out of your garden.

Q: How often should I water my vertical herb garden on a balcony?

A: The frequency of watering your vertical herb garden on a balcony will depend on the climate, weather, and type of herbs you are growing. As a general rule, herbs prefer well-draining soil and should be watered when the top inch of soil feels dry to the touch. Avoid overwatering, which can lead to root rot and other problems. You can also use a moisture meter to check the soil moisture levels and adjust your watering schedule accordingly. It’s also important to provide good air circulation to prevent fungal diseases.

Q: How do I maintain and harvest my vertical herb garden on a balcony?

A: To maintain your vertical herb garden on a balcony, make sure to fertilize your herbs regularly, prune them to encourage bushy growth, and keep an eye out for pests and diseases. When harvesting your herbs, pinch or cut off individual leaves or stems to encourage new growth and prevent the plant from flowering. Regular harvesting will also help to keep your herbs healthy and prevent them from becoming leggy. You can also use scissors or clippers to trim back overgrown herbs and keep your garden looking neat and tidy. By following these simple tips, you can enjoy a thriving and productive vertical herb garden on your balcony all year round.

The Benefits of Using Permeable Paving in Your Yard

As you consider the design of your yard, you may want to explore the option of permeable paving, a choice that allows rainwater to filter through the surface, reducing runoff and promoting a healthier environment. By incorporating this eco-friendly feature, you can create a more sustainable outdoor space. To learn more about the advantages of this approach, visit A Greener Choice: Advantages of Permeable Paving and discover how your yard can benefit from this innovative technique.

Key Takeaways:

To get the most out of your yard, consider the advantages of incorporating permeable paving into your design. Here are a few points to consider:

  • Using permeable pavers allows for better water absorption, reducing stormwater runoff and the potential for erosion in your yard.
  • Permeable paving materials, such as porous concrete or gravel, promote healthy drainage and can help to recharge groundwater levels, supporting local ecosystems.
  • Incorporating permeable pavers into your yard design can also help to reduce urban heat island effects by allowing water to penetrate the surface, keeping the area cooler and more comfortable during warm weather.

Environmental Advantages

A key aspect of permeable paving is its ability to harmonize with nature, allowing your yard to blend seamlessly into the surrounding environment, creating a more natural balance and reducing the impact of human activity on the land.

Reduced Stormwater Runoff

About the time you start noticing the effects of heavy rainfall, you’ll appreciate the benefits of permeable paving, as it allows rainwater to percolate through the surface, reducing stormwater runoff and alleviating pressure on your local drainage system.

Improved Water Quality

Any effort you make to reduce stormwater runoff will also contribute to improved water quality, as permeable paving helps to filter out pollutants and sediments, allowing cleaner water to flow into your local waterways, benefiting both your yard and the environment.

Runoff from traditional paving can carry pollutants and sediments into nearby waterways, but with permeable paving, you can rest assured that your yard is playing a role in maintaining the health of your local ecosystem, as the water that flows through the paving is filtered and cleansed, helping to preserve the natural balance of your environment, and allowing you to enjoy a clearer conscience, knowing your yard is a part of the solution, not the problem.

Economic Benefits

Assuming you’re looking to make a smart investment in your yard, permeable paving can offer significant economic benefits. By reducing stormwater management costs, you can save money in the long run. For more information on the benefits of permeable pavers, visit The Environmental Benefits of Permeable Pavers to learn more.

Lower Maintenance Costs

Betwixt the initial installation and long-term upkeep, you’ll find that permeable paving requires less maintenance than traditional paving methods, saving you time and money on repairs and replacements.

Increased Property Value

Behind the aesthetic appeal of permeable paving lies a significant increase in your property’s value, as eco-friendly features become increasingly desirable to homebuyers and environmentally conscious individuals.

A key aspect of increased property value is the potential for higher resale value, as your yard becomes a unique selling point, showcasing your commitment to sustainability and environmental stewardship, which can be a major draw for like-minded buyers, allowing you to reap the rewards of your investment in permeable paving.

Aesthetic Appeal

Once again, you’ll find that permeable paving enhances your yard’s beauty, allowing you to create a unique outdoor space that showcases your personal style. The natural look and feel of permeable pavers blend seamlessly with your surroundings, creating a harmonious balance between nature and design.

Variety of Designs and Materials

Beneath the surface of traditional paving lies a world of limitations, but with permeable paving, you have a wealth of design options and materials to choose from, enabling you to customize your outdoor space to suit your tastes and preferences.

Enhanced Curb Appeal

Various features of permeable paving can boost your yard’s curb appeal, from the attractive appearance of the pavers themselves to the vibrant plant life that thrives in the spaces between them, all combining to create a visually stunning exterior that invites you to linger and appreciate its beauty.

With the added benefit of enhanced curb appeal, you can take pride in your yard’s appearance, knowing that it not only looks beautiful but also supports the local ecosystem and manages stormwater runoff effectively, making your outdoor space a true oasis that nourishes both you and the environment.

Functional Benefits

For a more sustainable and environmentally friendly yard, permeable paving offers numerous advantages. You can enjoy a reduction in stormwater runoff, minimizing the burden on your local drainage systems, and creating a more balanced ecosystem in your yard.

Improved Drainage and Reduced Flooding

On occasion, heavy rainfall can overwhelm traditional paving, leading to flooding and erosion. With permeable paving, you can mitigate this issue, allowing rainwater to percolate through the surface, reducing the likelihood of flooding and creating a more stable outdoor space.

Increased Safety and Accessibility

Above all, permeable paving provides a slip-resistant surface, reducing the risk of accidents and injuries, making it an excellent choice for families with children or pets, and allowing you to enjoy your outdoor space with greater peace of mind.

Hence, as you consider the benefits of permeable paving, you’ll find that it not only enhances the aesthetic appeal of your yard but also provides a safer and more accessible environment for you and your loved ones to enjoy, allowing you to connect with nature and appreciate the simple pleasures of life.

Types of Permeable Paving

Many options are available for your yard, including:

  • Porous Asphalt
  • Permeable Interlocking Concrete Pavement

This information is broken down into the following table:

Type Description
Porous Asphalt Allows water to percolate
Permeable Interlocking Concrete Pavement Reduces stormwater runoff
Grass Pavers Combines pavement and grass
Permeable Pavers Filters rainwater
Concrete Grid Pavers Increases drainage

Porous Asphalt

For a more eco-friendly option, consider porous asphalt, which enables water to drain through the surface, reducing the amount of stormwater that enters your local waterways, allowing you to contribute to a healthier environment.

Permeable Interlocking Concrete Pavement

After selecting the type of pavers, you can enjoy the benefits of permeable interlocking concrete pavement, which reduces stormwater runoff and allows water to filter through the pavement, recharging groundwater and reducing the burden on your local drainage systems.

Hence, as you consider permeable interlocking concrete pavement for your yard, you’ll notice that it not only reduces stormwater runoff but also provides a durable and low-maintenance surface, allowing you to enjoy your outdoor space while also doing your part for the environment, and thereby creating a harmonious balance between your yard and nature.

Installation and Maintenance

Now that you’ve decided to incorporate permeable paving into your yard, it’s vital to consider the installation and maintenance process. You’ll want to ensure that your paving is properly installed to reap its benefits and maintain its effectiveness over time.

Proper Installation Techniques

Beneath the surface of a successful permeable paving system lies a well-designed and executed installation plan. You’ll need to choose the right materials and follow the manufacturer’s instructions to ensure a seamless integration with your yard’s ecosystem.

Regular Maintenance and Repair

Amidst the beauty of your newly installed permeable paving, you’ll need to stay on top of regular maintenance and repair tasks. You should inspect your paving regularly to identify any issues that may arise, such as clogging or settling, and address them promptly to maintain its effectiveness.

Considering the long-term benefits of permeable paving, it’s worth investing time in regular maintenance and repair. You’ll find that your paving requires less upkeep than traditional impervious surfaces, and with the right techniques, you can enjoy a beautiful, functional, and eco-friendly outdoor space that blends seamlessly into your surrounding landscape, allowing you to live in harmony with nature, just as you intended when you chose to incorporate permeable paving into your yard.

Summing up

The decision to use permeable paving in your yard can have a profound impact on the environment and your own well-being. As you consider this option, you’ll find that it allows rainwater to seep into the ground, reducing runoff and filtering out pollutants, ultimately benefiting your surrounding ecosystem and your own little corner of the world, making your yard a haven that harmonizes with nature. You will enjoy the beauty and tranquility it brings to your outdoor space.

FAQ

Q: What are the environmental benefits of using permeable paving in my yard?

A: Permeable paving allows rainwater to percolate through the surface, reducing stormwater runoff and filtering out pollutants and sediments. This helps to protect local waterways and maintain healthy groundwater levels. Additionally, permeable pavers can reduce the urban heat island effect, as they allow water to evaporate and cool the surrounding area, creating a more sustainable and eco-friendly outdoor space.

Q: How does permeable paving help with drainage and flooding in my yard?

A: Permeable paving is designed to allow water to pass through the surface, reducing the amount of stormwater runoff and alleviating pressure on drainage systems. This helps to prevent flooding, erosion, and water damage to your yard and surrounding properties. By allowing water to infiltrate the ground, permeable pavers also help to recharge groundwater aquifers, reducing the risk of drought and water scarcity.

Q: Can permeable paving be used for driveways and high-traffic areas?

A: Yes, permeable paving can be used for driveways and high-traffic areas, but it’s vital to choose a suitable material and design. Porous asphalt, permeable concrete, and permeable interlocking concrete pavers are popular options for driveways and high-traffic areas. These materials are designed to withstand heavy loads and frequent use while still allowing water to percolate through the surface. However, it’s crucial to consult with a professional to determine the best material and design for your specific needs.

Q: How do I maintain and clean permeable paving in my yard?

A: Maintaining permeable paving is relatively easy. Regular sweeping and clearing of debris can help prevent clogging and maintain the paving’s permeability. Depending on the material, you may need to perform occasional vacuuming or pressure washing to remove dirt and sediment. It’s also vital to inspect your permeable paving regularly to ensure it’s functioning correctly and make any necessary repairs to prevent damage and extend its lifespan.

Q: Are there any cost benefits to using permeable paving in my yard?

A: Yes, permeable paving can offer several cost benefits. By reducing stormwater runoff, you may be eligible for stormwater management credits or discounts on your water bills. Additionally, permeable paving can help extend the lifespan of your yard’s drainage system, reducing the need for costly repairs and replacements. While the initial installation cost of permeable paving may be higher than traditional paving materials, its long-term benefits and potential cost savings can make it a worthwhile investment for your outdoor space.

How to Incorporate Edible Plants Into Decorative Landscaping

As you step into your garden, you’re surrounded by the vibrant sights and scents of nature. You can elevate this experience by blending edible plants into your decorative landscaping, creating a harmonious union of beauty and functionality. To get started, consider learning How to Mix Ornamental and Edible Plants in Your Garden, and discover the joy of cultivating your own edible oasis, where your senses come alive amidst the lush foliage and thriving flora that you’ve carefully nurtured.

Key Takeaways:

To successfully incorporate edible plants into decorative landscaping, consider the following points:

  • Choose edible plants that are both visually appealing and productive, such as flowering herbs like roses or lavender, to add color and texture to your landscape.
  • Consider the climate and soil conditions of your area when selecting edible plants, and group them with other plants that have similar watering and sunlight requirements.
  • Incorporate edible plants into your landscape design by using them as border plants, hedges, or groundcovers, and combine them with ornamental plants to create a unique and sustainable landscape.

    Choosing Edible Plants

    For a harmonious blend of beauty and bounty, you’ll want to select edible plants that thrive in your local climate and complement your landscape’s aesthetic. As you wander through your yard, consider the textures, colors, and growth habits of various plants, imagining how they might enhance your outdoor space.

    Selecting Plants for Climate and Soil

    One of the most important factors in choosing edible plants is ensuring they are well-suited to your region’s climate and soil type, allowing you to create a lush and vibrant landscape that requires minimal care.

    Considering Space and Maintenance

    Maintenance of your edible plants will depend on the specific varieties you choose and the space in which they are planted, so you’ll want to think carefully about how much time you can devote to tending your landscape.

    It is in the quiet moments spent tending to your edible plants that you’ll come to appreciate the beauty of nature and the joy of cultivating your own food, as you watch your landscape flourish under your care, and you harvest the fruits of your labor, savoring the sweetness of your homegrown treasures.

    Designing the Landscape

    While designing your landscape, consider the interplay of edible plants with the existing environment, allowing you to cultivate a space that is both beautiful and bountiful, much like a lush forest that yields its secrets to the attentive eye.

    Combining Edible Plants with Ornamental Plants

    Besides the aesthetic appeal, combining edible plants with ornamental plants will add depth and diversity to your landscape, inviting you to meander through the vibrant tapestry of colors and textures that you have so thoughtfully woven.

    Creating a Visually Appealing Layout

    Behind every successful landscape lies a thoughtful design, and as you launch on this creative journey, you will find that the deliberate placement of edible plants amidst ornamental ones yields a harmonious balance that delights the senses and nourishes the soul.

    Hence, as you craft your visually appealing layout, you will begin to notice the subtle dance between form and function, where the edible plants not only provide sustenance but also become an integral part of the landscape’s beauty, inspiring you to slow down and appreciate the simple joys of nature that unfold before your eyes.

    Incorporating Fruits and Vegetables

    Many of the same plants that thrive in your kitchen garden can also add beauty and interest to your decorative landscaping, allowing you to harvest fresh produce right in your own yard. You can grow a variety of fruits and vegetables, such as strawberries, blueberries, and leafy greens, amidst your flowers and shrubs.

    Using Vertical Space for Vines and Climbers

    Akin to the way a verdant trellis can transform a blank wall, you can train vines like peas, beans, and cucumbers to climb up arbors or trellises, making the most of your space and adding a touch of whimsy to your garden.

    Adding Color with Fruit-Bearing Shrubs

    Comparable to the vibrant hues of a sunset, you can introduce colorful fruit-bearing shrubs like currants, gooseberries, and elderberries into your landscape, providing a pop of color and attracting pollinators to your garden.

    In fact, as you wander through your garden, you’ll discover that the fruit-bearing shrubs not only add visual interest, but also provide a bounty of fresh fruit for you to enjoy, inviting you to slow down and savor the simple pleasures of nature, and encouraging you to explore the intersection of beauty and utility in your outdoor space.

    Adding Herbs and Flowers

    After considering the overall aesthetic you want to achieve, you can start incorporating herbs and flowers into your decorative landscaping. For inspiration, visit Creating a Permaculture-Inspired Edible Landscape to discover new ideas for your outdoor space.

    Using Herbs as Border Plants

    Above all, herbs like rosemary and thyme make excellent border plants, adding a fragrant and rustic touch to your landscape. You can plant them along pathways or around the perimeter of your garden, creating a beautiful and functional border.

    Incorporating Edible Flowers into the Landscape

    Across your landscape, edible flowers like violas and pansies can add a pop of color and whimsy. You can plant them in containers or directly in the ground, and use them to attract pollinators and add beauty to your outdoor space.

    Another way to incorporate edible flowers into your landscape is to use them as a garnish for your outdoor dining area. Imagine sipping lemonade surrounded by a garden filled with fragrant herbs and colorful flowers, and being able to pick a few to add to your drink or salad. As you wander through your garden, you can harvest a few flowers to add to your meal, creating a truly immersive and delicious experience.

    Maintaining the Landscape

    Unlike traditional decorative landscaping, incorporating edible plants requires attention to their unique needs. As you explore the world of edible landscaping, consider visiting 6 Design Guidelines for Edible Landscaping to learn more about harmonious coexistence with nature.

    Watering and Mulching Techniques

    Lush landscapes demand thoughtful watering and mulching practices, allowing you to nourish your edible plants while preserving the beauty of your outdoor space.

    Managing Pests and Diseases

    Managing the health of your edible landscape is an ongoing process, as you observe and respond to the needs of your plants, fostering a balanced ecosystem that thrives under your care.

    This mindful approach to maintaining your edible landscape allows you to cultivate a deeper connection with the natural world, as you tend to the intricate web of relationships between plants, soil, and wildlife, and you will find that your efforts yield a bountiful harvest, not just of food, but of serenity and wonder.

    Benefits of Edible Landscaping

    Keep in mind that incorporating edible plants into your decorative landscaping can have a significant impact on your life and the environment. You will not only enjoy the aesthetic appeal, but also reap numerous benefits.

    Environmental Benefits

    To truly appreciate the value of edible landscaping, consider the positive effects it has on the ecosystem. You will be supporting local biodiversity, reducing your carbon footprint, and creating a more sustainable outdoor space.

    Personal and Community Benefits

    Benefits such as fresh produce, savings on groceries, and a sense of accomplishment will enrich your life as you tend to your edible landscape. You will feel more connected to nature and your community as you share your harvest.

    The personal and community benefits of edible landscaping extend beyond the individual, fostering a sense of community and cooperation. You will have the opportunity to share your knowledge, skills, and fresh produce with neighbors and friends, strengthening your relationships and building a stronger, more supportive community around you.

    Final Words

    With these considerations, you can harmoniously weave edible plants into your decorative landscaping, blending functionality and beauty. As you tend to your landscape, you’ll find that the intersection of nature and nurture fosters a deeper connection to the earth and your own well-being. Your outdoor space will flourish, inviting you to slow down and savor the simple joys of growth and abundance, surrounded by the vibrant textures and colors of the natural world.

    FAQ

    Q: What are some popular edible plants that can be used in decorative landscaping?

    A: Some popular edible plants that can be used in decorative landscaping include herbs like rosemary, thyme, and oregano, as well as fruits like strawberries, blueberries, and raspberries. Vegetables like lettuce, kale, and carrots can also be used to add a pop of color and texture to your landscape. Additionally, flowering plants like nasturtiums and violas can add a decorative touch and are also edible.

    Q: How can I incorporate edible plants into my existing landscape design?

    A: To incorporate edible plants into your existing landscape design, start by assessing your yard’s conditions, including sunlight, soil type, and moisture levels. Choose edible plants that thrive in your climate and soil type, and consider using container gardens or raised beds to add visual interest. You can also mix edible plants with ornamental plants to create a unique and dynamic landscape. Consider adding a statement piece, like a beautifully crafted planter or trellis, to showcase your edible plants.

    Q: What are some tips for maintaining edible plants in a decorative landscape?

    A: To maintain edible plants in a decorative landscape, make sure to water them regularly, but avoid overwatering, which can lead to disease and pests. Fertilize your edible plants regularly, using organic or natural fertilizers whenever possible. Prune your edible plants regularly to keep them looking their best and to encourage healthy growth. Also, keep an eye out for pests and diseases, and take action quickly if you notice any problems. Finally, harvest your edible plants regularly to encourage continued production and to prevent them from becoming leggy or flowering.

    Q: Can I use edible plants in shady areas of my landscape?

    A: Yes, there are many edible plants that can thrive in shady areas of your landscape. Consider using plants like lettuce, kale, and herbs like mint and cilantro, which prefer partial shade. You can also use shade-tolerant fruits like currants and gooseberries. When planting in shady areas, make sure to choose plants that are specifically bred for shade tolerance, and consider using a mixture of plants with different textures and growth habits to add visual interest. Keep in mind that shady areas may require more frequent watering, as the soil can dry out quickly.

    Q: Are there any potential drawbacks to using edible plants in decorative landscaping?

    A: While edible plants can be a wonderful addition to a decorative landscape, there are some potential drawbacks to consider. For example, edible plants can be more prone to pests and diseases, which can spread to other plants in your landscape. Additionally, edible plants may require more maintenance than ornamental plants, as they need to be harvested and pruned regularly. Finally, some edible plants can be invasive, so make sure to choose plants that are well-behaved and won’t spread beyond their boundaries. With proper planning and maintenance, however, edible plants can be a beautiful and functional addition to your landscape.

The Best Climbing Plants for Fences and Trellises

As you tend to your garden, you likely seek to create a sense of harmony with nature. You want your outdoor space to be a reflection of the beauty that surrounds you. By choosing the right climbing plants for your fences and trellises, you can add a touch of elegance and vibrancy to your yard, inviting the splendor of the natural world into your own little corner of it. You’ll find that with the right plants, your garden will flourish.

Key Takeaways:

  • When dicking out climbing plants for fences and trellises, consider the amount of sunlight and moisture the area receives to ensure the plants thrive in their environment.
  • Fast-growing plants like English Ivy and Clematis are great options for quickly covering fences and trellises, while slow-growing plants like Roses and Honeysuckle provide a more gradual and delicate display.
  • Choose low-maintenance plants like Morning Glory and Trumpet Vine for a hassle-free option, or opt for fragrant plants like Jasmine and Wisteria to add a sensory experience to your outdoor space.

    Choosing the Right Climbing Plant

    Your choice of climbing plant will depend on your personal style and the conditions of your garden. For inspiration, you can visit Top 10 Climbing Plants to explore various options.

    Considerations for Climate and Soil

    Climatic conditions play a significant role in selecting the perfect climbing plant for your garden. You should consider the temperature, sunlight, and soil type to ensure the plant thrives in your environment.

    Popular Climbing Plant Varieties

    Astonishing varieties of climbing plants are available, offering a range of colors, textures, and fragrances to enhance your garden’s beauty. You can choose from flowering plants like roses or clematis, or opt for foliage plants like ivy or Boston ivy.

    Due to the diversity of climbing plants, you can easily find one that suits your garden’s theme and your personal taste. You may prefer plants with showy flowers, like wisteria or honeysuckle, or those with delicate, lacy foliage, like sweet peas or morning glories, to adorn your fences and trellises, bringing charm and character to your outdoor space.

    Types of Climbing Plants

    Now, as you consider climbing plants for your fence or trellis, you’ll find various types to choose from, including:

    • Flowering
    • Evergreen

    Any of these can enhance your outdoor space.

    Type Description
    Flowering Annual bloom
    Evergreen
    Vining Long stems
    Twining Stem wrapping
    Succulent Fleshy leaves

    Flowering Climbers

    Above all, flowering climbers can add vibrant colors to your garden, attracting pollinators and beautifying your fence or trellis with their blooms.

    Evergreen Climbers

    Across your garden, evergreen climbers can provide year-round interest, with foliage that stays green even in winter, offering a sense of continuity and structure.

    It is worth noting that evergreen climbers can be particularly useful for creating a sense of privacy and screening, as they maintain their foliage throughout the year, making them an excellent choice for your garden.

    Benefits of Climbing Plants

    To enhance your outdoor space, consider the advantages of climbing plants. They add beauty and functionality to your fences and trellises, creating a lush and inviting atmosphere.

    Aesthetic Appeal

    Benefits such as softening harsh lines and adding color to your garden make climbing plants a great choice. You can train them to grow up your fences, creating a beautiful display of blooms and foliage.

    Functional Uses

    The functional aspects of climbing plants are numerous, as they provide shade, act as a natural screen, and attract wildlife to your garden. You can use them to conceal unsightly areas or create a sense of seclusion.

    Also, by choosing the right climbing plants, you can create a habitat for birds and insects, adding to the biodiversity of your garden. You can enjoy watching them thrive and flourish in their new environment, bringing joy and tranquility to your outdoor space.

    Tips for Training Climbing Plants

    All climbing plants benefit from proper training to maximize their growth and beauty. You can train your plants using:

    • gentle guidance
    • soft ties

    . Knowing these simple techniques will help your plants thrive on your fence or trellis.

    Pruning and Maintenance

    Practically, trimming your climbing plants regularly will keep them healthy and encourage new growth, allowing you to enjoy their beauty throughout the seasons.

    Supporting Structures

    Typically, providing a sturdy support for your climbing plants is vital, as it allows them to grow upwards and outwards, showcasing their natural beauty, and you can achieve this with your fence or trellis.

    At the heart of a thriving garden, you will often find carefully selected supporting structures, such as trellises, arbors, or fences, that complement your climbing plants, and as you tend to your garden, you will find that these structures become an integral part of the landscape, blending seamlessly into the natural beauty of your outdoor space, and you will appreciate the way they enhance the growth and display of your climbing plants.

    Common Mistakes to Avoid

    After selecting the perfect climbing plant for your fence or trellis, you’ll want to ensure you provide it with the right care to thrive. Carefully consider your plant’s needs to avoid common pitfalls.

    Overwatering and Underwatering

    One of the most frequent errors you’ll encounter is overwatering or underwatering your plants, which can lead to root rot or withered foliage, so be mindful of your plant’s watering needs.

    Poor Plant Selection

    On the path to creating a lush, vibrant garden, you may choose a climbing plant that doesn’t suit your climate or soil type, which can ultimately lead to disappointment and plant failure.

    Poor plant selection can be a significant setback for your garden, so take the time to research and understand your plant’s specific needs and limitations, and consider factors such as sunlight, soil quality, and moisture levels to ensure you choose a plant that will flourish in your care.

    Creative Ideas for Climbing Plants

    Unlike traditional garden designs, incorporating climbing plants into your fence or trellis can add a touch of elegance and whimsy to your outdoor space, allowing you to explore new dimensions of beauty and functionality.

    Vertical Gardens

    By utilizing climbing plants, you can create stunning vertical gardens that not only save space but also provide a unique way to showcase your favorite blooms, bringing a sense of serenity to your surroundings as you tend to your lush, growing wall.

    Arbors and Pergolas

    Above the ordinary, your garden can become a tranquil oasis with climbing plants adorning your arbors and pergolas, inviting you to linger beneath their shaded beauty and bask in the serene atmosphere they create.

    And as you wander through your garden, you’ll find that the arbors and pergolas covered in climbing plants become a haven, providing a sense of seclusion and peace, while also serving as a breathtaking backdrop for outdoor gatherings and quiet moments of contemplation, allowing you to connect with nature and your own inner self.

    Final Words

    Following this journey through climbing plants, you now possess the knowledge to transform your outdoor space into a lush oasis. As you tend to your fences and trellises, you’ll find that these plants bring a sense of serenity to your surroundings, and your connection to nature will deepen. With your thoughtful selection, your garden will flourish, and you’ll bask in the beauty that your climbing plants bring to your little corner of the world.

    FAQ

    Q: What are the best climbing plants for fences and trellises in terms of ease of growth and maintenance?

    A: Some of the best climbing plants for fences and trellises that are easy to grow and maintain include clematis, honeysuckle, and ivy. These plants are adaptable to various conditions, can thrive in different types of soil, and require minimal care. They also provide beautiful blooms or foliage, making them perfect for decorating outdoor spaces.

    Q: How do I train climbing plants to grow up a trellis or fence without causing damage to the structure?

    A: To train climbing plants to grow up a trellis or fence, start by gently twining the stems around the structure or using soft ties to secure them. As the plant grows, it will naturally cling to the trellis or fence. For plants with tendrils, like peas or cucumbers, you can guide them onto the trellis. Avoid using wire or anything that might constrict the plant’s growth or damage the fence. Regular pruning also helps maintain the plant’s shape and promotes healthy growth.

    Q: What climbing plants are suitable for shaded areas and can thrive with limited sunlight?

    A: For shaded areas, climbing plants like English ivy, Creeping Fig, and Boston Ivy are excellent choices. These plants can thrive in partial to full shade and can add beauty to areas with limited sunlight. They are also relatively low maintenance and can grow well in a variety of soil conditions. For flowering options, consider plants like Clematis montana or Shade-loving Clematis varieties that can bloom well in shadier spots.

    Q: How often should I water and fertilize climbing plants on fences and trellises to ensure they remain healthy?

    A: Climbing plants on fences and trellises generally require regular watering, especially during hot or dry spells. Check the soil moisture by inserting your finger into the soil up to the knuckle; if the soil feels dry, it’s time to water. As for fertilization, a balanced, water-soluble fertilizer applied during the growing season (spring to early fall) can promote healthy growth and flowering. However, be sure to follow the instructions on the fertilizer package to avoid over-fertilizing, which can harm the plants.

    Q: Are there any climbing plants that are resistant to pests and diseases, making them ideal for low-maintenance gardening?

    A: Yes, several climbing plants are known for their resistance to pests and diseases, making them perfect for low-maintenance gardening. Roses, for instance, have varieties that are bred for disease resistance. Similarly, Clematis and Honeysuckle have species that are less susceptible to common garden pests and diseases. Additionally, plants like Passionflower and Trumpet Vine are known for their hardiness and resistance to pests. Always choose disease-resistant varieties when possible, and maintain good garden hygiene to prevent the spread of diseases.

Skip to content