How to Create a DIY Outdoor Workspace

Planning

A well-planned outdoor workspace is imperative for a successful DIY project. You’ll want to consider the layout, materials, and purpose of your space to ensure it meets your needs.

Assessing Your Space

On the path to creating your ideal outdoor workspace, you’ll need to evaluate the area where you plan to build. You’ll be looking at the size, shape, and condition of your yard or patio.

Defining Your Needs

Your needs and goals will drive the design of your outdoor workspace. You’ll want to think about what you’ll be using the space for, whether it’s woodworking, gardening, or another activity.

Also, as you define your needs, consider the tools and equipment you’ll require, as well as any storage or seating you’ll need. You’ll be using this space regularly, so make sure it’s functional and comfortable for you.

Key Takeaways:

To create a productive and functional DIY outdoor workspace, consider the following points:

  • Choose a shaded area or create a canopy to protect yourself from the elements, ensuring a comfortable working environment.
  • Invest in durable and weather-resistant materials for your outdoor furniture and decor to withstand various weather conditions.
  • Consider ergonomic and space-saving designs for your workspace to maximize productivity and minimize clutter, allowing you to focus on your work in a peaceful outdoor setting.

    Designing

    Even with a solid plan, designing your outdoor workspace can be a daunting task. You’ll need to consider the space you have available, the type of work you’ll be doing, and the style you’re aiming for. Take your time, and don’t be afraid to get creative and try out different ideas.

    Choosing a Layout

    After you have a sense of your space and style, it’s time to think about the layout. You’ll want to consider the flow of your workspace, where you’ll place your tools and materials, and how you’ll move around the area. Think about your workflow and how you can optimize your space to make your projects easier and more efficient.

    Selecting Materials

    Before you start building, you’ll need to decide on the materials you’ll use. You’ll want to choose materials that are durable, weather-resistant, and suitable for outdoor use. Consider using recycled or reclaimed materials to add some character to your space.

    Layout is everything when it comes to your outdoor workspace, and the materials you choose will play a big role in determining the overall look and feel of your space. You’ll want to think about the type of projects you’ll be working on and choose materials that will withstand the elements and your workflow. Consider using materials like cedar, redwood, or composite materials that are designed to withstand the outdoors, and don’t be afraid to add some personal touches to make your space truly unique and functional for your needs.

    Building

    There’s no denying that building your DIY outdoor workspace is the most exciting part of the process. You get to see your vision come to life, and with the right tools and materials, you’ll be well on your way to creating the perfect spot to tackle your projects.

    Preparing the Site

    Upon arriving at your building site, you’ll need to clear the area of any debris and level the ground to ensure a stable foundation for your workspace. You’ll be surprised at how much of a difference a clean slate can make in the overall quality of your build.

    Constructing the Workspace

    Across the board, the key to a successful build is a solid plan and attention to detail. You’ll want to consider the size and layout of your workspace, as well as the materials you’ll need to bring it all together. As you start constructing, take your time and don’t be afraid to get creative.

    Considering the type of projects you’ll be working on, you may want to add specialty features to your workspace, such as built-in shelving or a workbench. You’ll appreciate the extra storage and functionality as you start tackling your outdoor projects, and your workspace will quickly become your new favorite spot to spend time.
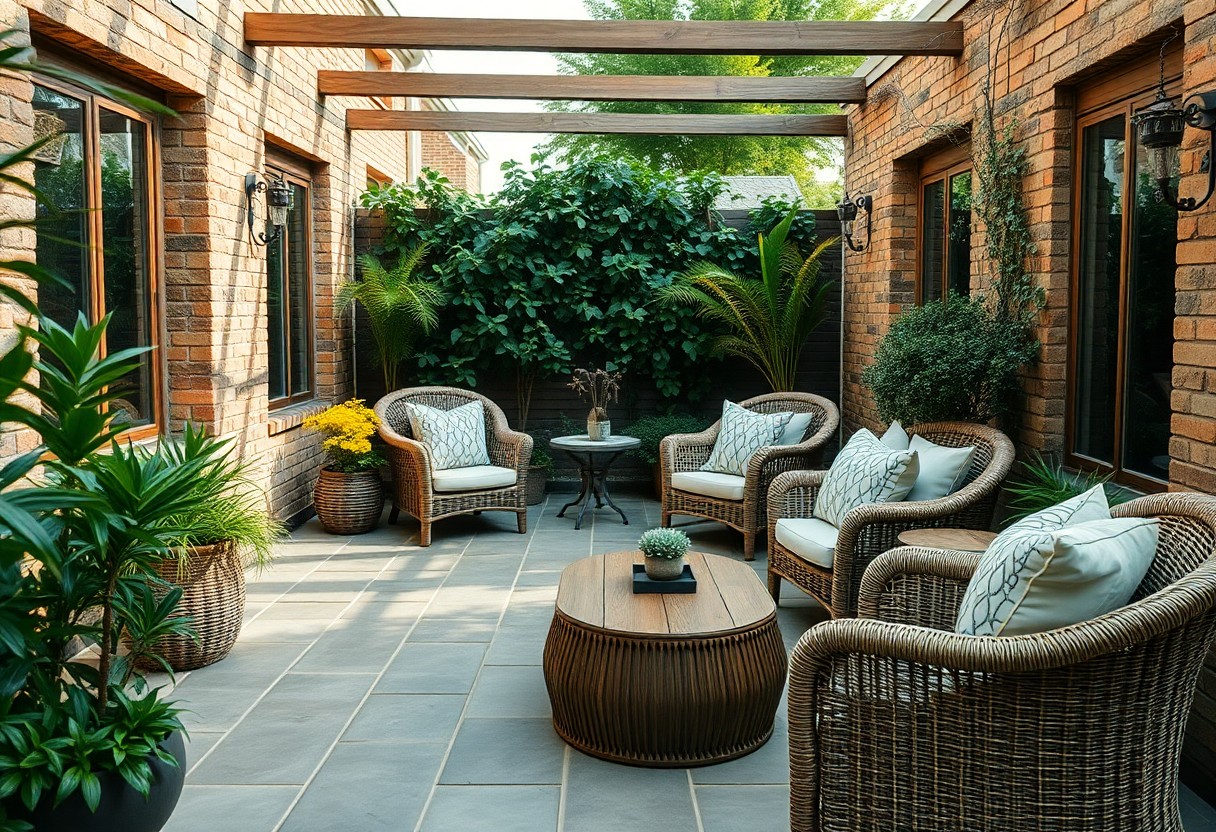
    Furnishing

    Your outdoor workspace needs the right stuff to get the job done. You’ll want to choose furniture that’s durable and comfortable, so you can work outside without a hitch.

    Choosing Outdoor-Friendly Furniture

    About the furniture, consider using recycled plastic or cedar wood, they’re perfect for withstanding the elements. Look for pieces that are sturdy and can handle your work style.

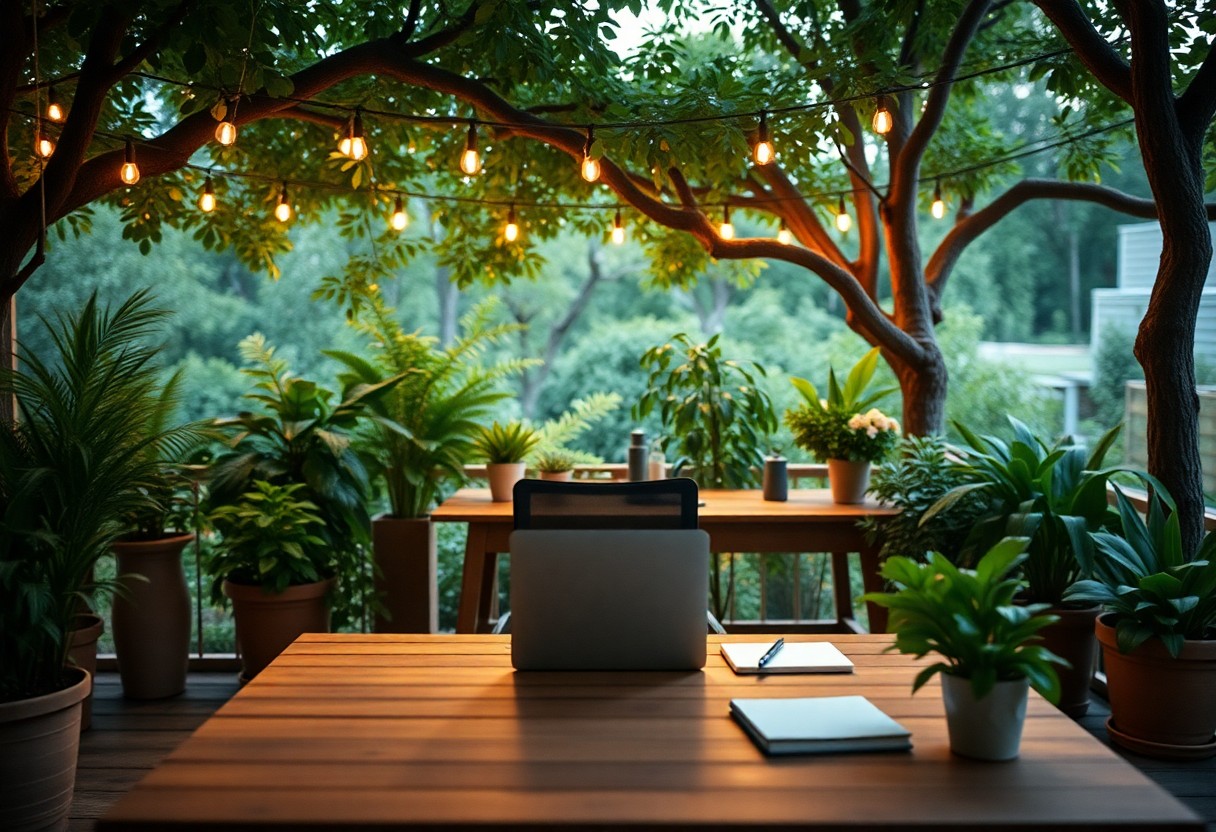
    Adding Lighting and Electronics

    About the illumination, string lights or lanterns can add a nice ambiance, and make sure to get outdoor-rated electronics to keep you working safely and efficiently.

    At this point, you’re probably thinking about how to power all these fancy lights and gadgets. You can use solar panels or outdoor outlets to keep your workspace lit and charged, just make sure to follow safety guidelines to avoid any electrical mishaps.

    Decorating

    Not only does your outdoor workspace need to be functional, but it also needs to be a space that inspires you. You’ll want to add some decorative elements that reflect your personal style and make you feel good about spending time outside.

    Adding Personal Touches

    Against the backdrop of your outdoor setting, you can add personal touches that make your workspace feel truly yours. You can hang artwork, add colorful rugs, or bring in vibrant textiles to create a space that feels like an extension of your indoor office.

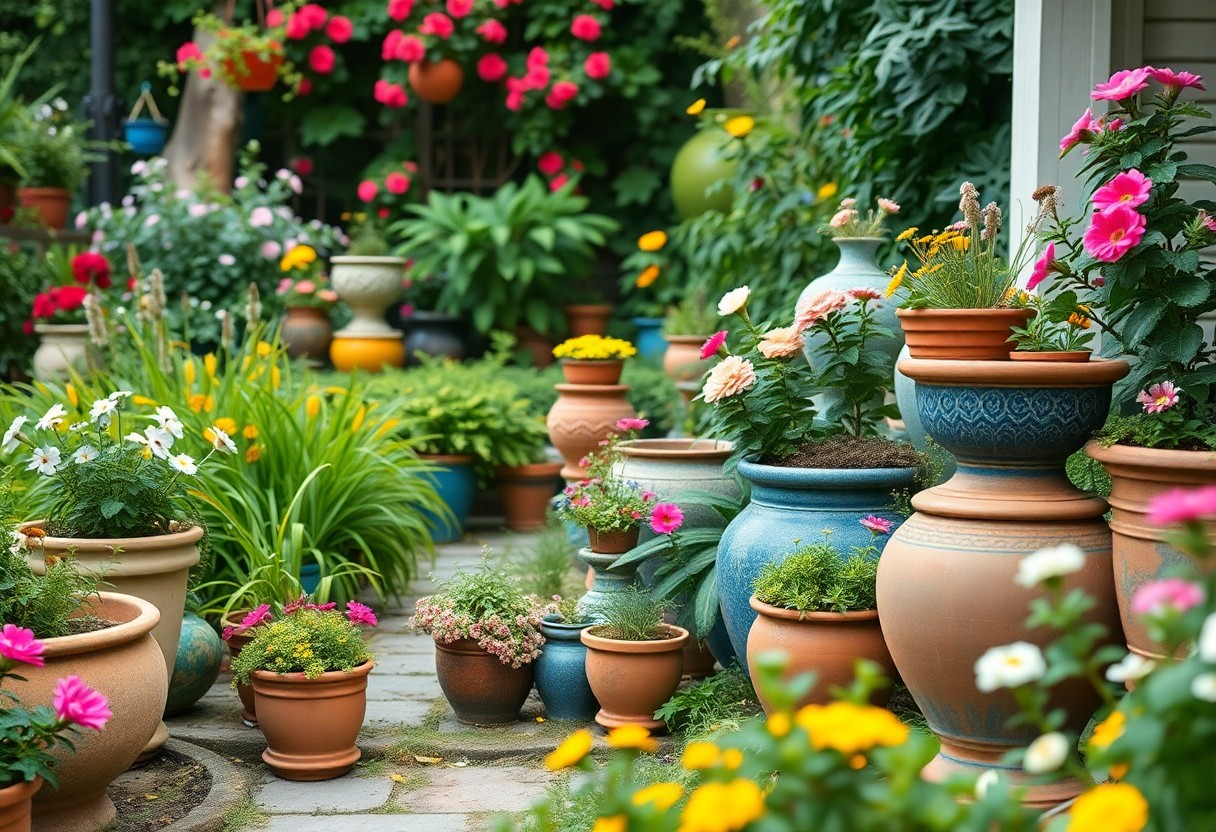
    Incorporating Plants and Greenery

    Around your outdoor workspace, you can incorporate plants and greenery to bring in a natural touch. You can choose low-maintenance plants like succulents or herbs that are easy to care for and add a pop of color to your space.

    Also, when incorporating plants and greenery, you’ll want to consider the amount of sunlight and water your outdoor workspace gets. You can choose plants that thrive in shady areas or use self-watering planters to make maintenance a breeze. As you add plants and greenery, you’ll start to feel like your outdoor workspace is a peaceful oasis that inspires your best work.

    Safety and Maintenance

    Once again, you’ll want to prioritize your well-being while working outdoors, so be sure to check out some expert advice on How to Create a Functional Outdoor Workspace to get your project started on the right foot.

    Ensuring Electrical Safety

    To avoid any electrical hazards, you’ll need to take necessary precautions when setting up your outdoor workspace, especially if you’re using power tools or lighting.

    Regular Maintenance Tips

    Maintenance is key to keeping your outdoor workspace in top shape, so you’ll want to:

    • check your tools regularly
    • keep your workspace clean

    The right maintenance routine will help you stay safe and productive.

    With your safety and maintenance plan in place, you can focus on the fun part – creating your DIY outdoor workspace. You’ll want to:

    • oil your tools
    • cover your workspace

    The end result will be a space that’s both functional and enjoyable to work in.

    You’re probably itching to get outside and start building something with your own two hands. Well, you’ve come to the right place. Creating a DIY outdoor workspace is a great way to expand your workshop and take advantage of fresh air and natural light. Your backyard is just waiting to be transformed into a functional and comfortable spot where you can tinker, build, and create to your heart’s content. Get ready to hammer out a space that’s all your own.

    Final Words

    The journey to creating your DIY outdoor workspace is now complete, and you should be proud of your handy work. You’ve transformed your outdoor space into a functional area where you can work and enjoy nature. For more inspiration, check out DIY Outdoor Desk – How to Build projects to take your workspace to the next level, and make your outdoor workspace truly your own.

    FAQ

    Q: What are the necessary materials needed to create a DIY outdoor workspace?

    A: To create a DIY outdoor workspace, you will need a few necessary materials, including a durable and weather-resistant outdoor table or desk, a comfortable and sturdy chair, a reliable source of power, such as a solar-powered generator or an outdoor outlet, and a reliable internet connection, such as a mobile hotspot or a wireless range extender. Additionally, you may also want to consider investing in a waterproof canopy or umbrella to provide shade and protection from the elements.

    Q: How do I choose the perfect location for my DIY outdoor workspace?

    A: Choosing the perfect location for your DIY outdoor workspace is important to ensure that you have a comfortable and productive working environment. Consider a spot that receives plenty of natural light, is protected from harsh weather conditions, and is close to a power source. You should also consider the noise level and distractions in the area, and choose a location that is quiet and private. Additionally, think about the accessibility of the location, and choose a spot that is easy to get to and has enough space to accommodate your outdoor workspace.

    Q: What are some ways to optimize my DIY outdoor workspace for productivity?

    A: There are several ways to optimize your DIY outdoor workspace for productivity, including adding plants and greenery to improve air quality and reduce stress, investing in a comfortable and ergonomic chair and desk, and using a noise-cancelling headset or playing calming music to minimize distractions. You can also use a task management tool or app to stay organized and focused, and consider implementing a schedule or routine to help you stay on track. Additionally, you can also add some decorative elements, such as artwork or inspirational quotes, to create a motivating and creative environment.

    Q: How can I ensure that my DIY outdoor workspace is safe and secure?

    A: Ensuring that your DIY outdoor workspace is safe and secure is important to protect your equipment and prevent accidents. Make sure that your outdoor workspace is well-lit, especially at night, and consider investing in motion-sensitive lights or security cameras to deter intruders. You should also keep your valuables, such as laptops and tools, secure and out of sight, and consider using a lockbox or safe to store sensitive equipment. Additionally, be mindful of weather conditions, such as strong winds or heavy rain, and take necessary precautions to protect your equipment and workspace.

    Q: What are some creative ways to decorate and personalize my DIY outdoor workspace?

    A: There are many creative ways to decorate and personalize your DIY outdoor workspace, including adding colorful rugs, pillows, and throws to create a cozy and inviting atmosphere, using string lights or lanterns to add ambiance and warmth, and incorporating natural elements, such as branches or stones, into your decor. You can also add personal touches, such as family photos or artwork, to make your outdoor workspace feel more like your own. Consider adding a few plants or a small herb garden to bring in some greenery and freshness, and don’t be afraid to experiment and try out new and unique decorating ideas to make your outdoor workspace truly one-of-a-kind.

How to Add Decorative Pots to Elevate Garden Aesthetics

:

As you step into your garden, you want to be surrounded by beauty and serenity. Your outdoor space is an extension of your home, and with a few simple additions, you can turn it into a stunning oasis. By incorporating decorative pots into your garden design, you can add a touch of personality and style, creating a unique and inviting atmosphere that reflects your taste and flair.

Key Takeaways:

To enhance your garden’s visual appeal, consider the following points when adding decorative pots:

  • Choose pots that complement the color scheme and style of your garden to create a harmonious atmosphere, ensuring that the pots blend in with the surrounding environment.
  • Select pots made from durable materials that can withstand various weather conditions, such as ceramic, terra cotta, or concrete, to ensure they last throughout the seasons.
  • Consider the scale and placement of the pots in relation to the plants and other garden features, balancing large pots with smaller ones and placing them in a way that creates a visually appealing symmetry or asymmetry.

Choosing the Right Decorative Pots

For a beautiful garden, selecting the right decorative pots is important. You want pots that complement your garden’s style and theme, and add a personal touch to your outdoor space.

Consider the Style and Theme of Your Garden

With your garden’s unique character in mind, choose pots that enhance its charm. Consider the colors, textures, and shapes that already exist in your garden to create a harmonious look.

Selecting the Perfect Material and Size

One of the key factors in choosing decorative pots is the material and size. You should select pots that fit your garden’s scale and are made from a material that suits your climate and style.

To make the right choice, consider the durability and maintenance requirements of different materials, such as terracotta, ceramic, or wood. Think about the size of the plants you want to put in the pots and the space where they will be placed, ensuring they are proportional and balanced. This will help you create a beautiful and inviting garden that reflects your personal style.

Preparing the Garden for Decorative Pots

Now that you’ve decided to add decorative pots to your garden, it’s time to get started. You’ll want to assess your outdoor space to determine the best spots for your pots and ensure your garden is ready for its new additions.

Assessing the Soil and Lighting Conditions

By taking a closer look at your garden’s soil and lighting conditions, you can decide which types of plants will thrive in each area and choose pots that complement their surroundings. Consider the amount of sunlight and shade your garden receives, as well as the soil type and moisture levels.

Creating a Plan for Pot Placement

At this stage, you should think about the overall aesthetic you want to achieve with your decorative pots. Consider the style and color of your pots, as well as the size and shape of your plants. You’ll want to create a cohesive look that enhances your garden’s natural beauty.

Due to the variety of factors involved, creating a plan for pot placement can be a fun and creative process. You can sketch out a rough design for your garden, taking into account the mature size of your plants, the color palette you want to achieve, and the texture and style of your pots. As you plan, think about how you can use your decorative pots to create a sense of balance and harmony in your garden, and don’t be afraid to experiment and try out different arrangements until you find a look that feels right for you.

Selecting the Perfect Plants

Your garden’s aesthetic can be greatly enhanced by choosing the right plants to put in your decorative pots, and learning about 10 Creative Ways to Use Pots and Planters for Home Décor will give you a good starting point.

Choosing Plants that Thrive in Containers

Around the garden, you’ll find a variety of plants that are perfect for container gardening, so take some time to explore and find the ones that suit your style.

Considering Color and Texture Combinations

Between the different colors and textures of plants and pots, you can create a unique and beautiful display that reflects your personal taste.

To create a visually appealing arrangement, consider combining plants with different heights, textures, and colors, and don’t be afraid to experiment until you find the perfect balance for your garden, and as you do this, you’ll find that your outdoor space becomes a true reflection of your personality and style, making it a wonderful place to relax and enjoy nature.

Adding Decorative Elements

Many gardeners turn to decorative pots to add a personal touch to their outdoor space. You can find inspiration on how to use unique planters to elevate your home aesthetics by visiting How to Elevate Your Home aesthetics with Unique Planters and exploring various design ideas.

Using Mulch and Gravel for Aesthetics

Beside the pots, you can use mulch and gravel to add texture and color to your garden, creating a beautiful and harmonious atmosphere that complements your decorative pots.

Incorporating Other Decorative Features

Across your garden, you can incorporate other decorative features, such as sculptures, bird baths, or benches, to create a unique and inviting space that reflects your personality and style.

This incorporation of various decorative elements will allow you to create a cohesive and visually appealing garden design, where your decorative pots are enhanced by the surrounding features, and you can enjoy the fruits of your labor in a beautiful and peaceful outdoor space, tailored to your taste and preferences, where you can relax and unwind surrounded by nature.

Caring for Your Decorative Pots

After adding decorative pots to your garden, you’ll want to ensure they continue to thrive. For inspiration on arranging your pots, visit How to Stage a Container Plant Display for expert advice.

Watering and Feeding Your Plants

Afterwards, you’ll need to focus on watering and feeding your plants regularly to keep them healthy and vibrant, adjusting your care routine according to the specific needs of each plant.

Protecting Your Pots from the Elements

With the arrival of changing seasons, you’ll need to think about protecting your pots from harsh weather conditions, such as freezing temperatures and intense sunlight.

Protecting your decorative pots from the elements is an important part of their upkeep, and you can do this by applying a waterproof sealant, moving them to a sheltered location during extreme weather, or using pot feet to improve drainage and prevent waterlogging, ensuring your pots and plants continue to flourish.

Arranging and Rearranging

Keep in mind that arranging decorative pots is an art that requires patience and creativity. You can start by placing your favorite pots in a corner or against a wall, and then experiment with different combinations to find the perfect balance.

Creating a Visually Appealing Display

Beneath the beauty of a well-designed garden lies a thoughtful arrangement of decorative pots. You can group pots of varying sizes and textures to create a visually appealing display that reflects your personal style and complements your garden’s unique character.

Experimenting with Different Layouts

Only by trying out different layouts will you discover what works best for your garden. You can place pots along a path, around a fountain, or in a cozy corner to create inviting spaces that draw you in and make you want to linger.

This process of experimentation is where the real fun begins, as you get to see your garden transform into a beautiful and unique outdoor space. You can try placing tall pots at the back and shorter ones at the front, or group similar pots together to create a sense of harmony, and as you experiment, you’ll find the perfect arrangement that reflects your taste and style, and enhances the overall ambiance of your garden.

To wrap up

Considering all points, you’ve now grasped the basics of adding decorative pots to elevate your garden aesthetics. By choosing the right pots, plants, and placement, you can create a beautiful outdoor space that reflects your personal style. With a little experimentation, you’ll find the perfect combination to enhance your garden’s charm, making it a tranquil haven you’ll enjoy for years to come, and your carefully selected decorative pots will be the perfect finishing touch to your lovely garden.

FAQ

Q: What are the benefits of adding decorative pots to my garden?

A: Adding decorative pots to your garden can greatly enhance its aesthetic appeal. Decorative pots can add a pop of color, texture, and personality to your outdoor space, making it more inviting and visually interesting. They can also help to create a sense of cohesion and harmony in your garden, tying together different elements such as plants, flowers, and hardscapes. Additionally, decorative pots can be used to add a touch of personality and style to your garden, reflecting your personal taste and flair.

Q: How do I choose the right decorative pots for my garden?

A: Choosing the right decorative pots for your garden depends on several factors, including the style and theme of your garden, the type of plants you want to feature, and the overall aesthetic you want to achieve. Consider the color, material, and texture of the pots, as well as their size and shape. You should also think about the level of maintenance you are willing to commit to, as some pots may require more care than others. For example, terra cotta pots are a popular choice for gardens with a rustic or natural theme, while ceramic pots are often used in more modern and contemporary gardens.

Q: What types of plants are best suited for decorative pots?

A: A wide variety of plants can thrive in decorative pots, depending on the size, material, and drainage of the pot. Some popular choices include flowering plants such as petunias, geraniums, and begonias, as well as foliage plants like succulents, ferns, and ivy. Herbs such as basil, rosemary, and thyme are also well-suited for decorative pots and can add a fragrant and edible element to your garden. When choosing plants for your decorative pots, be sure to select varieties that are compatible with the pot’s size, material, and drainage, and that will thrive in the amount of sunlight and water they will receive.

Q: How can I use decorative pots to create a cohesive look in my garden?

A: To create a cohesive look in your garden using decorative pots, try grouping pots of similar style, color, and texture together. You can also use pots of varying sizes and shapes to add visual interest and depth to your garden. Consider creating a focal point in your garden using a large, statement-making pot, and then using smaller pots to create a sense of balance and harmony around it. Additionally, you can use decorative pots to create a sense of continuity and flow in your garden by placing them along a path or walkway, or by using them to frame a entrance or seating area.

Q: How do I care for and maintain my decorative pots and plants?

A: To keep your decorative pots and plants looking their best, be sure to water them regularly, but avoid overwatering, which can lead to root rot and other problems. Fertilize your plants regularly, using a balanced fertilizer that is suitable for the type of plants you are growing. Also, make sure to clean your decorative pots regularly to prevent the buildup of dirt and debris, and to protect them from extreme temperatures and weather conditions. Finally, consider bringing your decorative pots and plants indoors during the winter months or extreme weather conditions to protect them from damage and ensure they continue to thrive.

The Best Tips for Growing Root Vegetables

As you begin on your journey to cultivate a thriving garden, you’ll discover the joy of growing your own root vegetables. With a little patience and practice, you can harvest a bounty of delicious, nutritious produce right in your own backyard. To get started, you can learn the basics of How to Grow Root Vegetables in Your Garden – 2024, and then explore the simple, yet effective techniques outlined in this article to take your gardening skills to the next level and enjoy the rewards of your labor.

Key Takeaways:

To achieve success in growing root vegetables, consider the following points:

  • Choose a location with full sun to partial shade to promote healthy growth and development of your root vegetables.
  • Prepare the soil with organic matter and ensure it has a loose structure to allow roots to grow deep and evenly.
  • Keep the soil consistently moist but not waterlogged, as this can lead to rot and other problems, and ensure a balanced fertilizer application to support root development.

Choosing the Right Root Vegetables

While selecting the right root vegetables, you’ll want to think about what will thrive in your garden. Consider the space you have and the climate you’re in, as these factors will greatly impact your harvest.

Selecting Varieties for Your Climate

Above all, you should choose varieties that are well-suited to your region’s temperature and moisture levels. This will ensure a healthy and abundant harvest, and make the growing process much easier for you.

Considering factors like Soil and Season

Alike other gardening tasks, you need to think about the specifics of your garden when choosing root vegetables. You should consider:

  • the type of soil you have
  • the time of year you’re planting

Perceiving these factors will help you make informed decisions about which root vegetables to grow.

Factors such as soil quality, sunlight, and water availability will all impact the success of your root vegetable garden. You should consider:

  • the pH level of your soil
  • the amount of sunlight your garden receives
  • the time of year you’re planting

Perceiving these factors will help you create a thriving and diverse garden, full of delicious root vegetables for you to enjoy.

Preparing the Soil

Assuming you want to grow healthy root vegetables, you’ll need to start with well-prepared soil. This involves loosening the soil to a depth of about 12 inches to allow roots to grow freely. You can use a fork or tiller to loosen the soil, and then add organic matter like compost or manure to improve its structure and fertility.

Testing and Amending Soil Quality

Above all, it’s crucial to test your soil to determine its pH level and nutrient content. You can purchase a soil testing kit or send a sample to a lab for analysis. Based on the results, you can amend your soil with lime, fertilizer, or other additives to create a balanced and fertile growing medium.

Creating a Suitable Environment for Root Growth

Across your garden bed, you’ll want to create a smooth, even surface for roots to grow. You can use a rake to remove any debris or stones, and then firm the soil gently to prevent settling. This will help your root vegetables grow straight and true, rather than becoming deformed or forked.

The key to creating a suitable environment for root growth is to pay attention to the details. You’ll want to ensure that your soil is consistently moist, but not waterlogged, as this can lead to rot and other problems. You can also use mulch or cover crops to retain moisture and suppress weeds, giving your root vegetables the best chance to thrive. As you work the soil, think about the roots growing beneath your feet, and take pleasure in providing them with the conditions they need to flourish. By doing so, you’ll be rewarded with a bountiful harvest of delicious and nutritious root vegetables.

Planting and Spacing

After preparing your soil, you’re ready to plant your root vegetables. For a comprehensive guide, check out The Only Root Vegetables Guide You’ll Ever Need to ensure you’re on the right track. By following a few simple steps, you’ll be on your way to a successful harvest.

Techniques for Sowing Seeds and Seedlings

Similar to seedlings, young roots need careful handling when being transplanted into your garden. You’ll want to sow your seeds at the right depth and water them gently to avoid washing away the tiny roots.

Optimal Spacing for Healthy Root Development

Similar to seedlings, your root vegetables will benefit from having enough space to grow. You’ll want to leave enough room between each plant to allow for proper air circulation and growth, giving your roots the best chance to develop.

This optimal spacing will also help prevent disease and pests from spreading, giving you a healthier and more bountiful harvest. As you plant, consider the mature size of your roots and leave enough space for them to reach their full potential, and with a little patience, you’ll be enjoying your delicious homegrown root vegetables in no time.

Watering and Care

Not all root vegetables require the same level of care, but they all need proper watering to thrive. You’ll want to keep the soil consistently moist, especially during the first few weeks after planting.

Providing Adequate Moisture and Nutrients

Among the most important things you can do for your root vegetables is provide them with adequate moisture and nutrients. You can achieve this by watering them deeply and adding organic matter like compost to the soil.

Managing Common Pests and Diseases

Manipulating the environment to prevent pests and diseases is key to growing healthy root vegetables. You can start by rotating your crops and removing any infected plants to prevent the spread of disease.

Pests like aphids and slugs can be a problem for root vegetables, but you can manage them by using natural methods like introducing beneficial insects or spraying soapy water on the affected areas. By taking these steps, you’ll be able to enjoy a bountiful harvest of delicious and healthy root vegetables from your garden.

Mulching and Maintenance

All root vegetables require some level of care to thrive. You will need to mulch and maintain your soil to create an ideal environment for your roots to grow.

Retaining Moisture and Suppressing Weeds

Retaining the right amount of moisture in your soil is vital for healthy root growth. You can achieve this by applying a thick layer of organic mulch, which will also help suppress weeds that compete with your roots for water and nutrients.

Regular Tasks for a Healthy Root Crop

Any gardener knows that regular tasks are necessary to keep your root crop healthy. You should regularly check your soil moisture, remove weeds, and inspect your roots for signs of disease or pests.

Further to these tasks, you will also need to ensure your soil is well-aerated and loose, allowing your roots to grow freely. As you tend to your roots, you will begin to notice the subtle signs of a healthy crop, and with patience and dedication, you will be rewarded with a bountiful harvest of delicious and nutritious root vegetables, all from your own garden, grown with your own care and attention.

Harvesting and Storage

Many root vegetables can be left in the ground until you’re ready to use them, but it’s important to harvest them before they become too old.

Timing and Techniques for Optimal Flavor

Technically, the best time to harvest root vegetables is when they’re at their peak flavor and texture, which is usually in the fall or early spring.

Tips for Storing and Preserving Root Vegetables

By utilizing proper storage methods, you can enjoy your root vegetables year-round:

  • keep them in a cool, dark place
  • store them in a container with good ventilation

After harvesting and storing your root vegetables, you’ll be able to savor their flavor and texture for months to come.

Even with proper storage, root vegetables will eventually go bad, but you can extend their shelf life by following a few simple tips:

  • check on them regularly for signs of spoilage
  • store them in a way that allows for air circulation

After taking the time to properly store and preserve your root vegetables, you’ll be rewarded with a bounty of delicious, homegrown produce.

Final Words

Taking this into account, you now have the knowledge to grow your own delicious root vegetables. You’ve learned the best tips to cultivate a thriving garden, and with patience and practice, your harvest will flourish. As you tend to your garden, you’ll find joy in the simple act of nurturing your own food, and your efforts will be rewarded with a bountiful yield, allowing you to enjoy the fruits of your labor in your own backyard.

FAQ

Q: What are the best conditions for growing root vegetables?

A: Root vegetables such as carrots, beets, and potatoes prefer well-draining, loose soil with a pH between 6.0 and 7.0. They also require full sun to partial shade and consistent moisture, especially when they are producing roots. Additionally, the soil should be free of rocks and debris to allow the roots to grow straight and unobstructed.

Q: How deep should I plant root vegetable seeds?

A: The depth at which you plant root vegetable seeds depends on the type of vegetable. For example, carrot seeds should be planted about ¼ inch deep, while beet seeds can be planted about 1 inch deep. It’s also important to sow the seeds thinly and evenly, as overcrowding can lead to deformities and poor growth. You can check the specific planting depth for each type of root vegetable on the seed package or consult with a gardening expert.

Q: How often should I water root vegetables?

A: Root vegetables need consistent moisture, especially when they are producing roots. The soil should be kept moist but not waterlogged, as this can lead to rot and other problems. Aim to provide about 1-2 inches of water per week, either from rainfall or irrigation. You can also mulch around the plants to help retain moisture and suppress weeds.

Q: Can I grow root vegetables in containers?

A: Yes, you can grow root vegetables in containers, but you’ll need to choose a container that is deep enough to accommodate the roots of the plants. For example, a container that is at least 6-8 inches deep is suitable for growing carrots and beets. Make sure the container has good drainage holes to prevent waterlogged soil, and use a well-draining potting mix to prevent rot. You’ll also need to provide enough space for the plants to grow, so choose a container that is at least 12-18 inches wide.

Q: How do I know when my root vegetables are ready to harvest?

A: The timing of harvest depends on the type of root vegetable and the variety. For example, baby carrots can be harvested as early as 50 days after sowing, while maincrop carrots take around 70 days. You can check the harvest time on the seed package or consult with a gardening expert. You can also check for readiness by gently digging around the plants with a fork, being careful not to damage the roots. For example, if you’re growing beets, you can harvest them when the roots are between 1-3 inches in diameter, depending on the variety.

How to Add Texture to Your Outdoor Space

You step out into your yard, and the space feels flat, like a canvas waiting for brushstrokes of depth. Your outdoor area yearns for dimension, for tactile elements that invite touch and exploration. As you look around, you consider the possibilities: rough-hewn wood, soft grasses, and vibrant flowers. You envision a space that’s richly layered, where your senses come alive with every step, and every glance. Now, you’re ready to add texture, to transform your outdoor space into a sensory haven.

Key Takeaways:

To enhance your outdoor space, consider the following points:

  • Adding planters and greenery can introduce different textures and dimensions to your outdoor area, creating a visually appealing atmosphere.
  • Incorporating hardscapes such as stone or brick can add depth and contrast to your outdoor space, making it more inviting and interesting.
  • Using outdoor furniture with varying materials and patterns, such as wicker or rattan, can bring warmth and character to your outdoor space, making it feel more cozy and inviting.

    Adding Texture with Plants

    The addition of plants to your outdoor space can greatly enhance its texture. You can mix different species to create a unique blend of colors and textures, making your space more inviting.

    Native Plants and Grasses

    Around your yard, native plants and grasses can be used to add texture, providing a natural look that blends with the surroundings, allowing you to create a seamless transition between your outdoor space and the environment.

    Ornamental Plants and Flowers

    Beneath the sun, ornamental plants and flowers can add a pop of color and texture to your outdoor space, giving you the opportunity to express your personal style and create a unique ambiance.

    Grasses and other foliage can be combined with ornamental plants and flowers to create a layered, dimensional look, allowing you to experiment with different textures and colors, making your outdoor space a true reflection of your taste and personality.

    Incorporating Hardscapes

    Clearly, adding texture to your outdoor space can be achieved by incorporating hardscapes, which provide a solid foundation for your design. You can use various materials to create a unique and inviting atmosphere, enhancing your overall outdoor experience.

    Pavers and Stone

    Around every corner, you’ll find opportunities to incorporate pavers and stone, adding depth and visual interest to your outdoor space. You can use them to create pathways, patios, or retaining walls, bringing texture and variation to your landscape.

    Bricks and Concrete

    Behind your design choices, bricks and concrete can provide a solid backbone, offering a range of textures and colors to choose from. You can use them to create a cohesive look or mix and match for a more eclectic feel, adding character to your outdoor space.

    Concrete, in particular, can be molded and textured to fit your design, allowing you to create unique patterns and designs. You can stamp, stain, or etch concrete to add visual interest, making it a versatile choice for your hardscape needs, and allowing you to personalize your outdoor space to fit your style.

    Creating Contrast with Furniture

    Many outdoor spaces lack depth due to uniform furniture. You can add texture by mixing materials, as seen in 13 Ways to Use Color and Texture in Your Landscape Design. This approach creates visual interest and invites conversation.

    Wicker and Rattan

    The natural beauty of wicker and rattan furniture brings warmth to your outdoor space, adding a cozy texture that complements plants and flowers.

    Metal and Wood

    Woven metal and wood furniture offers a sleek, modern contrast, blending industrial and natural elements to create a unique atmosphere in your outdoor space.

    Consequently, as you explore metal and wood combinations, you’ll find that the key to success lies in balancing opposing textures. You can pair rough-hewn wood with smooth metal, or combine reclaimed wood with metallic accents, to create a space that reflects your personal style and invites you to linger.

    Utilizing Outdoor Rugs

    After selecting the perfect outdoor furniture, you can add warmth and texture to your space with outdoor rugs. They define different areas and bring a sense of comfort to your patio or deck.

    Natural Fiber Rugs

    Along with their unique textures, natural fiber rugs like sisal or jute add a touch of earthy charm to your outdoor space, blending seamlessly with the surrounding environment.

    Synthetic Rugs

    For a more durable and low-maintenance option, you can choose synthetic rugs that mimic the look of natural fibers, offering a wide range of styles and colors to complement your outdoor decor.

    And as you explore synthetic rugs, you’ll find they’re often made from recycled materials, resistant to fading, and easy to clean, making them a practical choice for your outdoor space, allowing you to enjoy your area without worrying about upkeep.

    Enhancing with Lighting

    Unlike other design elements, lighting can make or break your outdoor space’s ambiance. You can learn more about enhancing your space by checking out How To Integrate Texture, Color, And Dimension Into Your Outdoor Living Space to create a cohesive look.

    String Lights

    Lights that are strung up around your patio or deck can add a warm glow to your outdoor space, making it feel more inviting and cozy, allowing you to enjoy your evenings outdoors.

    Lanterns and Sconces

    Strings of lanterns or sconces can add a touch of elegance to your outdoor space, providing soft, warm lighting that highlights your textures and colors.

    Plus, lanterns and sconces come in a variety of styles and materials, allowing you to choose the perfect fit for your space, and with the right placement, you can create a warm and welcoming atmosphere that you’ll enjoy spending time in.

    Combining Elements

    Keep your outdoor space engaging by mixing different elements. You’ll create a unique atmosphere that invites relaxation and conversation.

    Mixing Materials

    Any combination of natural and synthetic materials will add depth to your space. You can pair wood with metal or stone with fabric to create a layered look.

    Balancing Texture and Color

    For a cohesive look, balance your textures with a thoughtful color palette. You’ll want to select colors that complement your textures, creating a visually appealing outdoor space.

    Considering the interplay between texture and color, you’ll find that certain textures pop against specific hues. You can use bold colors to accentuate smooth textures or mute bright colors with rougher textures, allowing you to experiment and find the perfect balance for your outdoor space.

    Summing up

    Considering all points, you’ve learned how to add texture to your outdoor space. You can now enhance your area with different elements. For more information, visit Adding Texture and Color to Outdoor Spaces to create a unique ambiance in your yard, making it your own haven. Your outdoor space will become a reflection of your style, inviting you to relax and enjoy nature.

    FAQ

    Q: What are the benefits of adding texture to my outdoor space?

    A: Adding texture to your outdoor space can enhance the aesthetic appeal and create a more inviting atmosphere. Texture can add depth, visual interest, and tactile experience to your outdoor area, making it more engaging and comfortable for relaxation and entertainment. By incorporating different textures, you can create a unique and personalized outdoor space that reflects your style and personality.

    Q: What are some ways to add texture to my outdoor space?

    A: There are several ways to add texture to your outdoor space, including incorporating natural elements like stone, brick, or wood, using outdoor rugs and mats, adding plants and greenery with varying foliage, and installing water features or fire pits. You can also use decorative elements like throw pillows, blankets, and wall hangings to add texture and visual interest to your outdoor furniture and decor.

    Q: How can I choose the right textures for my outdoor space?

    A: To choose the right textures for your outdoor space, consider the style and theme you want to achieve, as well as the climate and surroundings. For example, if you live in a coastal area, you may want to incorporate natural textures like driftwood or sea grass, while a desert landscape might call for more rustic textures like terra cotta or sandstone. You should also think about the functionality and durability of the textures you choose, as well as how they will withstand the elements.

    Q: Can I add texture to my outdoor space on a budget?

    A: Yes, you can add texture to your outdoor space without breaking the bank. Consider repurposing or upcycling items you already have, like old pallets or containers, to create unique textured elements. You can also shop for second-hand or discounted outdoor decor, or DIY your own textured elements using natural materials like pinecones, branches, or stones. Additionally, start small and focus on one area or element at a time to make the project more manageable and affordable.

    Q: How can I maintain and protect the textures in my outdoor space?

    A: To maintain and protect the textures in your outdoor space, make sure to clean and inspect them regularly, especially after harsh weather conditions. Use protective sealants or coatings to shield natural elements like wood or stone from the elements, and apply fabric protectants to outdoor textiles like rugs and upholstery. You should also consider storing fragile or sensitive textured elements during extreme weather conditions, like heavy rain or intense sunlight, to prevent damage and extend their lifespan.

The Best Ways to Use Rocks and Gravel in Landscaping

As you plan your outdoor space, you’ll discover the versatility of rocks and gravel in enhancing your landscape’s aesthetic and functionality. You can use them to create beautiful pathways, retaining walls, and decorative borders that add texture and visual interest to your yard. By incorporating rocks and gravel into your design, you can also improve drainage, reduce maintenance, and create a unique look that reflects your personal style, making your outdoor space truly special and functional.

Key Takeaways:

To enhance your outdoor space, consider the following points when using rocks and gravel in landscaping:

  • Using Decorative Rocks can add a touch of elegance to your garden or yard, and they come in a variety of colors and textures to suit different design themes.
  • Installing Gravel Paths is an excellent way to create a beautiful and functional walkway that is also easy to maintain, as it allows for good drainage and suppresses weed growth.
  • Combining Mulch and Gravel can help to create a balanced and visually appealing landscape, as the mulch retains moisture and regulates soil temperature, while the gravel provides a decorative border and prevents mulch from spreading.

Choosing the Right Rocks and Gravel

The selection of rocks and gravel for your landscaping project depends on several factors, including the desired appearance, drainage, and functionality of your outdoor space. You will need to consider various types of rocks and gravel to determine which ones best suit your needs. Your choice will significantly impact the overall look and feel of your landscape.

Considering Color and Texture

Against a backdrop of your existing landscape features, you’ll want to select rocks and gravel that complement or contrast with the colors and textures already present. You should consider the hues and finishes of your plants, hardscapes, and architectural elements to create a harmonious and visually appealing environment.

Thinking About Size and Shape

For a balanced and functional design, you must think about the size and shape of the rocks and gravel you choose. You will want to consider how different sizes and shapes will interact with each other and with other elements in your landscape, such as plants, pathways, and water features.

Choosing the right size and shape of rocks and gravel can make a significant difference in the overall aesthetic and functionality of your landscape. You should consider the scale of your outdoor space and the purpose of each area, selecting larger rocks and gravel for decorative accents and smaller ones for pathways and drainage. By doing so, you will create a well-designed and functional landscape that meets your needs and enhances your outdoor living experience.

Designing with Rocks and Gravel

It is imperative to consider the overall aesthetic you want to achieve when incorporating rocks and gravel into your landscape design. You can use them to add texture, color, and depth to your outdoor space, creating a unique and visually appealing atmosphere.

Creating Pathways and Walkways

Along with planning, you will find that rocks and gravel are perfect for creating pathways and walkways that lead to different areas of your yard, allowing you to guide visitors through your beautifully designed landscape.

Building Rock Gardens and Borders

With careful selection, you can build rock gardens and borders that complement your home’s architecture and surrounding environment, adding a touch of elegance to your outdoor space.

In addition, you can experiment with different rock sizes, shapes, and colors to create a unique and personalized rock garden or border that reflects your style and enhances your yard’s natural beauty, allowing you to enjoy a serene and inviting atmosphere.

Using Rocks and Gravel for Drainage

Keep your landscape looking its best by using rocks and gravel to improve drainage. You can create a French drain or use gravel as a base layer to direct water away from your plants and prevent waterlogged soil.

Preventing Erosion and Runoff

Beneath the surface, rocks and gravel help prevent erosion and runoff by allowing water to percolate through the soil. You can use rocks to line your garden beds and gravel to fill in low-lying areas, keeping your soil in place.

Improving Soil Quality

Above all, rocks and gravel can improve your soil quality by increasing aeration and drainage. You can mix gravel into your soil to create a well-draining mix that supports healthy plant growth.

This improvement in soil quality can have a significant impact on your garden’s overall health, allowing you to grow a wider variety of plants and reducing the need for fertilizers and pesticides. As you incorporate rocks and gravel into your soil, you’ll notice an increase in beneficial microbial activity, which helps to break down organic matter and support plant growth.

Adding Decorative Touches

Now that you have a solid foundation for your landscape, you can start thinking about adding decorative touches with rocks and gravel to enhance your outdoor space.

Incorporating Rock Features and Fountains

To create a unique and visually appealing landscape, you can incorporate rock features, such as boulders or stone walls, and fountains to add a soothing sound and movement to your yard.

Mixing Gravel with Other Materials

Before selecting a specific type of gravel, consider mixing it with other materials, such as plants, mulch, or wood chips, to create a diverse and dynamic landscape that showcases your personal style.

Hence, by combining gravel with other elements, you can add texture, color, and interest to your outdoor space, making it more inviting and enjoyable for you and your guests to spend time in, and allowing you to fully utilize your yard’s potential.

Maintaining Your Rock and Gravel Landscape

Unlike other landscaping materials, rocks and gravel require minimal upkeep, but you can learn more about using rocks in your yard by visiting Rocks instead of mulch? : r/arborists. Your rock and gravel landscape will remain beautiful with regular maintenance.

Weeding and Cleaning

With a simple routine, you can keep your rock and gravel landscape looking its best, removing weeds and debris as needed to prevent accumulation.

Replacing and Refreshing

To keep your landscape vibrant, you will need to replace or refresh your rocks and gravel periodically, ensuring they continue to enhance your outdoor space.

In addition, when replacing or refreshing your rocks and gravel, you can take the opportunity to reassess your landscape design and make any desired changes, allowing you to update your yard’s look and feel to suit your evolving style and preferences, and you can also consider adding new plants or features to complement your rock and gravel landscape.

Creative Ideas and Inspirations

Despite the numerous options available, you can find inspiration for your landscaping project by exploring different resources, such as Types of Landscaping Rocks and How To Use Them, to help you get started.

Using Rocks and Gravel in Small Spaces

To maximize your small space, you can use rocks and gravel to create a beautiful and functional area, perfect for your outdoor haven, allowing you to enjoy your landscape with minimal maintenance.

Combining with Plants and Flowers

Against a backdrop of rocks and gravel, your plants and flowers will stand out, adding a pop of color and texture to your landscape, and you can experiment with different combinations to find the perfect look for your outdoor space.

At the heart of combining rocks and gravel with plants and flowers is the ability to create a unique and personalized landscape that reflects your style, and as you explore different designs, you’ll find that the possibilities are endless, allowing you to create a beautiful and inviting outdoor space that you’ll enjoy for years to come.

Summing up

Upon reflecting on the best ways to use rocks and gravel in landscaping, you can enhance your outdoor space by incorporating these elements. You will find that adding rocks and gravel can improve your landscape’s aesthetic and functionality. For more inspiration, visit How to Use Rocks in Your Landscape to explore various designs and ideas to elevate your yard, making your outdoor area unique and beautiful, tailored to your personal style and preferences.

FAQ

Q: What are the most popular types of rocks and gravel used in landscaping?

A: The most popular types of rocks and gravel used in landscaping include decomposed granite, pea gravel, river rocks, limestone, and marble chips. Each type has its unique characteristics, colors, and textures, allowing homeowners to choose the best option to suit their design and functional needs. For example, decomposed granite is ideal for pathways and walkways, while pea gravel is often used for drainage and decoration.

Q: How can I use rocks and gravel to improve drainage in my yard?

A: Rocks and gravel can be used to improve drainage in your yard by creating a French drain or a rock-lined swale. A French drain is a trench filled with gravel and rocks that directs water away from your home and yard, while a rock-lined swale is a shallow ditch filled with rocks and gravel that collects and filters rainwater. Both methods can help to prevent water accumulation and erosion in your yard.

Q: Can I use rocks and gravel as a substitute for mulch in my garden beds?

A: Yes, rocks and gravel can be used as a substitute for mulch in your garden beds. They help to suppress weeds, retain moisture, and regulate soil temperature. Additionally, rocks and gravel do not decompose like organic mulch, making them a low-maintenance option. However, it’s important to note that rocks and gravel can heat up in the sun, which may affect plant growth, so it’s best to use them in combination with other landscaping materials.

Q: How can I use rocks and gravel to create a decorative border in my yard?

A: Rocks and gravel can be used to create a decorative border in your yard by edging your garden beds, paths, or other features. For example, you can use small rocks or pebbles to create a border around your garden beds, or use larger rocks to create a statement piece. You can also mix different types and colors of rocks and gravel to create a unique and visually appealing design.

Q: What are some tips for installing rocks and gravel in my yard to ensure a professional-looking finish?

A: To ensure a professional-looking finish when installing rocks and gravel in your yard, it’s important to prepare the site properly, laying down a layer of landscape fabric to prevent weeds and soil from mixing with the rocks and gravel. You should also use a level to ensure the surface is even and compact the rocks and gravel to prevent settling. Additionally, consider using a border or edging to contain the rocks and gravel and create a clean, finished look.

Skip to content