The Best Tips for Growing Basil Indoors

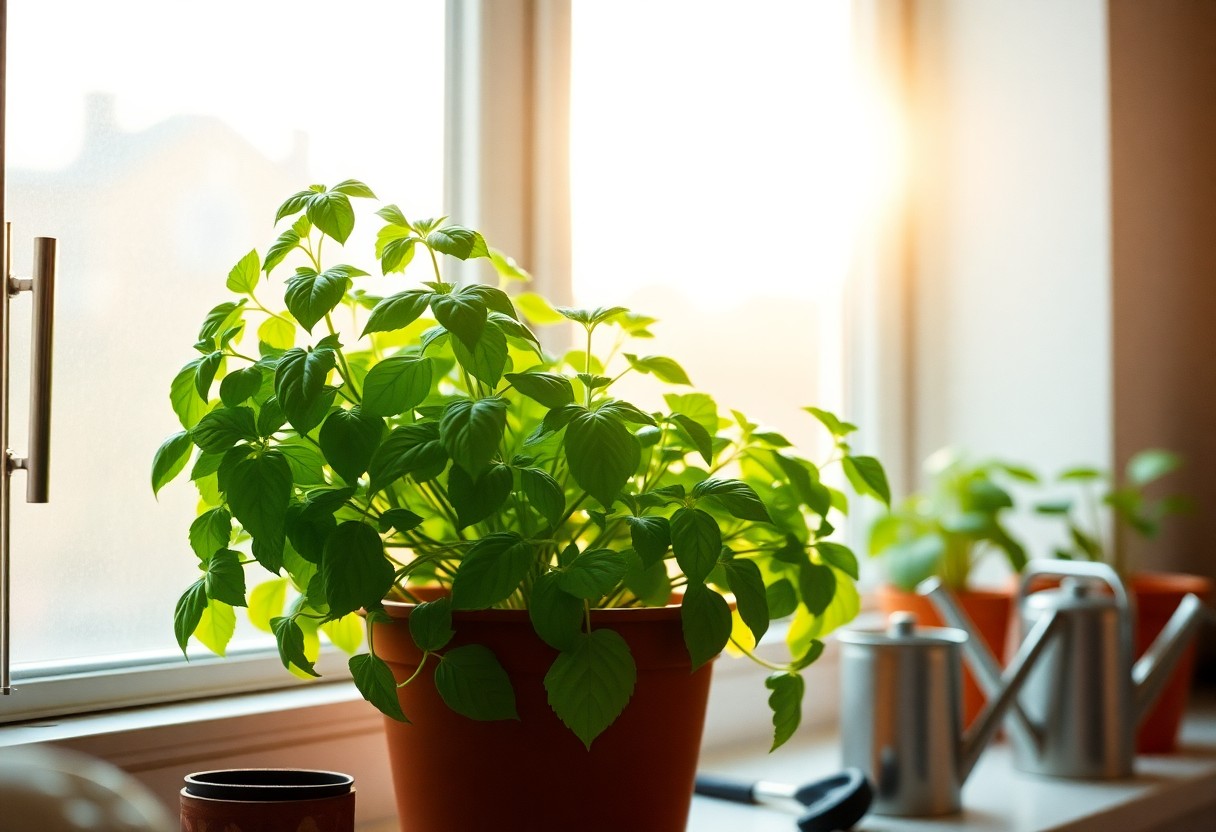
You’re about to uncover the secrets to cultivating a thriving basil plant in the comfort of your own home. Your indoor space can be a perfect spot to grow this fragrant herb, and with the right approach, you’ll be enjoying fresh basil in no time. You’ll learn how to provide your basil with the right conditions, from lighting to watering, and harvest it like a pro, bringing a touch of freshness to your cooking.

Key Takeaways:

To achieve success in growing basil indoors, consider the following points:

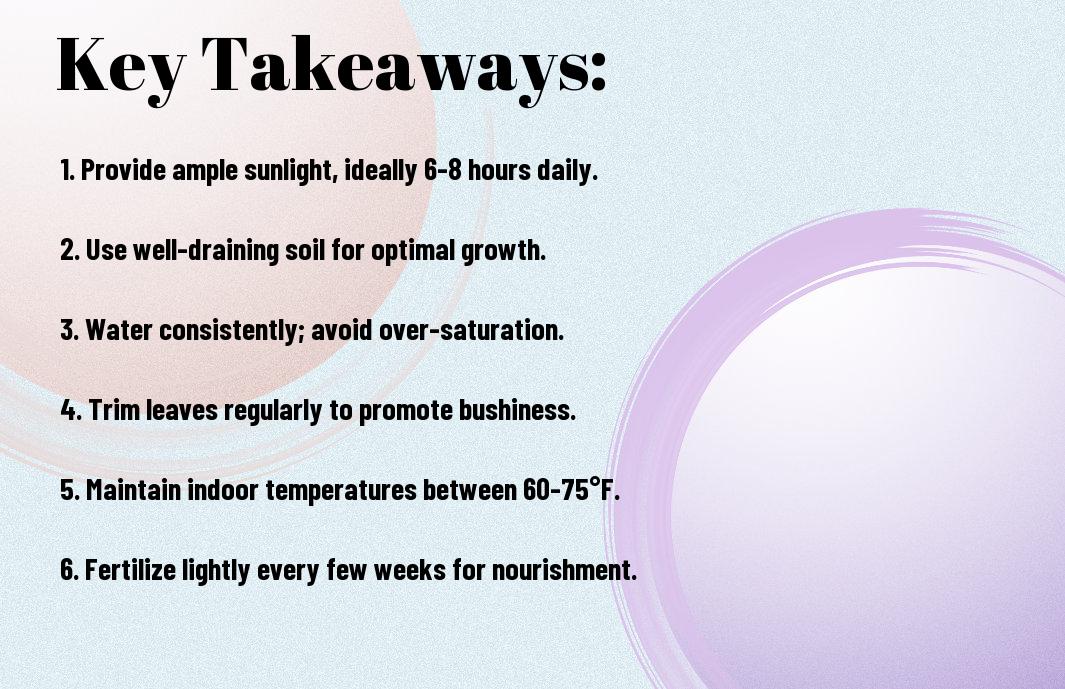
  • Provide adequate lighting for your basil plants, as they require a significant amount of light to photosynthesize and grow. Place them near a sunny window or use grow lights to supplement the natural light.
  • Ensure optimal temperature and humidity levels for your basil plants. They thrive in temperatures between 65-75°F (18-24°C) and a relatively high humidity, which can be achieved by placing the pot on a tray filled with water and pebbles.
  • Use well-draining soil and fertilize your basil plants regularly to promote healthy growth. A balanced fertilizer will provide the necessary nutrients for your basil to flourish, and a well-draining soil will prevent waterlogged soil and root rot.

Preparing the Environment

A well-prepared environment is vital for growing basil indoors. You will need to consider the container, location, and lighting to create an ideal space for your basil to thrive.

Choosing the Right Container

Along with the quality of the soil, a suitable container is vital for your basil’s growth. You should look for a container that is at least 6-8 inches deep and has good drainage holes to prevent waterlogged soil.

Selecting the Ideal Location

Similar to other plants, selecting the right location for your basil is key. You want to place your basil in a spot that gets plenty of sunlight, ideally 4-6 hours of direct sunlight per day.

Considering the amount of sunlight your space receives, you may need to supplement with grow lights to ensure your basil gets enough light to photosynthesize. You should also keep your basil away from drafts and extreme temperatures to promote healthy growth.

Soil and Nutrition

There’s no substitute for good soil when growing basil indoors. You can find valuable advice on caring for your basil plant by checking out threads like Any tips on how to take care of a basil plant inside a condo?

Using High-Quality Potting Soil

Anything less than the best potting soil can hinder your basil’s growth. You should opt for a well-draining mix specifically designed for indoor plants to give your basil the best chance to thrive.

Fertilizing for Optimal Growth

The key to a healthy basil plant is balanced fertilization. You will need to fertilize your plant regularly, using a fertilizer that is high in nutrients, to promote healthy growth and flavor.

Understanding how to fertilize your basil properly is vital to its success. You need to strike a balance, as over-fertilization can be just as harmful as under-fertilization, so you should follow the instructions on the fertilizer package carefully and monitor your plant’s response to the fertilizer, adjusting as necessary to ensure your basil receives the nutrients it needs to flourish.

Watering and Humidity

Once again, you’ll find that growing basil indoors requires attention to detail, and you can learn more about How to Grow and Care for Basil Indoors to master the technique.

Watering Techniques for Indoor Basil

Along with providing sufficient light, you need to water your basil plant carefully, making sure not to overwater or underwater, as this can lead to root rot or weak growth.

Maintaining the Right Humidity Level

The right humidity level is necessary for your basil plant to thrive, and you should aim to keep it between 40-60% to promote healthy growth.

Maintaining this level can be achieved by placing the pot on a tray filled with water and pebbles or using a humidifier, allowing you to create an ideal environment for your basil plant to flourish, and you can enjoy the benefits of fresh, fragrant basil all year round.

Lighting and Temperature

Now, you’ll want to consider the lighting and temperature for your indoor basil. The ideal conditions are outlined in the following table:

Condition Requirement
Light Bright, indirect light
Temperature 65-75°F (18-24°C)

Providing Adequate Light for Basil

To give your basil the best chance, place it near a sunny window or use grow lights. This will help it thrive and produce plenty of leaves.

Keeping the Temperature Just Right

Before you settle on a spot, check the temperature. The ideal range is outlined in the following table:

Temperature Effect
Below 60°F (15°C) Slow growth
Above 80°F (27°C) Wilting

Lighting and temperature are closely linked. You’ll find that the right light and temperature combination is key to healthy growth, as shown in the following table:

Lighting Temperature
Bright, indirect 65-75°F (18-24°C)
Low, indirect 55-65°F (13-18°C)

You can adjust your setup to find the perfect balance for your basil, and with a little practice, you’ll be harvesting fresh leaves in no time.

Pruning and Maintenance

Many indoor gardeners overlook the importance of pruning and maintenance when growing basil indoors. You will need to trim your basil plants regularly to promote healthy growth and prevent them from flowering.

Pruning Techniques for Healthy Growth

Around the time your basil plant reaches 6 inches tall, you should start pruning it to encourage bushy growth. You can pinch off the top leaves to direct the plant’s energy towards leaf production.

Regular Maintenance Tasks

Once you have pruned your basil, you will need to perform regular maintenance tasks to keep it thriving. You should check your plant daily to ensure it is getting enough water and light.

Indeed, checking your plant’s condition daily will help you identify any potential issues before they become major problems. You can then take action to adjust your care routine, such as increasing the frequency of watering or fertilizing your basil plant, to keep it healthy and productive. As you continue to care for your basil, you will develop a sense of what it needs to thrive, and you will be able to enjoy fresh, fragrant leaves all year round.

Common Challenges

Keep in mind that growing basil indoors comes with its own set of challenges. You’ll need to navigate issues like limited light, temperature fluctuations, and pests to keep your plants healthy.

Dealing with Pests and Diseases

About the time you notice your basil leaves turning yellow or developing black spots, you’ll know you have a problem. You’ll need to identify the issue and take action to prevent it from spreading to your other plants.

Overcoming Common Growing Issues

Overcoming the hurdles of indoor growing requires patience and attention to detail. You’ll need to monitor your plants closely, adjusting their care as needed to ensure they thrive in their indoor environment.

Common issues like root bound plants, nutrient deficiencies, and inadequate light can be solved by taking a closer look at your care routine. You can start by checking your plants’ roots, fertilizing them regularly, and making sure they’re getting enough light. By making a few simple adjustments, you can help your basil plants overcome these common growing issues and continue to produce fresh, fragrant leaves for your cooking needs.

Summing up

The key to growing basil indoors lies in your hands. You’ve learned the basics: provide your basil with sufficient light, water, and nutrients. You’ll harvest fresh leaves in no time. Keep your pots clean, prune your plants, and maintain a comfortable temperature. With these tips, you’ll enjoy your homegrown basil all year round, adding flavor to your favorite dishes with ease.

FAQ

Q: What are the best conditions for growing basil indoors?

A: To grow basil indoors, it’s best to provide it with plenty of sunlight, warm temperatures, and high humidity. Place your basil plant in a south-facing window or under grow lights, and maintain a consistent temperature between 65-75°F (18-24°C). You can also use a humidifier to maintain a humid environment, which will help your basil plant thrive.

Q: How often should I water my indoor basil plant?

A: Basil plants need consistent moisture to grow well indoors. Water your basil plant when the top inch of soil feels dry to the touch, usually every 1-2 days in the summer and less often in the winter. Make sure not to overwater, as this can lead to root rot and other problems. Check the soil daily, and adjust your watering schedule accordingly.

Q: What type of soil is best for growing basil indoors?

A: Basil plants prefer well-draining soil that is rich in organic matter. Use a high-quality potting mix that contains ingredients like peat moss, vermiculite, or perlite. Avoid using garden soil from your outdoor garden, as it can compact and prevent proper drainage. You can also add fertilizers or compost to the soil to provide your basil plant with necessary nutrients.

Q: How can I prevent pests from infesting my indoor basil plant?

A: Indoor basil plants can be susceptible to pests like aphids, whiteflies, and spider mites. To prevent infestations, inspect your plant regularly and isolate it from other plants. Use neem oil or insecticidal soap to control infestations, and make sure your plant has good air circulation. You can also introduce natural predators, like ladybugs or lacewings, to your plant to control pest populations.

Q: Can I grow basil indoors year-round, and how do I prune it to encourage new growth?

A: Yes, you can grow basil indoors year-round, as long as you provide it with the right conditions. To encourage new growth and prevent your basil plant from flowering, prune it regularly. Pinch off flower buds as soon as they form, and trim back leggy stems to encourage branching. You can also harvest individual leaves or stems to use in cooking, which will help your plant bush out and produce more foliage. Regular pruning will help you enjoy a continuous supply of fresh basil leaves throughout the year.

How to Build a DIY Greenhouse on a Budget

As you consider building a greenhouse, you’re likely aware of the high costs associated with traditional kits. However, with some planning and creativity, you can create your own DIY greenhouse without breaking the bank. Before you start, you can check out this video on DIY Greenhouse | Don’t Buy a Kit Until You See This to get inspired and learn valuable tips. You’ll be able to grow your own plants year-round, and your DIY greenhouse will be a valuable addition to your backyard.

Key Takeaways:

To build a DIY greenhouse on a budget, consider the following points:

  • Use recycled materials such as old windows, doors, and lumber to minimize costs and reduce waste. This approach can help you save money on initial construction expenses.
  • Opt for a simple design that is easy to build and maintain, such as a hoop house or a cold frame. This will not only reduce construction costs but also make it easier to manage and repair your greenhouse.
  • Utilize natural lighting and ventilation to regulate the temperature and atmosphere inside the greenhouse, reducing the need for artificial lighting and heating/cooling systems. This will help you save money on energy costs and create a healthier environment for your plants.

Planning Your DIY Greenhouse

A well-planned DIY greenhouse is necessary for a successful project. You need to consider your space, resources, and budget to build a functional and efficient greenhouse.

Assessing Your Space and Resources

Your available space and resources will determine the size and type of greenhouse you can build. You should evaluate your yard, considering factors like sunlight, wind direction, and accessibility.

Setting a Budget and Timeline

By establishing a clear budget and timeline, you can ensure your project stays on track. You should set realistic goals and priorities to achieve your desired outcome.

It is necessary to break down your budget into components like materials, tools, and labor to get a clear picture of your expenses. You can then allocate your resources effectively, making adjustments as needed to stay within your budget and complete your greenhouse on time, allowing you to enjoy your new space sooner.

Choosing the Right Materials

If you’re looking to build a DIY greenhouse on a budget, selecting the right materials is vital. You’ll want to consider the durability, sustainability, and cost of the materials you choose, as they will impact the overall structure and functionality of your greenhouse.

Selecting Frames and Coverings

One of the most important decisions you’ll make is choosing the frames and coverings for your greenhouse. You’ll need to decide on a frame material, such as wood or metal, and a covering, such as glass or plastic, that fits your budget and meets your needs.

Considering Insulation and Ventilation Options

Covering the basics of insulation and ventilation is vital to creating a stable environment for your plants. You’ll want to explore different options, such as shading materials and venting systems, to ensure your greenhouse maintains a healthy temperature and humidity level.

Options for insulation and ventilation will depend on your climate and the specific needs of your plants. You’ll need to consider factors such as heat retention, air circulation, and moisture control when selecting your insulation and ventilation materials, and you can choose from a range of products, including foam board, straw bales, and automatic vent openers, to create a well-regulated environment for your plants to thrive.

Building the Greenhouse Structure

Once again, you’ll need to plan carefully to ensure your greenhouse structure is sturdy and well-built. You’ll be using your DIY skills to create a functional and comfortable space for your plants to thrive.

Constructing the Frame

Prior to starting, you should gather all the necessary materials, such as wooden beams and screws, to construct the frame of your greenhouse. You will need to ensure that it is square and level to provide a solid foundation.

Installing Roofing and Walls

Anyway, you will need to install roofing and walls to enclose your greenhouse, using materials like polycarbonate panels or glass. You should follow the manufacturer’s instructions to ensure a secure and watertight seal.

But as you install the roofing and walls, you should consider factors like ventilation, insulation, and drainage to create an optimal growing environment for your plants. You will need to balance these factors to ensure your greenhouse functions effectively and provides the best conditions for your plants to grow and thrive.

Installing Essential Systems

Unlike other projects, building a DIY greenhouse requires careful planning of its systems. You can find inspiration and guidance on how to Build a DIY Greenhouse with One of These Easy Kits to ensure your project is a success.

Heating and Cooling Systems

Before installing any systems, consider your greenhouse’s heating and cooling needs to maintain a stable temperature for your plants.

Irrigation and Lighting Systems

At this stage, you’ll need to plan your irrigation and lighting systems to provide your plants with the necessary water and light.

Another important aspect of irrigation and lighting systems is automating them to ensure your plants receive the right amount of water and light, even when you’re not around to monitor them, allowing you to optimize your greenhouse’s conditions for optimal growth.

Adding Finishing Touches

After completing the structure of your DIY greenhouse, you can now focus on the final details. For inspiration, you can visit Build a Simple, Inexpensive Greenhouse to get ideas on how to enhance your greenhouse.

Shelving and Bedding

On the inside of your greenhouse, you will need to install shelving and bedding to accommodate your plants. You can use recycled materials or purchase affordable options to fit your budget.

Decorative Elements and Features

Any additional features you add will enhance the overall aesthetic of your greenhouse. Consider adding a trellis or a small seating area to make your space more inviting.

With your shelving and bedding in place, you can now think about the decorative elements that will make your greenhouse unique. You can add personal touches such as wind chimes, statues, or a sundial to create a peaceful atmosphere, making your DIY greenhouse a haven for you to relax and tend to your plants.

Maintenance and Upkeep

Despite the initial effort of building your DIY greenhouse, you’ll need to perform regular tasks to ensure its longevity and optimal performance. You’ll be checking for damage, cleaning, and making adjustments as needed to maintain a healthy environment for your plants.

Regular Cleaning and Inspection

Upkeeping your greenhouse involves regularly cleaning and inspecting the structure, removing debris and dirt that can accumulate and obstruct sunlight and ventilation, allowing you to identify potential issues before they become major problems and affect your plants.

Seasonal Preparations and Repairs

Maintenance of your greenhouse varies by season, with tasks such as insulating for winter, ventilating for summer, and preparing for extreme weather conditions, you’ll be able to adapt your greenhouse to the changing seasons and protect your plants from harsh weather.

Hence, as you prepare your greenhouse for each season, you’ll be taking proactive steps to prevent damage and ensure your plants thrive, by doing so, you’ll be able to enjoy a healthy and productive greenhouse all year round, and make any necessary repairs to extend the life of your greenhouse, saving you time and money in the long run.

Summing up

On the whole, you now have the knowledge to build a DIY greenhouse on a budget. You can construct your own mini indoor garden using recycled materials and basic tools. By following the steps and tips provided, you can create a functional and cost-effective greenhouse that suits your needs, allowing you to grow your favorite plants year-round and enjoying the benefits of your own DIY project in your backyard.

FAQ

Q: What materials do I need to build a DIY greenhouse on a budget?

A: To build a DIY greenhouse on a budget, you will need a variety of materials, including a frame made of PVC pipes or wooden beams, transparent plastic sheeting or polycarbonate panels for the walls and roof, a door and windows for ventilation, and a foundation such as concrete or gravel. You may also want to consider using recycled or repurposed materials, such as old windows or a plastic bottle wall, to save money and make your greenhouse more sustainable. Additionally, you will need tools such as a drill, saw, and hammer to assemble the structure.

Q: What is the best location for a DIY greenhouse on a budget?

A: The best location for a DIY greenhouse on a budget is a spot that receives plenty of sunlight, is level, and is well-drained. It’s also important to consider the direction of the sun and the prevailing winds in your area, as this can affect the temperature and ventilation inside the greenhouse. A south-facing location is ideal, as it will receive the most sunlight throughout the day. You should also consider the accessibility of the location, as you will need to be able to easily get to the greenhouse to tend to your plants.

Q: How do I construct the frame of a DIY greenhouse on a budget?

A: Constructing the frame of a DIY greenhouse on a budget can be done using a variety of materials, including PVC pipes, wooden beams, or metal framing. The frame should be sturdy and able to support the weight of the plastic sheeting or polycarbonate panels, as well as any snow or wind loads. You can use a simple hoop house design or a more complex gable or Gothic arch style, depending on your needs and skill level. It’s a good idea to use a pre-made frame kit or consult with a professional if you are not experienced with building or construction.

Q: How do I provide ventilation and climate control in a DIY greenhouse on a budget?

A: Providing ventilation and climate control in a DIY greenhouse on a budget is important to prevent overheating and maintain a healthy environment for your plants. You can use a variety of methods, including automatic vents, manual windows, and shading materials such as shade cloth or louvers. You can also use fans or solar-powered ventilation systems to circulate the air and cool the greenhouse. Additionally, you can use thermal mass materials such as concrete or brick to absorb and release heat, helping to regulate the temperature inside the greenhouse.

Q: How much does it cost to build a DIY greenhouse on a budget, and what are some ways to save money?

A: The cost of building a DIY greenhouse on a budget can vary widely, depending on the size, materials, and complexity of the design. On average, a small DIY greenhouse can cost anywhere from $100 to $1,000 or more, depending on the materials and features. To save money, you can use recycled or repurposed materials, shop for second-hand or discounted materials, and keep the design simple. You can also consider building a mini or micro greenhouse, or using a pre-made kit or plan to simplify the construction process and reduce costs. Additionally, you can consider enlisting the help of friends or family members to share the labor and costs.

How to Organize a Shared Home Office Space

You work from home, and so does your partner. Your workspace is shared, but your productivity doesn’t have to suffer. You need a system to keep your office organized and clutter-free. You’ll learn how to create a functional and efficient space that works for both of you. Your goal is to boost productivity and minimize distractions. You’ll start by assessing your space and setting clear boundaries, then implement a plan to maintain your organized office. Your shared home office will become a haven for productivity.

Key Takeaways:

To effectively manage a shared home office space, consider the following points:

  • Establish a Designated Workspace for each individual to maintain organization and minimize clutter, ensuring that each person has their own area to work efficiently.
  • Implement a Shared Storage System to keep common office supplies and documents in order, making it easy for everyone to access what they need when they need it.
  • Develop a Schedule and Routine that outlines work hours, meeting times, and cleaning responsibilities to promote a sense of respect and harmony among those sharing the space.

Assessing the Space

A well-planned shared home office starts with evaluating the area. You can find inspiration on how to arrange your space by visiting posts about How to Arrange A Shared Home Office For Two? to get started.

Measuring the Room

Among the first steps in planning your office is measuring the room. You will need to take note of the dimensions of your space to determine the best layout for your furniture and equipment.

Identifying Natural Light Sources

Assessing the natural light in your office is vital. You should identify where the natural light comes from and how it affects your workspace throughout the day.

Due to the impact of natural light on productivity, you will want to position your desk and other work areas to maximize the benefits of natural light, making your workspace more comfortable and efficient. You will be able to work better and stay focused with a well-lit space.

Designing the Layout

Any well-organized shared home office space starts with a thoughtful layout. You’ll need to consider the room’s dimensions, the number of users, and the type of work that will be done there.

Creating a Functional Workflow

Above all, your goal is to create a space that promotes productivity. You’ll want to position workstations to minimize distractions and maximize collaboration, allowing you to work efficiently and effectively.

Selecting Essential Furniture

Beneath the surface of a well-designed office lies functional furniture. You’ll need to choose pieces that serve multiple purposes, such as a desk with built-in storage, to keep your space organized and clutter-free.

Layout is key when selecting imperative furniture for your shared home office. You’ll want to consider the flow of traffic, the placement of electrical outlets, and the overall aesthetic you want to achieve. By choosing furniture that fits your needs and the space, you’ll be able to create a comfortable and productive work environment that you and your colleagues will enjoy using.

Establishing Boundaries

Many shared home office spaces require careful planning. You can find inspiration for your space by checking out 5 Steps to Setting Up a Shared Home Office Space. This will help you create a functional and harmonious workspace.

Defining Personal Workspaces

With a clear plan, you can define your personal workspace, making it easier to focus on your work. You’ll be able to customize your area to suit your needs, ensuring productivity and comfort.

Setting Rules for Shared Areas

Behind every successful shared office space are rules that maintain harmony. You’ll need to establish guidelines for shared areas, such as common desks or equipment, to avoid conflicts and ensure a smooth workflow.

Boundaries are crucial in a shared home office space. You’ll need to communicate your needs and expectations clearly, respecting your colleagues’ space and time. By setting rules and guidelines, you can create a productive and respectful environment, allowing you to work efficiently and effectively.

Managing Shared Resources

Despite the challenges, you can efficiently manage shared resources in your home office. You’ll need to establish clear guidelines and communicate with your coworkers to avoid conflicts.

Scheduling Shared Equipment

Before using shared equipment, you should create a schedule to ensure everyone has access when they need it. You can use a shared calendar to reserve time slots for equipment like printers or scanners.

Organizing Shared Supplies

Regarding resources, you will need to keep track of supplies like paper, ink, and toner. You can assign a person to monitor and reorder supplies as needed.

Shared supplies can quickly become disorganized, so you need to designate a specific area for storage. You should label each storage bin and shelf to help your coworkers quickly find what they need, keeping your home office tidy and functional.

Maintaining Productivity

Now that you’ve set up your shared home office space, it’s time to focus on staying productive. You’ll need to find ways to minimize distractions and establish a routine that works for you and your coworkers.

Minimizing Distractions

Apart from noise and clutter, distractions can come in many forms, and you must identify what hinders your focus and take steps to eliminate it, so you can concentrate on your work.

Establishing a Routine

Only by creating a schedule and sticking to it can you ensure that your work gets done efficiently, and you’ll be able to make the most of your shared home office space, allowing you to achieve your goals.

Minimizing procrastination is key to establishing a routine, and you can achieve this by breaking down your tasks into smaller, manageable chunks, and assigning specific times for each task, helping you stay on track and maintain your productivity levels throughout the day.

Addressing Conflicts

For a harmonious shared home office, you need to tackle conflicts head-on. You’ll encounter differences in work styles and habits, but with a clear plan, you can minimize disruption and maintain productivity.

Communicating with Roommates

Beneath the surface of a well-run shared office lies effective communication. You must discuss your needs, boundaries, and expectations with your roommates to avoid misunderstandings and ensure a smooth workflow.

Resolving Disputes

Alleviating tension is key to resolving disputes. You should establish a process for addressing issues as they arise, allowing you to find mutually beneficial solutions and preserve your working relationship.

This process involves active listening, compromise, and a willingness to adapt. You’ll need to consider your roommates’ perspectives, be open to changing your own habits, and work together to find a resolution that suits everyone. By doing so, you can maintain a positive and productive shared home office environment, even in the face of disagreements.

Conclusion

Considering all points, you’ve learned how to organize a shared home office space. You can now create a functional area that boosts your productivity. For more tips, check out A Useful Guide for Sharing a Home Office with Your Partner. With your new space, you’ll be able to work efficiently and effectively, making the most of your time and increasing your overall job satisfaction.

FAQ

Q: What are the benefits of organizing a shared home office space?

A: Organizing a shared home office space can greatly improve productivity, reduce clutter, and enhance the overall working environment. By designating specific areas for different tasks and activities, individuals can minimize distractions, optimize their workflow, and maintain a sense of personal space. A well-organized shared home office can also promote collaboration, creativity, and communication among users, ultimately leading to better work outcomes and a more harmonious working relationship.

Q: How can I determine the best layout for my shared home office space?

A: To determine the best layout for your shared home office space, start by assessing the room’s dimensions, natural lighting, and existing features, such as windows, doors, and electrical outlets. Consider the specific needs and work styles of each user, including the type of work they will be doing, the equipment they will need, and their preferred level of privacy. You can also use online tools or consult with a professional organizer to create a customized floor plan that maximizes the space and promotes efficient workflow.

Q: What are some effective ways to manage shared office supplies and equipment in a home office space?

A: To manage shared office supplies and equipment in a home office space, consider implementing a labeling system, where each user is assigned a specific set of supplies and equipment. You can also designate a central storage area for shared resources, such as paper, toner, and staplers. Establishing a routine for restocking and maintaining supplies can help prevent depletion and reduce waste. Additionally, setting clear guidelines for equipment usage and maintenance can help prevent conflicts and ensure that all users have access to the resources they need.

Q: How can I maintain a clutter-free and organized shared home office space over time?

A: To maintain a clutter-free and organized shared home office space, establish a regular cleaning schedule, where each user is responsible for tidying up their designated area. Set aside time each week for a thorough cleaning and organization of the shared spaces, including dusting, vacuuming, and wiping down surfaces. Implementing a “one in, one out” policy can help prevent clutter from building up, and encouraging users to prioritize digital storage and paperless documentation can reduce paper waste and minimize the need for physical storage.

Q: What are some strategies for minimizing distractions and promoting productivity in a shared home office space?

A: To minimize distractions and promote productivity in a shared home office space, consider implementing noise-reducing measures, such as acoustic panels or noise-cancelling headphones. Establishing clear communication channels and setting boundaries around work hours and focus times can help reduce interruptions and distractions. Designating specific areas for breaks and socializing can also help users recharge and refocus, while implementing a system for tracking progress and setting deadlines can help individuals stay motivated and on track.

The Best Ways to Utilize Rainwater in Your Garden

As you step into your garden, you’re surrounded by the sights and sounds of nature. You notice the way rainwater nourishes your plants, and you wonder how to harness its power. You can collect and utilize rainwater to create a thriving oasis, reducing your reliance on municipal water sources. By embracing this simple, yet effective approach, you’ll not only conserve water but also foster a deeper connection with the natural world, just as the rhythms of nature intended. You’ll discover the harmony that comes with working in tandem with the environment.

Key Takeaways:

To make the most of rainwater in your garden, consider the following:

  • Collect and store rainwater in a barrel or tank to reduce your water bill and provide a natural source of water for your plants during dry periods.
  • Use rainwater for irrigation purposes, such as watering plants, gardens, and lawns, as it is free from chemicals and minerals found in tap water.
  • Implement a gray water system to reuse rainwater for activities like washing garden tools and composting, reducing your water consumption and minimizing waste.

Benefits of Rainwater Harvesting

While collecting rainwater, you’ll discover numerous advantages for your garden. Harvesting rainwater reduces your reliance on municipal water supplies, decreasing the demand on local resources.

Reduced Water Bills

Gathering rainwater helps you save money by lowering your water bills. Your collected rainwater can be used for various purposes, such as watering plants and washing garden tools.

Minimal Environmental Impact

For a more sustainable approach, consider the positive effects of rainwater harvesting on the environment. Your efforts will contribute to a reduction in stormwater runoff, decreasing the risk of local flooding and erosion.

Environmental benefits abound when you choose to harvest rainwater. You will be helping to maintain a healthy balance of groundwater, which is vital for your plants and the local ecosystem, allowing you to enjoy a thriving and diverse garden.

Collecting Rainwater

There’s no better way to conserve water than by collecting rainwater for your garden. You can collect rainwater from your roof and store it in a tank or barrel, reducing your water bill and helping the environment. This simple act can make a significant difference in your garden’s health and your community’s water conservation efforts.

Installing Rain Barrels

Raining down from the sky, water can be collected and stored in rain barrels, providing you with a free and sustainable source of water for your garden. You can place these barrels under your downspouts to collect rainwater, making it easily accessible for your gardening needs.

Creating a Rainwater Pond

Implementing a rainwater harvesting system can be as simple as creating a rainwater pond, which can be a beautiful addition to your garden. You can use this pond to collect and store rainwater, providing a natural source of water for your plants and wildlife.

Also, as you create a rainwater pond, you’ll be attracting birds, bees, and other beneficial insects to your garden, creating a thriving ecosystem. You can use natural materials like rocks and plants to build your pond, making it a unique and harmonious part of your garden landscape, allowing you to connect with nature and appreciate its beauty.

Filtering and Storing Rainwater

Not all rainwater is suitable for your garden, as it may carry contaminants and debris. You’ll need to filter and store it properly to ensure its quality.

Using Natural Filters

To purify the rainwater, you can use natural filters like sand, gravel, or plants, which will help remove impurities and sediment from the water, making it safe for your garden.

Maintaining Water Quality

After collecting and filtering the rainwater, you’ll need to regularly check its quality to prevent contamination and ensure it remains suitable for your plants.

Even as you take steps to maintain the water quality, you’ll find that your stored rainwater can be a valuable resource for your garden, providing a natural and sustainable way to nourish your plants, and with proper care, it can be a reliable source of water throughout the growing season, allowing you to tend to your garden with greater ease and harmony with nature.

Irrigation Methods

After collecting rainwater, you can use it to irrigate your garden. Visit Collecting Rainwater For The Garden: A Step-by-Step Guide to learn more about this process.

Drip Irrigation Systems

Beside traditional irrigation methods, drip irrigation systems are an efficient way to distribute rainwater directly to your plants’ roots, minimizing evaporation and runoff.

Soaker Hoses and Sprinklers

For a more straightforward approach, consider using soaker hoses and sprinklers to deliver rainwater to your plants, allowing you tokrv them evenly and efficiently.

Sprinklers can be adjusted to suit different areas of your garden, ensuring that each plant receives the right amount of water, while soaker hoses provide a gentle, consistent flow, perfect for delicate plants and seedlings, helping you to nurture your garden with ease and care.

Using Rainwater for Other Purposes

Despite the many benefits of using rainwater for irrigation, you can also utilize it in other ways to reduce your water consumption. You can use collected rainwater for various tasks, making your garden more sustainable and environmentally friendly.

Washing Gardening Tools

The next time you need to clean your gardening tools, consider using rainwater. You can fill a bucket with collected rainwater and use it to wash your tools, keeping them clean and free of debris.

Cleaning Outdoor Surfaces

On a sunny day, you can use rainwater to clean your outdoor surfaces, such as patios and walkways. You can use a gentle detergent and collected rainwater to create a cleaning solution that is gentle on the environment.

Surfaces around your garden, such as decks and furniture, can also be cleaned with rainwater. You can use a soft brush and collected rainwater to gently scrub away dirt and grime, keeping your outdoor spaces looking their best without wasting precious water resources.

Maintenance and Troubleshooting

Many factors can affect the quality and effectiveness of your rainwater harvesting system, so it’s imperative to stay on top of maintenance tasks to ensure your garden remains thriving.

Regular Inspections

Against the forces of nature, your system may deteriorate over time, so you should inspect it regularly to identify any potential issues before they become major problems, allowing you to take corrective action and keep your garden flourishing.

Solving Common Issues

Beside the usual wear and tear, you may encounter issues like clogged gutters or contaminated water, which can be solved with simple repairs and proper maintenance, enabling you to continue using your rainwater harvesting system with confidence.

This approach to solving common issues will help you to develop a deeper understanding of your rainwater harvesting system and enable you to address problems promptly, ensuring that your garden continues to thrive, and you can enjoy the many benefits of using rainwater in your gardening endeavors, from reducing your water bill to creating a more sustainable and self-sufficient outdoor space that reflects your connection to nature.

Conclusion

So, as you begin on this journey to harness the power of rainwater in your garden, you’ll find that it’s a simple yet profound way to connect with nature. By implementing these methods, you’ll not only reduce your water consumption but also create a thriving ecosystem. For a more in-depth look, visit Collecting Rainwater for Your Garden (A Guide) to discover the full potential of rainwater collection and its benefits for your garden. You’ll be nurturing your plants and the environment.

FAQ

Q: What are the benefits of using rainwater in my garden?

A: Using rainwater in your garden has numerous benefits. It reduces the demand on municipal water supplies, decreases your water bills, and provides a natural source of water that is free from chemicals and additives often found in tap water. Additionally, rainwater is slightly acidic, which can help to lower the pH of your soil, creating a more balanced environment for your plants to thrive.

Q: How can I collect and store rainwater for my garden?

A: Collecting and storing rainwater can be done using a rainwater harvesting system, which typically consists of a roof catchment, gutters, downspouts, and a storage tank. The roof catchment collects the rainwater, which then flows through the gutters and downspouts into the storage tank. The storage tank can be made of plastic, metal, or wood, and should be large enough to hold a sufficient amount of water for your garden’s needs. It’s also important to ensure that the system is properly installed and maintained to prevent contamination and mosquito breeding.

Q: What are the best ways to use rainwater in my garden?

A: There are several ways to use rainwater in your garden, including watering plants, filling ponds or fountains, and washing gardening tools. Rainwater can also be used for irrigation, either by directly watering plants or by using a drip irrigation system. Additionally, rainwater can be used to make compost tea, a liquid solution made by steeping compost in water, which can help to provide beneficial microbes to your plants.

Q: Are there any precautions I should take when using rainwater in my garden?

A: Yes, there are several precautions you should take when using rainwater in your garden. First, make sure that the water is free from contamination by using a first flush device, which allows the first flow of water from the roof to be diverted, taking any debris and contaminants with it. Additionally, keep the storage tank covered to prevent mosquito breeding and contamination from animals. It’s also a good idea to test the pH level of the rainwater to ensure it is suitable for your plants.

Q: Can I use rainwater for all of my gardening needs, or are there any limitations?

A: While rainwater can be used for many gardening needs, there may be some limitations. For example, if you live in an area with low rainfall, you may not be able to collect enough rainwater to meet all of your gardening needs. Additionally, rainwater may not be suitable for seed starting or watering young seedlings, as it can be too cold and may contain high levels of bacteria. In these cases, it may be necessary to supplement with other water sources. However, with proper collection and storage, rainwater can be a valuable resource for many gardening applications.

How to Make DIY Planters From Household Items

As you launch on your gardening journey, you’re likely looking for creative ways to showcase your plants. You can turn your old household items into unique planters, adding a personal touch to your space. With a little imagination, you can transform everyday objects into beautiful containers for your plants. You’ll be amazed at how easy it is to create stunning planters using items you might otherwise discard, and your plants will thrive in their new, one-of-a-kind homes.

Key Takeaways:

To create your own unique planters, consider the following points:

  • Use recycled materials like old plastic bottles, cardboard tubes, and wooden crates to make ecofriendly planters that are also cost-effective.
  • Get creative with upcycled items such as mason jars, tin cans, and glass containers to add a touch of personalized style to your planters.
  • Apply a coat of protective paint or varnish to your DIY planters to make them durable and waterproof, ensuring they last for a long time.

Gathering Materials

Before you start creating your DIY planters, take a walk around your home to see what items you can repurpose. Look for things that can be transformed into unique and functional planters.

Household Items to Repurpose

For instance, you’ll find plenty of potential planters in your kitchen, like old jars, containers, and pots. Consider using wooden crates, cardboard tubes, or plastic bottles to add some personality to your planters.

Essential Crafting Tools

Gathering your crafting tools is the next step in preparing for your DIY project. You’ll need items like scissors, glue, and a paintbrush to get started.

To make your planters truly special, you’ll want to have a variety of tools on hand. You’ll be using these tools to clean, prepare, and decorate your planters, so take some time to gather everything you need, including a workspace where you can spread out and get creative with your projects, and think about the look and feel you want to achieve with your DIY planters, and have fun with the process, as you’re making something unique and personalized, just for you and your home.

Preparing the Planters

Assuming you’ve gathered your household items, it’s time to prepare them for planting. For inspiration, check out 29 Insanely Creative DIY Planter Ideas from Household Items to get your creative juices flowing. You’ll be amazed at the possibilities.

Cleaning and Disinfecting

Above all, you want to start with a clean slate, so thoroughly wash your chosen items with soap and water to remove any dirt or debris.

Sanding and Smoothing

The next step is to sand and smooth out any rough edges or surfaces, making it easier to plant and maintain your DIY planter. You’ll find that this step makes a big difference in the overall look and feel of your planter.

Also, as you sand and smooth out your planter, you’ll have the opportunity to add any decorative touches, such as paint or varnish, to give your planter a personalized and unique look that reflects your style, and you can take pride in knowing you created it yourself.

Decorating the Planters

Once again, you’re getting creative with your DIY planters, and now it’s time to add some personality to them. For more inspiration, check out How to Make DIY Planting Containers by Repurposing Old Items for unique ideas. You can decorate your planters in various ways to match your home decor.

Painting and Staining

One of the easiest ways to give your planters a personal touch is by painting or staining them. You can choose colors that complement your garden or home decor, and add a coat of varnish to protect the paint or stain.

Adding Embellishments

On the other hand, you can add embellishments like ribbons, stickers, or decoupage to give your planters a more decorative look. You can get creative with the materials you have at home and experiment with different designs.

Planters with embellishments can add a charming touch to your garden or indoor space. You can use your imagination to create unique and beautiful designs, and make your DIY planters truly special. As you decorate your planters, you’ll find that the process is just as enjoyable as the end result, and you’ll be proud to display your handmade creations.

Planting and Care

All your hard work in creating a beautiful DIY planter will pay off when you fill it with your favorite plants and give them the care they need to thrive.

Choosing the Right Plants

For a beautiful and thriving planter, you’ll want to select plants that fit your lifestyle and the conditions of the spot where the planter will sit.

Soil and Watering Tips

Around the time you’re planting, you’ll also want to think about the soil and watering needs of your plants. You can:

  • Use a high-quality potting soil
  • Water your plants when the soil feels dry to the touch

. Recognizing the unique needs of your plants will help you keep them happy and healthy.

Watering your plants is an vital part of their care, and you’ll want to make sure you’re giving them just the right amount. You can:

  • Check the soil moisture by sticking your finger into the soil
  • Water your plants in the morning so the plants have the entire day to absorb the water

. Recognizing the signs of over- or under-watering will help you adjust your care routine to keep your plants thriving.

Creative Variations

For a personalized touch, consider adding your own style to your DIY planters. You can paint, glue, or decoupage your favorite designs onto the planters to give them a unique look that reflects your personality.

Unique Planter Ideas

Contrary to what you might think, old boots, colanders, and even toilet paper rolls can make great planters. You can get creative with the items you have at home and turn them into one-of-a-kind planters that add a touch of whimsy to your garden or indoor space.

Mixing and Matching Materials

Prior to finalizing your planter design, think about combining different materials to add texture and interest. You can pair smooth ceramic pots with rough wooden planters or mix metal and glass containers to create a visually appealing display that showcases your plants.

Unique combinations of materials can elevate your planters from ordinary to extraordinary. You can experiment with different textures, colors, and shapes to create a look that is all your own. As you mix and match materials, consider the style and theme of your home and garden, and have fun with the process of creating one-of-a-kind planters that reflect your personal taste and flair.

Troubleshooting

Your DIY planters may not turn out as expected, but don’t worry, you can easily fix common issues and give your planters a second chance.

Common Mistakes to Avoid

Mistakenly using the wrong materials or techniques can lead to disappointing results, so be sure to follow the instructions carefully to avoid such errors.

Repairing and Upcycling

Repairing your planters can be a fun and creative process, allowing you to breathe new life into your DIY projects and make them even more unique and special.

A great way to approach repairing and upcycling is to think outside the box and consider how you can repurpose or reuse elements of your planter to create something entirely new and exciting, giving you the opportunity to get creative and add your personal touch to your DIY project.

Final Words

As a reminder, you now have the skills to create your own unique planters from household items. With a little creativity, you can turn your old items into beautiful garden decorations. For more inspiration, visit Common Household Items You Can Turn Into Beautiful Planters to discover new ways to repurpose and reuse your items, giving your garden a personal touch that reflects your style, and showcases your ingenuity, making your outdoor space truly special and yours.

FAQ

Q: What household items can I use to make DIY planters?

A: You can use a variety of household items to make DIY planters, such as old plastic bottles, cardboard tubes, wooden crates, old boots, and even plastic bags. Get creative and think outside the box! Some other items you can consider using include mason jars, tin cans, and glass containers. Just make sure to clean and disinfect them before using them as planters.

Q: How do I prepare the household items for use as planters?

A: To prepare the household items for use as planters, start by cleaning them thoroughly with soap and water. Remove any labels and scrub off any dirt or debris. If using wooden items, you may need to sand them down to smooth out the surface. For plastic items, you can use a Drill to make holes in the bottom for drainage. Make sure the items are dry before filling them with soil and plants.

Q: What type of soil and plants are best for DIY planters?

A: The type of soil and plants you use will depend on the type of planter you’re using and the climate you’re in. For most DIY planters, a well-draining potting soil is best. Choose plants that are suitable for the size and material of your planter, such as herbs, succulents, or small flowers. Consider the amount of sunlight and water your plants will need and choose a location that provides the right conditions.

Q: How do I prevent my DIY planters from leaking or falling over?

A: To prevent your DIY planters from leaking, make sure to add a layer of small rocks or broken pottery at the bottom for drainage. You can also use a waterproof coating or liner to prevent leaks. To prevent your planters from falling over, use a wide and stable base or add weights to the bottom. You can also attach the planter to a wall or a fence using screws or a bracket.

Q: How do I care for my plants in DIY planters?

A: Caring for plants in DIY planters is similar to caring for plants in traditional planters. Make sure to water them regularly, but not too much, and provide them with enough sunlight and fertilizer. Check the soil moisture by sticking your finger into the soil up to the first knuckle. If the soil feels dry, it’s time to water. You should also fertilize your plants regularly to promote healthy growth and blooming. With proper care, your plants should thrive in their new DIY planters.

Skip to content