Gardening

The Best Tips for Growing Zucchini in Small Spaces

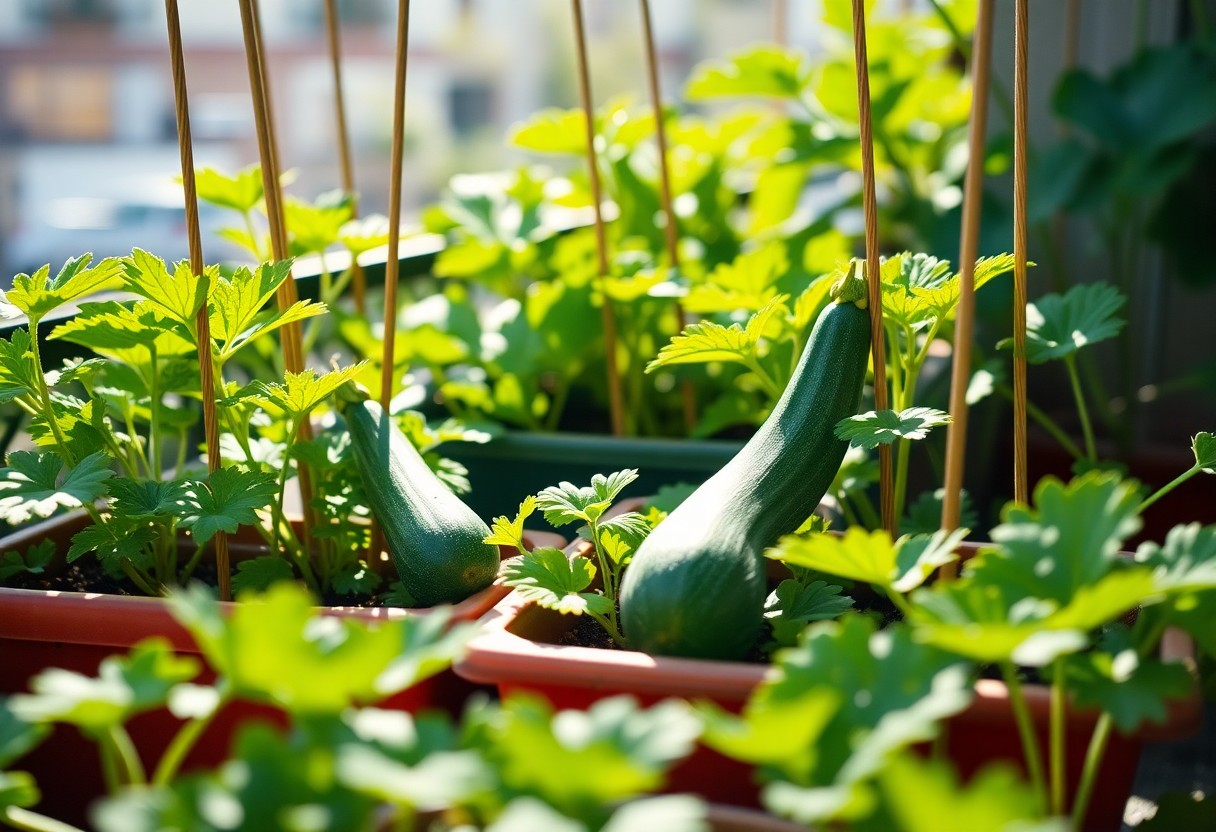
You can successfully grow zucchini in small spaces with the right techniques. Your small garden or balcony can thrive with zucchini plants. To get started, you’ll need to know how to optimize your space. For guidance on maximizing your area, visit How to Contain Zucchini in a Small-Space Garden to learn more about containing these versatile plants. With proper care, you’ll be enjoying a bountiful harvest in no time.
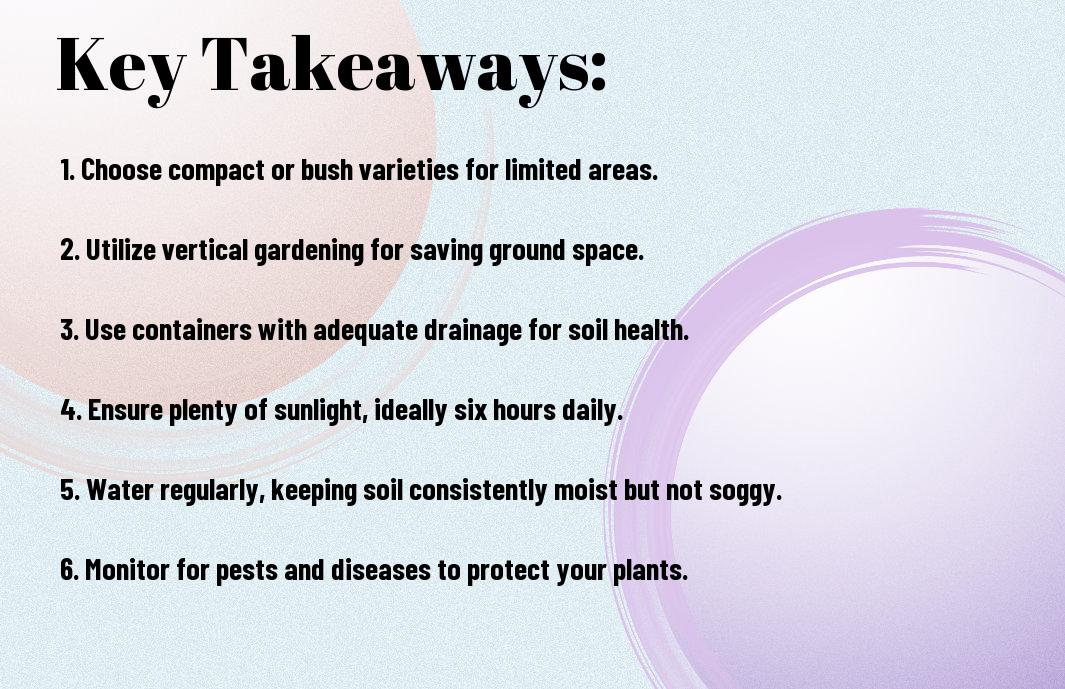
Key Takeaways:

To achieve success in growing zucchini in small spaces, consider the following points:

  • Choose a container that is at least 5-7 gallons to provide enough room for the zucchini roots to grow, and make sure it has drainage holes to prevent waterlogged soil.
  • Provide your zucchini plants with full sun and warm temperatures to promote healthy growth and fruit production, aiming for at least 6 hours of direct sunlight per day.
  • Use a trellis or cage to support the zucchini plants as they grow, keeping them upright and maximizing space, while also making it easier to harvest the fruit when it’s ready.

Choosing the Right Variety

A key factor in growing zucchini in small spaces is selecting a variety that thrives in tight conditions. You’ll want to look for varieties that are compact, produce smaller fruits, and have a bushy growth habit.

Selecting compact varieties

By opting for compact varieties, you can make the most of your limited space. You’ll find that these varieties are bred specifically for small gardens and containers, allowing you to grow delicious zucchini without sacrificing too much space.

Considering bush-type zucchinis

Bushtype zucchinis are an excellent choice for small spaces, as they spread less than traditional vining varieties. You can train them to grow upright or use a trellis to maximize space.

Hence, when considering bush-type zucchinis, you should also think about the specific growing conditions they require. You’ll want to provide your zucchinis with well-draining soil, full sun, and adequate water to ensure a bountiful harvest, and with the right care, you can enjoy a plentiful crop of delicious zucchinis even in the smallest of spaces.

Preparing the Soil

Now that you’re ready to grow zucchini in your small space, it’s time to focus on preparing the soil. You’ll want to ensure it’s well-draining and rich in nutrients to support healthy plant growth.

Testing soil pH levels

Alike other plants, zucchini prefers a slightly acidic to neutral soil pH, so you’ll want to test your soil to determine its pH level, adjusting it if necessary to create an optimal growing environment for your zucchini.

Adding organic matter

Along with testing your soil, you’ll also want to add organic matter such as compost or well-rotted manure to improve its structure and fertility, which will help your zucchini plants thrive in your small space.

It is vital to incorporate a 2-3 inch layer of organic matter into your soil, as this will not only improve its drainage but also provide your zucchini plants with the necessary nutrients for healthy growth and development, allowing you to enjoy a bountiful harvest from your small space.

Creating a Suitable Environment

All you need to do is provide your zucchini plants with the right conditions to thrive. Check out How to Grow Zucchini: You’ve Been Doing It All Wrong for more tips on creating an ideal environment.

Providing adequate sunlight

Suitable lighting is crucial for zucchini growth, and you should ensure your plants receive at least 6 hours of direct sunlight daily.

Ensuring good air circulation

Ensuring adequate space between plants is vital for healthy growth, as it allows for good air circulation and helps prevent disease.

This is especially important in small spaces, as poor air circulation can lead to fungal diseases that can quickly spread and damage your zucchini plants, so make sure to leave enough space between each plant to allow for good airflow, and consider using fans or other ventilation methods to improve circulation if necessary.

Container Gardening

For growing zucchini in small spaces, container gardening is an excellent option. You can use large pots or containers with good drainage to plant your zucchini seeds.

Selecting the right containers

Right from the start, you’ll want to choose containers that are at least 12-14 inches deep to accommodate your zucchini plant’s root system. Your container should also have drainage holes to prevent waterlogged soil.

Using trellises for support

On top of providing enough space, you’ll need to consider support for your zucchini plants as they grow. You can use trellises or cages to keep them upright and organized.

Selecting the right trellis for your zucchini plant is important, as it will help keep the plant upright and encourage vertical growth. You can use a tomato cage or a teepee trellis, and place it in the container when you plant your zucchini seeds, so the plant can grow up the trellis as it matures, making the most of your small space.

Watering and Maintenance

To grow healthy zucchini in small spaces, you need to focus on proper watering and maintenance techniques. This includes providing your plants with adequate water and nutrients, while also taking steps to prevent common issues like pests and diseases.

Watering deeply but infrequently

Maintenance of your zucchini plants’ watering schedule is key, as you want to water them deeply but infrequently to encourage deep root growth and make them more drought-resistant, allowing you to enjoy a bountiful harvest.

Mulching to retain moisture

Mulching around your zucchini plants helps to retain moisture in the soil, reducing the need for frequent watering and keeping your plants happy and healthy, as you work to create an ideal growing environment.

It is vital to use a layer of organic mulch, such as straw or wood chips, to retain moisture and suppress weeds, allowing you to direct your attention to other aspects of your zucchini’s care, like providing support and pruning, as you strive to get the most out of your small space garden.

Common Challenges

After starting to grow zucchini in small spaces, you may encounter some difficulties. For more information, you can visit Growing Zucchini in Small Spaces – Clever, Crafty, Cookin’ Mama to learn more about overcoming them.

Dealing with pests and diseases

Beneath the surface of your zucchini plants, pests and diseases can be lurking, so you need to be vigilant and take action quickly if you notice any issues.

Managing harvest and storage

Across the board, managing your zucchini harvest and storage effectively is key to enjoying your crop, so consider how you will use and preserve your zucchini to get the most out of your plants.

With a little planning, you can efficiently manage your zucchini harvest and storage, allowing you to make the most of your crop and enjoy it for a longer period, you can start by checking your plants daily for ripe zucchini and harvest them when they are at their peak freshness.

Conclusion

On the whole, you can successfully grow zucchini in small spaces by implementing a few key strategies. You will be able to enjoy a bountiful harvest by selecting compact varieties, utilizing vertical space, and providing your plants with sufficient light and care. With these tips, you can maximize your yield and make the most of your limited space, allowing you to enjoy your homegrown zucchini all season long.

FAQ

Q: What are the best containers to use for growing zucchini in small spaces?

A: When growing zucchini in small spaces, it’s best to use large containers that are at least 12-18 inches deep and have good drainage holes. Containers such as wooden planters, plastic pots, or even grow bags can be used, as long as they provide enough room for the zucchini plant’s roots to grow. Make sure to choose a container that is also wide enough to accommodate the plant’s sprawling habit, at least 2-3 feet in diameter.

Q: How much sunlight does zucchini need to grow in small spaces?

A: Zucchini plants require full sun to produce well, so choose a location that receives direct sunlight for at least 6 hours a day. If you’re growing zucchini in a small space with limited sunlight, consider using mirrors or reflective surfaces to reflect sunlight onto the plants. You can also use grow lights to supplement the natural light, especially during the winter months or in areas with limited sunlight.

Q: What is the best way to support zucchini plants in small spaces?

A: Zucchini plants can spread out quite a bit, so providing support is necessary to keep them upright and organized in small spaces. You can use tomato cages, trellises, or even a simple stake to provide support for the plants. Another option is to use a teepee or a pyramid trellis, which can help to keep the plants upright and make the most of the available space.

Q: How often should I water zucchini plants in small spaces?

A: Zucchini plants need consistent moisture, especially when they’re producing fruit. Water the plants when the top 1-2 inches of soil feels dry to the touch, and avoid overwatering, which can lead to root rot and other problems. Check the soil daily, and water every 2-3 days during hot weather, and every 4-5 days during cooler weather. Make sure to also fertilize the plants regularly, using a balanced fertilizer that is high in phosphorus to promote fruit production.

Q: How can I prevent pests and diseases from affecting my zucchini plants in small spaces?

A: To prevent pests and diseases from affecting your zucchini plants in small spaces, make sure to keep the area clean and well-ventilated. Remove any weeds or debris that can attract pests, and avoid overcrowding the plants, which can lead to disease. Use organic pest control methods whenever possible, such as neem oil or insecticidal soap, and treat fungal diseases promptly with a fungicide. Regularly inspect the plants for signs of pests or diseases, and take action quickly to prevent the problem from spreading.

How to Incorporate Water-Saving Techniques in Gardening

As you strive to maintain a lush and thriving garden, you can take steps to reduce your water usage. You can start by implementing efficient irrigation systems and choosing drought-tolerant plants. For more insights, you can explore 10 Tips for Water Conservation in Vegetable Gardens to optimize your garden’s water consumption, helping your garden flourish while conserving this precious resource.

Key Takeaways:

To achieve water efficiency in gardening, consider the following techniques:

  • Use drip irrigation systems, which deliver water directly to the roots of plants, reducing evaporation and runoff.
  • Implement mulching practices, which help retain moisture in the soil, suppress weeds, and regulate soil temperature.
  • Choose drought-resistant plants and group them according to their watering needs, minimizing water waste and ensuring that each plant receives the right amount of moisture.

Planning a Water-Efficient Garden

The first step in creating a water-efficient garden is to assess your current water usage and identify areas for improvement. You will need to consider your climate, soil type, and the types of plants you want to grow. By doing so, you can create a garden that is not only beautiful but also sustainable.

Assessing Water Usage

Along with evaluating your garden’s specific needs, you should consider the amount of rainfall your area receives and the efficiency of your irrigation system. You will be able to make informed decisions about how to optimize your water usage.

Choosing Drought-Tolerant Plants

After selecting the perfect location for your garden, you can start choosing plants that are adapted to thrive in conditions with minimal water. You will find a wide variety of drought-tolerant plants to choose from, each with its unique characteristics and benefits.

Understanding the specific needs of drought-tolerant plants will help you make the most of your water-efficient garden. You can group plants with similar water requirements together, and use mulch and other techniques to retain moisture in the soil, allowing you to reduce your water consumption while still enjoying a lush and vibrant garden.

Soil Conservation Methods

Some effective soil conservation methods can help you reduce water waste in your garden. You can learn more about water-saving techniques by visiting 10 Easy Ways to Save Water in Your Yard and Garden for tips on efficient gardening.

Mulching Techniques

Conversely, using mulch helps retain soil moisture, reducing the need for frequent watering, allowing you to conserve water in your garden.

Composting for Healthy Soil

By adopting composting practices, you can create a nutrient-rich soil that supports healthy plant growth, reducing your reliance on synthetic fertilizers and minimizing water consumption.

And as you start composting, you’ll notice improvements in your soil’s structure and water-holding capacity, enabling your plants to thrive with less water, making your garden more sustainable and environmentally friendly.

Watering Strategies

All gardeners can benefit from implementing efficient watering strategies to reduce their water consumption. You can start by assessing your garden’s specific needs and adjusting your watering schedule accordingly. This will help you minimize waste and ensure your plants receive the right amount of moisture.

Drip Irrigation Systems

Around the world, drip irrigation systems have proven to be an effective way to deliver water directly to the roots of your plants, reducing evaporation and runoff. You can install a drip irrigation system in your garden to target specific areas and reduce water waste.

Rainwater Harvesting

Beneath the surface of your garden, rainwater harvesting can be a valuable resource. You can collect and store rainwater in barrels or tanks to use for watering your plants, reducing your reliance on municipal water supplies.

This method not only conserves water but also reduces stormwater runoff and decreases the amount of pollutants entering local waterways. You can use the collected rainwater for irrigation, and also for other non-potable purposes such as washing garden tools or cleaning outdoor furniture, making it a valuable addition to your water-saving toolkit.

Selecting Water-Saving Tools

To incorporate water-saving techniques in your gardening, you need to select the right tools. You can start by choosing tools that help reduce water waste and optimize water usage.

Water-Efficient Hoses and Nozzles

Beneath the surface of traditional gardening tools, you’ll find water-efficient hoses and nozzles that can help you save water. You can opt for hoses with built-in timers and nozzles with low-flow settings to minimize water waste.

Moisture Sensors and Meters

Among the various tools available, you’ll find moisture sensors and meters that help you monitor your garden’s water levels. You can use these tools to determine when your plants need water, ensuring you don’t overwater or underwater.

And by using moisture sensors and meters, you can tailor your watering schedule to your garden’s specific needs, taking into account factors like soil type, climate, and plant species. This allows you to make informed decisions about your watering practices, optimizing water usage and promoting healthy plant growth in your garden.

Maintaining a Water-Smart Garden

Not only will a water-smart garden help you save water, but it will also ensure your plants thrive. You can learn more about Effective Water Conservation Techniques to optimize your garden’s water usage.

Regular Monitoring and Adjustments

Beneath the surface of a successful water-smart garden lies regular maintenance, which you can achieve by monitoring your garden’s condition and adjusting your techniques as needed to ensure optimal water usage.

Seasonal Watering Schedules

With the changing seasons, your watering schedule should also adapt to ensure your garden receives the right amount of moisture, and you can achieve this by understanding the specific needs of your plants during each season.

Understanding the seasonal watering needs of your garden will help you create an effective watering schedule, allowing you to make the most of your water conservation efforts, and as you continue to tend to your garden, you will find that your water usage decreases while your garden’s health and beauty increase, leading to a thriving and sustainable outdoor space that you can enjoy for years to come.

Creative Water Conservation Ideas

Despite the challenges of water scarcity, you can still maintain a beautiful garden by implementing creative water-saving techniques. You can use drought-tolerant plants, collect rainwater, and utilize efficient irrigation systems to minimize water waste.

Grey Water Systems

Across your garden, you can implement grey water systems that reuse water from sinks, washing machines, and showers for irrigation purposes, reducing your water consumption and lowering your water bills.

Xeriscaping and Desert Gardening

With water conservation in mind, you can adopt xeriscaping and desert gardening techniques that use low-water plants and efficient irrigation systems, allowing you to create a stunning garden that thrives in dry conditions.

Understanding the principles of xeriscaping and desert gardening, you can design a garden that not only saves water but also provides a unique and beautiful landscape. You can choose from a variety of plants that are adapted to dry conditions, such as cacti and succulents, and use mulch and gravel to retain moisture and suppress weeds, creating a sustainable and low-maintenance garden that you can enjoy for years to come.

To wrap up

Following this guide, you can effectively incorporate water-saving techniques in your gardening practices. You will be able to create a beautiful and sustainable garden while conserving water. By implementing these methods, you can reduce your water consumption and protect your local environment. As you continue to nurture your garden, you will see the positive impact of your water-saving efforts on your plants and your community, making your gardening experience even more fulfilling.

FAQ

Q: What are some effective ways to conserve water in my garden?

A: There are several ways to conserve water in your garden, including the use of drip irrigation systems, which deliver water directly to the roots of plants, reducing evaporation and runoff. Additionally, using mulch can help retain soil moisture, reducing the need for frequent watering. You can also use rain barrels to collect and store rainwater for later use. Furthermore, choosing drought-tolerant plants can help reduce water consumption, and implementing a schedule for watering can help ensure that your plants are receiving the right amount of moisture.

Q: How can I determine the right amount of water for my plants?

A: To determine the right amount of water for your plants, you need to consider the type of plant, soil type, and climate. Check the soil moisture by inserting your finger into the soil up to the knuckle, if the soil feels dry, it’s time to water. You can also use a soil moisture meter to get a more accurate reading. Water your plants deeply but infrequently to encourage deep root growth, and avoid overwatering, which can lead to root rot and other problems. It’s also a good idea to water your plants in the early morning or evening to minimize evaporation.

Q: What are some water-saving techniques for lawn care?

A: For lawn care, you can implement several water-saving techniques. Raise your mower blade to 3 inches to promote deeper root growth, which requires less water. You can also use drought-tolerant grass species, which require less watering. Additionally, consider using a rain sensor on your sprinkler system, which can detect when it’s raining and turn off the system. Aerating your lawn once a year can also help improve water penetration and reduce runoff. Finally, consider using a broom or leaf blower to remove debris instead of watering your lawn to wash it away.

Q: Can I use greywater in my garden, and if so, how?

A: Yes, you can use greywater in your garden, but it’s imperative to take some precautions. Greywater is wastewater generated from sinks, showers, and washing machines, and it can be used to water plants, but it’s not suitable for all plants. You can use a greywater system to collect and treat the water, and then use it to irrigate your garden. However, it’s imperative to check with your local authorities to see if greywater use is allowed in your area, and to follow proper treatment and safety guidelines to avoid contamination. Greywater should not be used on edible plants or plants that produce fruit or seeds that will be eaten.

Q: How can I maintain my garden’s soil to reduce water consumption?

A: To maintain your garden’s soil and reduce water consumption, add organic matter like compost or well-rotted manure to improve soil structure and increase its water-holding capacity. Use cover crops to protect the soil from erosion and retain moisture. You can also use alayer of mulch to retain soil moisture and suppress weeds that compete with your plants for water. Additionally, avoid over-tilling, which can damage soil structure and reduce its ability to hold water. By maintaining healthy soil, you can reduce the need for frequent watering and create a more resilient and water-efficient garden.

The Top Tips for Growing Mint Without Overgrowth

As you launch on cultivating the fragrant and versatile mint plant, you may find yourself entwined in a delicate dance of nurturing and restraint. Your intentions, no doubt, are to harness the herb’s cooling essence, but its propensity for unbridled growth can be overwhelming. You need not succumb to its invasive tendencies, for with the right approach, you can coax mint into a lush, yet contained, beauty, allowing you to savor its delights without sacrificing your garden’s serenity.

Key Takeaways:

To effectively manage mint growth, consider the following points:

  • Controlling the spread of mint is important to prevent it from overtaking other plants in the garden. This can be achieved by planting mint in containers or boundaries that restrict its root growth.
  • Regular pruning is necessary to maintain the health and shape of mint plants. This involves cutting back stems to encourage new growth and prevent the plant from becoming leggy.
  • Providing the right environment for mint growth, including ample moisture and light, will help to promote healthy growth without leading to overgrowth. This can be balanced by ensuring the soil is not too fertile, as this can cause the plant to grow excessively.

Preparing the Soil

The initial step in growing mint is preparing the soil, and for a comprehensive approach, you can consult A Complete Guide To Growing Your Own Mint for expert advice. As you commence on this journey, you’ll find that the right foundation is necessary for your mint plants to thrive.

Choosing the Right Location

Similarly, selecting a spot with partial shade to full sun is vital, as mint prefers well-drained areas with ample sunlight to flourish, allowing you to make the most of your mint plants.

Soil Requirements for Mint Growth

Among the key factors influencing mint growth, the soil’s pH level and composition play a significant role, and you should aim for a slightly acidic to neutral soil pH, ranging from 6.0 to 7.0, to create an ideal environment for your mint.

Considering the specific needs of mint, you will want to ensure your soil is rich in organic matter, which helps retain moisture and suppress weeds, thereby facilitating healthy growth and minimizing maintenance, as you nurture your mint plants to achieve optimal flavor and aroma, allowing you to fully appreciate the rewards of your careful preparation and attention to detail.

Selecting the Right Mint Variety

You will find that choosing the right mint variety is imperative for a harmonious growth experience, as different types have unique characteristics that may suit your needs and preferences. Consider the intended use of your mint, whether it be for cooking, tea, or ornamental purposes.

Peppermint vs Spearmint

Above all, the decision between peppermint and spearmint often comes down to personal taste, as peppermint has a stronger flavor and spearmint a more delicate one, allowing you to decide which suits your palate and uses.

Other Mint Varieties to Consider

Right from the start, you may want to explore other mint varieties, such as chocolate mint or apple mint, which offer distinct flavors and aromas that can add depth to your recipes and gardens.

Varieties like pineapple mint or ginger mint can also be quite intriguing, and as you examine into the world of mint, you will discover that each type has its own set of advantages, whether it be a more compact growth habit or a unique fragrant oil profile, allowing you to tailor your selection to your specific needs and preferences, and ultimately, to cultivate a mint garden that is truly your own.

Planting and Care

Keep your mint plants thriving by providing them with the right conditions. You will want to tend to their needs with diligence, as they can quickly take over your garden if left unattended.

How to Plant Mint

Along with a container that provides good drainage, you will need to select a location with partial shade to full sun, depending on your climate. You can plant mint in the ground or in a pot, making sure the soil is moist and fertile.

Watering and Sunlight Requirements

Above all, mint requires consistent moisture, so you will need to water your plants regularly, taking care not to overwater. You should also ensure they receive at least four to six hours of direct sunlight per day, which will promote healthy growth.

Further, as you tend to your mint plants’ watering and sunlight needs, you will begin to notice the subtle nuances of their development, and adjust your care accordingly, you will find that the right balance of water and light will yield a lush and fragrant harvest, perfect for adding a burst of freshness to your favorite dishes and drinks, and you will be able to appreciate the simple joys of nurturing your own mint plants.

Preventing Overgrowth

All gardeners know that mint can quickly take over a garden if not properly managed. You will need to take steps to prevent your mint from spreading and overtaking other plants in your garden.

Pruning and Trimming Techniques

Practically speaking, pruning your mint regularly is important to maintaining control. You can trim back your mint plants to encourage bushy growth and prevent them from becoming leggy.

Containing Mint Spread

Preemptively, you should consider containing your mint to prevent it from spreading. You can plant your mint in containers or boundaries to keep it from invading other parts of your garden.

Due to mint’s tendency to spread quickly, you will need to take extra precautions to keep it under control. You can use physical barriers, such as containers or edging, to contain your mint and prevent it from spreading to other parts of your garden, allowing you to enjoy its beauty and fragrance without the hassle of overgrowth.

Common Mistakes to Avoid

Despite your best intentions, growing mint can be a daunting task. You may find yourself struggling to control its spread, and your garden may become overrun. To avoid this, it’s important to be aware of the common pitfalls that can lead to overgrowth.

Overwatering and Underwatering

One of the most significant errors you can make is inconsistent watering. If you water your mint too much or too little, it can lead to weak and leggy growth, making it more prone to spreading.

Not Providing Enough Light

Around the time you plant your mint, you should consider the amount of light it will receive. You need to ensure your mint plant gets enough sunlight to thrive, as lack of light can cause it to become leggy and spread out.

Also, as you plan the lighting for your mint plant, you’ll want to place it in a spot that receives partial shade to full sun, depending on your climate. By doing so, you’ll be able to control the growth of your mint and encourage it to grow lush and healthy, without becoming invasive, allowing you to enjoy its fragrance and beauty in your garden.

Harvesting and Using Mint

Many of the challenges associated with growing mint can be mitigated by adopting a thoughtful approach to harvesting and using this versatile herb. As you tend to your mint plants, you will begin to notice the abundance of leaves and stems, and you will need to consider how to make the most of your bounty.

When to Harvest Mint

Against the tendency to let your mint plants grow unchecked, you should harvest them regularly to encourage new growth and prevent overgrowth. You can start harvesting your mint leaves as soon as the plant has multiple sets of leaves, and you can continue to harvest them throughout the growing season.

Creative Ways to Use Fresh Mint

Fresh from the garden, your mint leaves can be used in a variety of ways, from adding them to salads and drinks to using them in beauty treatments and crafts. You can use your fresh mint to make teas, cocktails, and desserts, and you can also use it to add fragrance to your home and garden.

Considering the many uses of fresh mint, you may find that you want to experiment with different recipes and projects. As you explore the possibilities of using fresh mint, you will discover that it can add a brightness and freshness to many aspects of your life, from your cooking and grooming to your decor and entertainment. You can use your mint to make delicious chutneys and sauces, or to create beautiful arrangements and wreaths, and you can also use it to make thoughtful gifts and favors for your friends and family.

To wrap up

With these considerations, you will be well on your way to cultivating a lush and thriving mint plant, all while maintaining the delicate balance of your garden’s ecosystem. As you tend to your mint, you will find that your efforts yield a bountiful harvest, and your garden becomes a haven of freshness and vitality, with your carefully controlled mint plant adding its unique charm to your outdoor space, allowing you to enjoy its beauty and fragrance, and savor the rewards of your thoughtful gardening approach.

FAQ

Q: What are the benefits of growing mint in containers to prevent overgrowth?

A: Growing mint in containers is an excellent way to control its spread and prevent overgrowth. By containing the roots, you can limit the mint’s ability to spread and take over your garden. This method also allows for better soil quality control, watering, and fertilization, resulting in healthier and more flavorful mint plants. Additionally, container-grown mint is easier to harvest and prune, making it a great option for backyard gardeners.

Q: How often should I water my mint plants to promote healthy growth without overwatering?

A: Mint plants prefer moist soil, but overwatering can lead to root rot and other problems. To avoid this, water your mint plants when the top inch of soil feels dry to the touch. Make sure the pot has good drainage holes to prevent waterlogged soil. In hot weather, you may need to water your mint plants daily, while in cooler weather, watering every other day should suffice. It’s also imperative to avoid getting water on the leaves to prevent fungal diseases.

Q: What are some effective ways to prune mint plants to prevent overgrowth and encourage bushy growth?

A: Pruning is imperative to control mint’s aggressive growth and promote bushy, healthy plants. Pinch off flower buds as they form to encourage leaf growth and prevent the plant from seeding. Regularly trim back long stems to about one-third of their length, and cut back leggy growth to encourage branching. You can also harvest individual leaves or stems as needed to use in cooking and herbal remedies. Prune your mint plants regularly to maintain shape, promote new growth, and prevent them from becoming leggy.

Q: Can I grow mint in shady areas, or does it require full sun to prevent overgrowth?

A: While mint can grow in partial shade, it prefers full sun to partial shade, depending on the variety. If you’re growing mint in a shady area, make sure it receives at least 4-6 hours of direct sunlight per day. However, if you live in a hot climate, providing some afternoon shade can help prevent scorching and promote healthier growth. Keep in mind that mint grown in shady areas may be more prone to overgrowth, so regular pruning is necessary to maintain its shape and size.

Q: Are there any specific mint varieties that are less prone to overgrowth and easier to manage?

A: Yes, some mint varieties are naturally more compact or less aggressive than others. For example, ‘Bowles’ mint, ‘Pineapple’ mint, and ‘Chocolate’ mint are known for their smaller growth habits and are less likely to take over your garden. These varieties are perfect for container gardens or small spaces. Other varieties, like peppermint and spearmint, can be more aggressive and may require more frequent pruning to control their spread. Choose a variety that suits your needs and provides the desired level of maintenance.

How to Grow Pollinator-Friendly Vegetables

As you tend to your garden, you have the power to create a haven for pollinators. By choosing the right vegetables, you can attract these vital creatures and support the health of your local ecosystem. Your garden can become a thriving oasis, teeming with life and color, as you cultivate a variety of pollinator-friendly vegetables. You will learn how to make informed choices to create a welcoming space for these important visitors, and in doing so, you will be contributing to a larger movement to protect the environment.

Key Takeaways:

To grow pollinator-friendly vegetables, consider the following points:

  • Choose varieties of vegetables that are rich in nectar and pollen, such as squash, cucumbers, and carrots, which attract a wide range of pollinators like bees and butterflies.
  • Plant a diverse selection of vegetables that bloom at different times to provide a constant source of food for pollinators throughout the growing season.
  • Use organic and sustainable gardening practices, such as avoiding pesticides and herbicides, and incorporating compost and mulch to create a healthy and thriving garden ecosystem that supports pollinator health.

Choosing Pollinator-Friendly Vegetables

While planning your garden, consider the types of vegetables that will attract pollinators. You can find a list of Bee Friendly Fruit And Vegetables: Flowering Food Plants For Bees to guide your selection.

Selecting Vegetable Varieties

To create a pollinator-friendly garden, you should choose vegetable varieties that produce flowers, as these will attract bees and other pollinators to your garden, supporting the health of your vegetables.

Native Vegetables for Local Pollinators

At the heart of a thriving pollinator garden are native vegetables that provide a source of food for local pollinators, and you can choose varieties that are well-suited to your region.

It is especially beneficial to select native vegetables that are naturally attractive to local pollinators, as these will help support the local ecosystem and provide a bounty of produce for you to enjoy, and by choosing these varieties, you are contributing to the preservation of biodiversity in your area.

Preparing the Soil

The foundation of a thriving pollinator-friendly vegetable garden begins with the soil. You’ll want to assess your soil type and consider its potential to support the complex relationships between plants, pollinators, and microorganisms.

Soil Composition for Healthy Vegetables

Along with understanding your soil’s pH level, you should also consider its composition, as this will affect the availability of nutrients for your vegetables. You can test your soil to determine its makeup and make adjustments as needed to create a balanced environment.

Adding Organic Matter for Pollinator Health

The addition of organic matter, such as compost or well-rotted manure, will help to support the health of your soil and the pollinators that visit your garden. You can incorporate these materials into your soil to create a welcoming environment for beneficial microorganisms and insects.

But as you add organic matter to your soil, you’ll also be supporting the broader ecosystem that relies on your garden. By creating a rich, diverse soil environment, you’ll be providing a foundation for a thriving web of life, from the tiniest microbe to the busiest bee, and ultimately, to the health and productivity of your pollinator-friendly vegetables.

Planting and Maintenance

For a thriving pollinator-friendly vegetable garden, you’ll want to focus on creating an environment that attracts and supports these beneficial insects. This involves selecting the right plants, planting them at the optimal time, and maintaining your garden with their needs in mind.

Planting Techniques for Maximum Pollination

Any gardener knows that the way you plant your vegetables can impact their ability to attract pollinators. You can maximize pollination by planting a diverse range of vegetables that bloom at different times, ensuring a constant source of nectar and pollen for your pollinator friends.

Watering and Mulching for Healthy Growth

Any effective garden maintenance plan includes proper watering and mulching techniques. You can help your pollinator-friendly vegetables thrive by watering them deeply but infrequently, and adding a layer of organic mulch to retain moisture and suppress weeds.

Further attention to the specifics of watering and mulching will help you refine your approach. As you water your garden, you’ll want to avoid getting the foliage wet, instead opting for soaker hoses or gentle irrigation methods that deliver water directly to the roots. Additionally, your choice of mulch can have a significant impact, with options like straw, bark chips, or leaves providing a nutrient-rich habitat for your pollinators as they break down over time.

Creating a Pollinator-Friendly Garden

All gardening efforts begin with a well-designed plan, and creating a pollinator-friendly garden is no exception. You will want to consider the specific needs of the vegetables you plan to grow and the pollinators you aim to attract.

Designing a Garden for Maximum Pollination

For maximum pollination, you should design your garden to be diverse and welcoming to a variety of pollinators, including bees, butterflies, and hummingbirds. You can achieve this by incorporating a mix of vegetables, herbs, and flowers that provide nectar and pollen.

Incorporating Native Plants and Flowers

By choosing native plants and flowers, you can create a garden that is tailored to the specific needs of local pollinators. You will be providing them with the food and shelter they need to thrive, and in return, they will help pollinate your vegetables.

Plus, native plants and flowers are often low-maintenance and drought-tolerant, making them a great choice for your garden. As you select native species, you will be supporting the local ecosystem and creating a haven for pollinators, which will in turn help your vegetables grow and flourish, allowing you to enjoy a bountiful harvest.

Managing Pests and Diseases

Once again, you’ll want to prioritize methods that promote a balanced ecosystem, rather than relying on chemical pesticides that can harm pollinators. By creating a diverse and thriving garden, you can reduce the likelihood of pest and disease issues arising in the first place.

Organic Pest Control Methods

Among the most effective approaches to managing pests is to introduce natural predators or parasites that target specific pests, allowing you to maintain a balanced ecosystem in your garden. You can also use physical barriers, crop rotation, and other organic methods to control pest populations.

Preventing Disease in Pollinator-Friendly Vegetables

About the best way to prevent disease in your pollinator-friendly vegetables is to focus on creating healthy soil and providing optimal growing conditions. You can achieve this by using compost, mulch, and other natural amendments to promote soil fertility and structure.

Managing disease in your pollinator-friendly vegetables requires a holistic approach, taking into account the entire garden ecosystem. You should monitor your plants regularly for signs of disease, and take action promptly if you notice any issues. This might involve removing infected plants, improving air circulation, or using organic fungicides to prevent the spread of disease. By taking a proactive and sustainable approach, you can help keep your pollinator-friendly vegetables healthy and thriving.

Supporting Local Pollinators

To create a thriving pollinator-friendly vegetable garden, you can learn about Pollinator-Friendly Companion Plants For Vegetables to enhance your garden’s biodiversity.

Providing Shelter and Food for Pollinators

Pollinators like bees and butterflies need your help to survive, and by planting a variety of flowers and herbs, you can provide them with the shelter and food they need to thrive in your garden.

Creating a Pollinator-Friendly Community

On your journey to creating a pollinator-friendly garden, you will be contributing to a larger effort to protect these vital creatures and preserve the health of your local ecosystem.

Creating a pollinator-friendly community starts with your own garden, where you can make a significant impact by choosing plants that attract and support pollinators, and by sharing your knowledge with others, you can inspire a collective effort to protect these vital creatures and preserve the health of your local ecosystem, and as you do so, you will be joining a growing movement of people who are working together to ensure the long-term health of our planet.

Summing up

Ultimately, as you launch on growing pollinator-friendly vegetables, you will be contributing to a healthier ecosystem. By choosing the right varieties and creating a welcoming environment, you can attract these vital creatures to your garden. Your efforts will not only boost your harvest, but also support the well-being of your local pollinators, fostering a balanced and thriving environment for years to come.

FAQ

Q: What vegetables are best for attracting pollinators to my garden?

A: To create a pollinator-friendly garden, focus on planting a variety of vegetables that are rich in nectar and pollen, such as tomatoes, peppers, cucumbers, squash, and beans. These vegetables are not only delicious but also attract a range of pollinators, including bees, butterflies, and hummingbirds. Consider incorporating a mix of annuals and perennials, and choose open-pollinated or heirloom varieties whenever possible to support genetic diversity.

Q: How can I design my garden to support pollinators?

A: To design a pollinator-friendly garden, consider creating a diverse and dynamic landscape that includes a mix of vegetables, herbs, and flowers. Plant a variety of vegetables that bloom at different times to provide a constant source of nectar and pollen throughout the growing season. Incorporate native plants, shrubs, and trees that provide habitat and food for pollinators, and consider adding a source of water, such as a shallow dish or birdbath, to support pollinators’ hydration needs.

Q: What role do native plants play in supporting pollinators in my vegetable garden?

A: Native plants play a vital role in supporting pollinators in your vegetable garden. These plants have co-evolved with local pollinators over time, providing a source of nectar, pollen, and host plants for caterpillars. Incorporating native plants, such as coneflower, black-eyed susan, or milkweed, into your garden can help support a range of pollinators, from bees and butterflies to hummingbirds and moths. Consider adding native plants to your garden’s borders or interspersing them among your vegetables to create a pollinator-friendly landscape.

Q: How can I minimize pesticide use in my pollinator-friendly garden?

A: To minimize pesticide use in your pollinator-friendly garden, adopt a range of integrated pest management (IPM) strategies. Start by using physical barriers, such as row covers, to prevent pests from reaching your plants. Encourage beneficial insects, such as lady beetles and lacewings, by providing food and habitat. Use organic pest control methods, such as neem oil or diatomaceous earth, and consider introducing beneficial nematodes to control soil-borne pests. If you must use pesticides, choose targeted, pollinator-safe options and apply them at times when pollinators are least active.

Q: Can I still grow pollinator-friendly vegetables in a small or urban garden?

A: Yes, you can still grow pollinator-friendly vegetables in a small or urban garden. Consider using containers or verticle gardens to make the most of limited space, and choose compact or dwarf varieties of vegetables that are well-suited to small gardens. Incorporate a range of pollinator-friendly herbs, such as basil, mint, or oregano, which can thrive in small spaces and provide a source of nectar and pollen for pollinators. Even a small garden or a few pots on a balcony can provide a haven for pollinators and support the local ecosystem.

The Best Tips for Growing Potatoes in Containers

You can successfully grow potatoes in containers with the right techniques. Your container should have drainage holes to prevent waterlogged soil. You will need to choose a suitable potato variety and use a well-balanced fertilizer to promote healthy growth. By following these guidelines and providing your potatoes with adequate sunlight and care, you can enjoy a bountiful harvest from your container garden, and discover the benefits of growing your own potatoes at home.

Key Takeaways:

To achieve a successful potato container garden, consider the following points:

  • Choose a large enough container with good drainage to allow the roots to grow and the soil to dry out slightly between waterings.
  • Select a suitable potato variety that is compact or dwarf, and bred for container growing to maximize yields in smaller spaces.
  • Provide adequate sunlight and water for your potato plants, aiming for at least 6 hours of direct sunlight and consistent moisture levels to promote healthy growth.

Choosing the Right Containers

The success of growing potatoes in containers depends on selecting the right ones. You need to consider the size, material, and drainage of your containers to ensure healthy growth.

Selecting the ideal size and material

Ideally, you should choose containers that are at least 6-8 inches deep to allow for adequate root growth. You can use plastic, wooden, or clay containers, depending on your preference and availability.

Ensuring proper drainage and aeration

Draining excess water is vital for healthy potato growth. You should ensure that your containers have holes in the bottom to prevent waterlogged soil.

In addition, to ensure proper drainage and aeration, you can add a layer of small rocks or broken pottery at the bottom of your containers. This will help to prevent the soil from washing away and allow for healthy root development, enabling you to grow thriving potatoes in your containers.

Preparing the Soil

It is necessary to prepare your soil before planting potatoes in containers. You need to ensure the soil is well-draining and rich in nutrients for optimal growth.

Mixing the perfect blend of compost and fertilizer

Along with choosing the right container, you will need to mix a blend of compost and fertilizer to create a nutrient-rich soil. You can combine peat moss, vermiculite, and perlite to create a well-draining mix, and add a balanced fertilizer for optimal growth.

Adjusting the pH level for optimal growth

Complementary to preparing the soil, you should adjust the pH level to ensure it’s suitable for potato growth. You can test your soil pH and adjust it if necessary, as potatoes prefer a slightly acidic to neutral soil pH.

Preparing your soil’s pH level is an important step in growing potatoes in containers. You will need to test your soil regularly to ensure it remains within the optimal pH range, and make adjustments as necessary to provide your potatoes with the best chance of growing and thriving. You can use lime or sulfur to adjust the pH level, but be careful not to overdo it, as this can harm your plants.

Selecting the Best Potato Varieties

Now that you’re ready to grow potatoes in containers, it’s time to choose the right variety for your needs. You’ll want to consider factors like maturity date, disease resistance, and climate adaptability to ensure a successful harvest.

Deciding between early, mid-season, and late varieties

Across the various types of potatoes, you’ll find that early varieties mature quickly, while mid-season and late varieties take longer to harvest, offering you a range of options to suit your schedule and preferences.

Considering disease resistance and climate adaptability

Any variety you choose should be well-suited to your local climate and resistant to common diseases, ensuring your potatoes thrive in their container environment, and you can enjoy a healthy crop.

A key aspect of selecting the right potato variety is understanding how different types respond to various climate conditions and diseases, so you can make an informed decision that suits your specific growing conditions, allowing you to provide your potatoes with the best possible care and maximize your chances of a successful harvest.

Planting and Caring

For successful container potato growth, you can learn more about the process by visiting How To Grow Potatoes In Containers. Step by step guide, which provides valuable insights.

Planting seed potatoes at the right depth and spacing

Right from the start, you should ensure that your seed potatoes are planted at the correct depth and spacing to promote healthy growth and maximize yields.

Providing adequate water, sunlight, and nutrients

For optimal growth, you need to provide your potatoes with the right amount of water, sunlight, and nutrients, which will help them thrive in their container environment.

In fact, your potatoes will require consistent moisture, especially when they’re producing tubers, and a balanced fertilizer will supply the necessary nutrients for a bountiful harvest, so make sure to check the soil regularly and adjust your care routine accordingly to meet the specific needs of your container potatoes.

Managing Pests and Diseases

Your container-grown potatoes are susceptible to pests and diseases, which can significantly impact your harvest. Regular monitoring and maintenance are crucial to prevent infestations and infections.

Identifying common pests and diseases

Beneath the surface, pests like aphids, wireworms, and nematodes can damage your potatoes. You should also watch out for diseases like late blight, scab, and powdery scab, which can spread quickly if left unchecked.

Implementing organic and integrated pest management techniques

Onto the solution, you can use organic methods like crop rotation, physical barriers, and biological controls to manage pests and diseases. You can also introduce beneficial insects to control pests naturally.

Diseases can be controlled by using resistant potato varieties, practicing good hygiene, and ensuring good air circulation around your containers. You can also use organic fungicides, like copper-based products, to prevent the spread of disease, and adopt integrated pest management techniques that combine physical, cultural, and biological controls to minimize harm to your potatoes and the environment.

Harvesting and Storage

Once again, your patience will be rewarded when your potatoes are ready to be harvested, and with proper storage, you can enjoy them for months to come.

Determining the optimal time for harvest

To determine when your potatoes are ready, you will need to check the plants for signs of maturity, such as yellowing foliage and a cessation of new growth, indicating that the tubers are fully formed and ready for harvest.

Storing potatoes for long-term preservation

Around this time, you should also consider how you will store your harvested potatoes to keep them fresh for a longer period, taking care to keep them cool, dark, and dry to prevent spoilage.

Optimal storage conditions for your potatoes involve maintaining a consistent temperature between 4-7°C and humidity level, ensuring that the tubers are not exposed to light, and providing adequate ventilation to prevent moisture buildup, allowing you to enjoy your homegrown potatoes for several months after harvest.

Conclusion

The key to successful container potato growth lies in your ability to provide the right conditions. You will achieve a bountiful harvest by following the tips outlined, such as choosing the right container and maintaining optimal soil quality. Your potatoes will thrive in a well-draining, sunny spot, and with proper care, you can enjoy a delicious crop of homegrown potatoes from your containers.

FAQ

Q: What type of container is best for growing potatoes?

A: As far as growing potatoes in containers, it’s best to use a container that is at least 15-20 gallons in size and has drainage holes in the bottom. This will provide enough room for the potatoes to grow and allow for good air circulation. You can use plastic or wooden containers, but make sure they are clean and free of any contaminants. It’s also a good idea to add a layer of small rocks or broken pottery at the bottom of the container to help with drainage.

Q: What type of soil is best for growing potatoes in containers?

A: For growing potatoes in containers, you’ll want to use a well-draining potting mix that is high in organic matter. A mix that contains peat moss, compost, and perlite or vermiculite is ideal. Avoid using soil from your garden, as it can compact and prevent proper drainage. You can also add a balanced fertilizer to the soil to provide nutrients for the potatoes.

Q: How much sunlight do potatoes need when grown in containers?

A: Potatoes need full sun to produce well, so choose a location that gets at least 6 hours of direct sunlight per day. If you’re growing in a container, you can move it to a sunny spot, but make sure it’s not too hot. Potatoes can tolerate some shade, but too much shade can lead to weak and spindly plants. Also, keep in mind that potatoes can be sensitive to extreme temperatures, so avoid placing the container in a spot that gets scorched by the sun.

Q: How often should I water potatoes grown in containers?

A: Potatoes need consistent moisture, especially when they’re producing tubers. Water the potatoes when the top 2-3 inches of soil feels dry to the touch. Avoid overwatering, as this can lead to rot and other problems. Check the soil daily, and water thoroughly when necessary. You can also use a moisture meter to check the soil moisture levels. During hot weather, you may need to water the potatoes daily, while during cooler weather, you may only need to water them every other day.

Q: How do I harvest potatoes grown in containers?

A: To harvest potatoes grown in containers, start by stopping watering the plants about 2-3 weeks before you plan to harvest. This will help the tubers mature and make them easier to harvest. Carefully dig through the soil with your hands or a fork, being careful not to damage the tubers. Start at the top of the container and work your way down, feeling for the tubers as you go. Once you’ve located a tuber, gently lift it out of the soil and set it aside. Continue harvesting the tubers until you’ve found them all, then let them dry in a cool, dark place for a few hours before storing them in a cool, dark place.

Skip to content