Home and Garden

10 Ways to Make Your Home More Energy Efficient

As you consider reducing your environmental footprint and saving on utility bills, you’ll find that making your home more energy efficient is a great place to start. You can begin by implementing simple changes to your daily habits and home maintenance. For more information on getting started, you can check out 10 Easy Ways to Save Money & Energy in Your Home, which provides valuable tips and advice. You’ll be on your way to a more sustainable and cost-effective living space.

Key Takeaways:

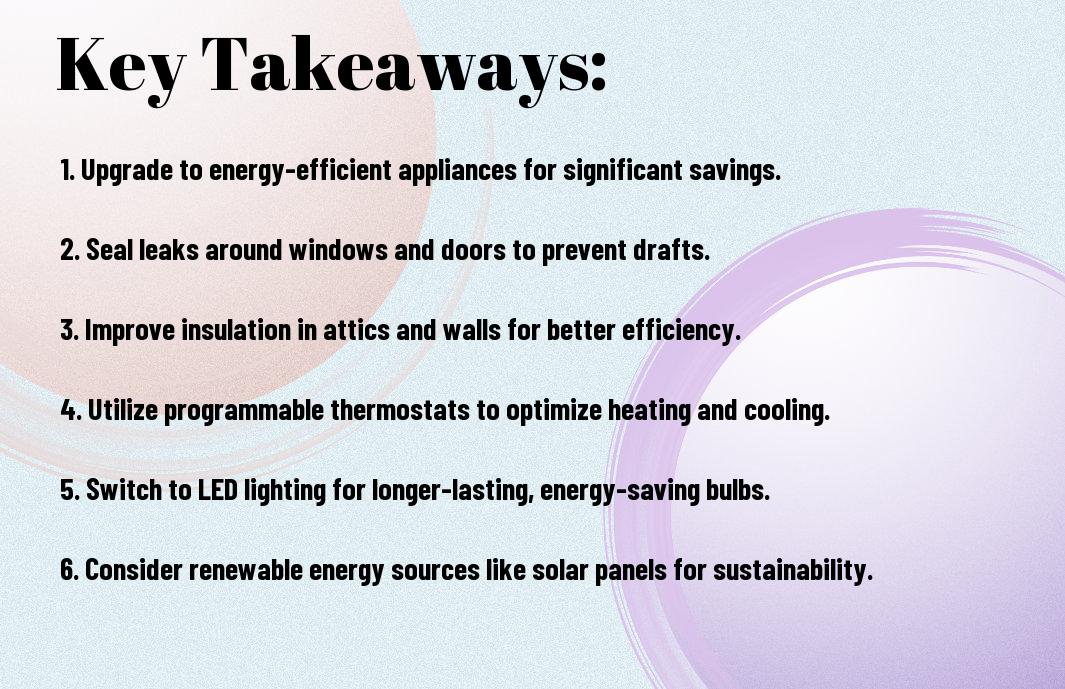
To make your home more energy efficient, consider the following points:

  • Using LED bulbs can significantly reduce your energy consumption, as they use up to 90% less energy than traditional incandescent bulbs.
  • Sealing air leaks around doors, windows, and ducts can help prevent heated or cooled air from escaping, reducing your energy bills and making your home more comfortable.
  • Upgrading to energy-efficient appliances can also make a big difference, as they are designed to use less energy while still providing the same level of performance as traditional appliances.

Simple Swaps

While making your home more energy efficient, you can start with simple changes. Visit 12 Ways to make your home more energy efficient for inspiration.

Replace Traditional Light Bulbs

Around your home, switching to LED bulbs can significantly impact your energy consumption, helping you save money on your utility bills.

Upgrade to Power-Strip Surge Protectors

Traditionally, you may have been using basic power strips, but upgrading to surge protectors can protect your devices and reduce standby power consumption.

Even with these upgrades, you can take it a step further by plugging your devices into the power strip and turning it off when not in use to eliminate standby power consumption, making your home more energy efficient and saving you money in the long run.
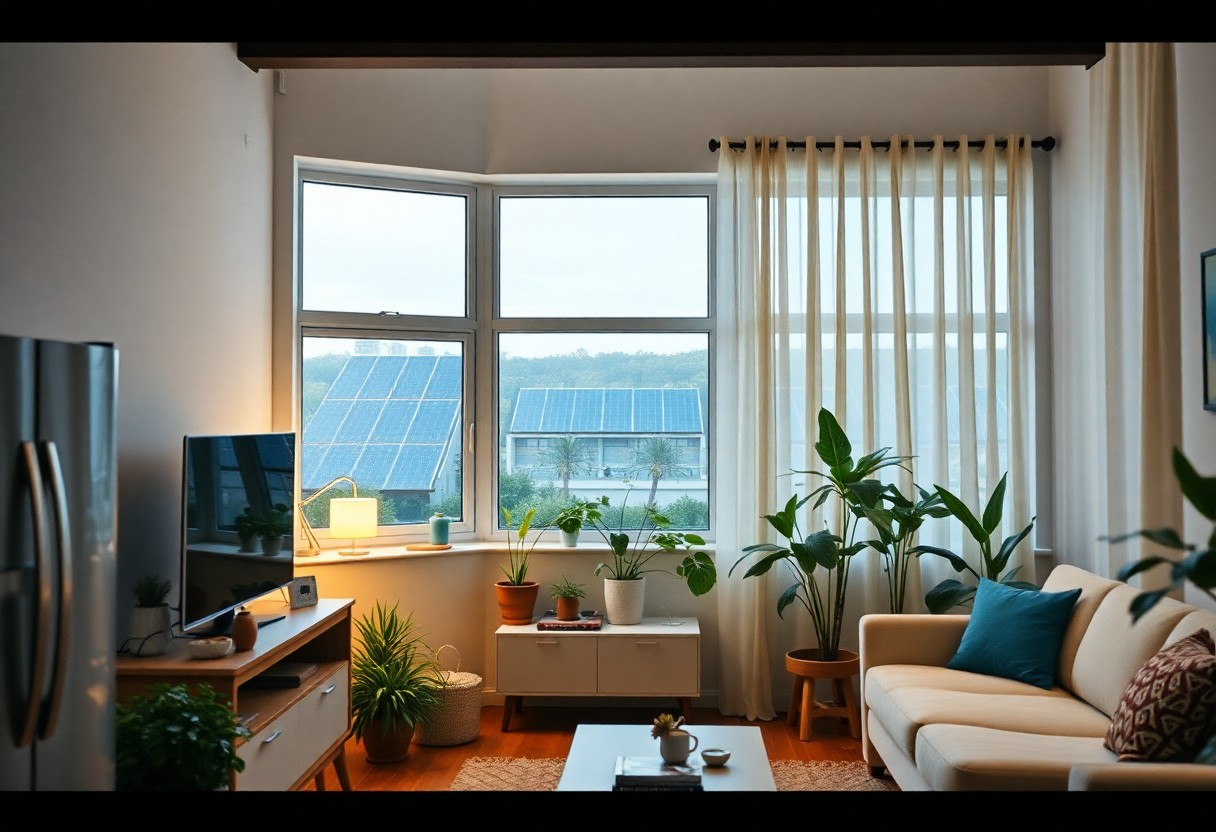
Smart Home Devices

The integration of smart home devices can significantly improve your home’s energy efficiency. You can control and monitor your energy usage remotely, making it easier to identify areas of waste and make adjustments.

Invest in a Smart Thermostat

Across various smart home devices, a smart thermostat is an excellent starting point, allowing you to regulate your home’s temperature and optimize your heating and cooling systems for maximum energy savings.

Install Smart Power Outlets

After assessing your energy usage, consider installing smart power outlets, which enable you to control and monitor the energy consumption of individual appliances and devices, helping you to reduce standby power consumption.

Install smart power outlets in areas where you use the most energy, such as your home office or entertainment room, and you will be able to track and control the energy usage of your devices, making it easier for you to make your home more energy efficient.

Energy-Efficient Appliances

Despite the initial higher cost, energy-efficient appliances can save you money in the long run. They consume less energy, reducing your utility bills and environmental impact. You can start by replacing your old appliances with energy-efficient ones, which will make a significant difference in your home’s overall energy efficiency.

Choose Energy Star Rated Refrigerators

Appliances like refrigerators account for a significant portion of your energy consumption. You should look for Energy Star rated refrigerators, which are designed to consume less energy while maintaining performance. This will help you reduce your energy bills and minimize your carbon footprint.

Select Front-Loading Washing Machines

Below your kitchen, your laundry room can also benefit from energy-efficient appliances. You can select front-loading washing machines, which use less water and energy than traditional top-loading machines. This will not only save you money but also help reduce your water consumption.

Plus, front-loading washing machines are designed to be gentler on your clothes, which means they will last longer. You will also have the option to choose from various cycles and settings, allowing you to customize your wash according to your needs. This flexibility, combined with energy efficiency, makes front-loading washing machines a great choice for your home.

Insulation and Drafts

Not addressing insulation and drafts in your home can lead to significant energy losses. You can reduce heat transfer and minimize energy bills by properly insulating your home.

Seal Air Leaks Around Windows and Doors

About 30% of your home’s heat can escape through gaps around windows and doors. You can seal these air leaks using weatherstripping or caulk to prevent heat from escaping.

Add Insulation to Attics and Walls

For maximum energy efficiency, you should add insulation to your attics and walls. You can use materials like fiberglass, cellulose, or foam board to insulate these areas.

Walls and attics that are not well-insulated can account for a significant portion of your home’s heat loss. You can check your attic and walls to determine if they have sufficient insulation, and add more if necessary to achieve optimal energy efficiency in your home.

Water Conservation

Many simple changes can help you make your home more water efficient. By implementing a few key strategies, you can significantly reduce your water consumption and lower your utility bills.

Install Low-Flow Showerheads and Faucets

Prior to making any major changes, consider installing low-flow showerheads and faucets, which can greatly reduce the amount of water you use without sacrificing performance, allowing you to save water and money.

Fix Leaky Taps and Toilets

For instance, a single leaky tap can waste up to 20 gallons of water per day, so fixing these issues is important to conserving water in your home, and you can start by checking your taps and toilets for any leaks.

Indeed, fixing leaky taps and toilets is a simple and effective way to conserve water, and you can do this by replacing worn-out washers or gaskets, and checking your toilet flapper to ensure it is sealing properly, which will help you save water and reduce your water bills, and you can also consider installing dual-flush toilets and low-flow faucet aerators to further reduce your water consumption.

Renewable Energy Sources

Unlike traditional energy sources, renewable energy sources can significantly reduce your carbon footprint and energy bills. You can harness energy from natural sources to power your home, reducing your reliance on non-renewable energy.

Consider Solar Panel Installation

Before investing in solar panels, you should assess your roof’s suitability and local building regulations to ensure a smooth installation process. You can then enjoy the benefits of solar energy and reduce your energy costs.

Explore Wind Energy Options

Around your location, you may have opportunities to harness wind energy, which can be a viable alternative to traditional energy sources. You can consider installing a small wind turbine to power your home.

And as you examine deeper into wind energy options, you’ll find that it can be an efficient way to generate electricity, especially if you live in an area with consistent wind speeds. You can assess your property’s wind potential and explore different turbine types to find the best fit for your energy needs.

Conclusion

From above, you can see that making your home more energy efficient is within your reach. You can apply these 10 ways to reduce your energy consumption and lower your bills. By implementing these simple and effective methods, you will make your home more eco-friendly and save money on your utility bills, making your living space more comfortable and sustainable for you and your family. You will be contributing to a better environment by reducing your carbon footprint.

FAQ

Q: What are the benefits of making my home more energy efficient?

A: Making your home more energy efficient can have numerous benefits, including reducing your energy consumption, lower utility bills, and a decrease in your carbon footprint. By implementing energy-efficient measures, you can also increase the value of your home, improve indoor air quality, and enhance the overall comfort and livability of your space.

Q: What are some simple ways to make my home more energy efficient without breaking the bank?

A: There are several simple and affordable ways to make your home more energy efficient, such as switching to energy-efficient light bulbs, sealing air leaks and drafts, and adjusting your thermostat to use less energy for heating and cooling. Additionally, using power strips to plug in electronics and turning them off when not in use can also help reduce standby power consumption. These small changes can make a significant impact on your energy usage over time.

Q: How can I reduce heat loss in my home during the winter months?

A: To reduce heat loss in your home during the winter months, you can take several steps, including installing insulation in your attic, walls, and floors, and sealing any gaps or cracks around windows and doors. You can also use thick curtains or drapes to help keep warm air in and cold air out, and consider installing storm windows or replacing old windows with energy-efficient ones. Furthermore, maintaining your heating system regularly and using a programmable thermostat can also help optimize your heating system’s performance.

Q: Are energy-efficient appliances worth the investment?

A: Yes, energy-efficient appliances are worth the investment, as they can help you save money on your utility bills and reduce your environmental impact over time. Look for appliances with the ENERGY STAR label, which indicates that they meet energy efficiency standards set by the U.S. Environmental Protection Agency. Although energy-efficient appliances may be more expensive upfront, they can provide long-term savings and help pay for themselves through reduced energy consumption.

Q: Can I make my home more energy efficient if I’m a renter?

A: Yes, there are still several ways to make your home more energy efficient even if you’re a renter. You can start by talking to your landlord about making energy-efficient upgrades, such as installing energy-efficient light bulbs or adjusting the thermostat. You can also take simple steps like using power strips, unplugging electronics when not in use, and using thick curtains or drapes to help keep your space warm or cool. Additionally, you can consider using portable energy-efficient appliances, such as a space heater or a portable air conditioner, to help reduce your energy consumption.

How to Install a Rainwater Harvesting System

As you consider reducing your water footprint, you may be thinking of collecting rainwater for your household needs. You can do this by installing a rainwater harvesting system, a simple and practical way to conserve water. Your first step will be to assess your roof and gutter system, ensuring they are secure and able to direct rainwater into a storage tank. You will then need to choose a suitable tank and install it, connecting it to your downspout and setting up a system for distributing the collected water.

Key Takeaways:

To effectively install a rainwater harvesting system, consider the following points:

  • Choose a suitable location for the system, taking into account the roof catchment area, gutter size, and downspout placement to maximize water collection efficiency.
  • Select the right storage tank size and material to hold the harvested rainwater, considering factors such as durability, maintenance, and aesthetics.
  • Ensure a proper filtration system is in place to remove debris and contaminants from the collected rainwater, allowing for safe use in irrigation, toilets, or other non-potable applications.

Planning and Design

Before installing a rainwater harvesting system, you need to consider several factors to ensure its effectiveness. You must think about your water usage, available space, and local regulations.

Assessing Water Needs

Water usage patterns will help you determine the size of your system. You should calculate your average water consumption to decide on the tank size and other components.

Choosing System Components

Below the surface of a successful rainwater harvesting system lies a well-planned design. You will need to select the right materials, such as tanks, gutters, and downspouts, to collect and store rainwater efficiently.

In addition to selecting the right components, you will also need to consider factors such as first flush devices, roof catchment area, and overflow systems to ensure your system functions properly and maintains water quality. You should research and evaluate different options to choose the best components for your specific needs and budget.

Site Selection and Preparation

It is necessary to choose the right location for your rainwater harvesting system. You can learn more about installing a rainwater catchment system to understand the process. Consider factors like sunlight, wind direction, and accessibility when deciding where to install your system.

Evaluating Roof Catchment Area

Preceding the installation, you’ll need to assess your roof’s condition and size to determine its potential for collecting rainwater. You’ll want to ensure your roof is suitable for a rainwater harvesting system, taking into account its material, slope, and existing drainage system.

Preparing the Ground

Preparing your yard for the system involves clearing the area where the tank will be placed, ensuring it’s level and free of debris. You’ll also need to check for any underground utilities or pipes that may interfere with the installation.

To prepare the ground properly, you’ll need to dig a hole for the tank, taking care not to damage any surrounding structures or plants. As you work, consider your impact on the environment and strive to minimize your footprint, just as you would when installing a rainwater harvesting system to conserve this precious resource. You’ll be laying the groundwork for a sustainable and eco-friendly system that will serve you well for years to come.

Tank Selection and Installation

Your rainwater harvesting system’s success depends on the right tank, so consider visiting 6 Tips for Installing a Rainwater Collection System for guidance.

Types of Tanks

Before choosing, you’ll find options like:

  • Plastic
  • Metal
  • Concrete
  • Fiberglass
  • Wood

The selection will depend on your needs and preferences, as outlined in the following table:

Tank Material Benefits
Plastic Affordable
Metal Durable
Concrete Long-lasting
Fiberglass Lightweight
Wood Natural look

Installing the Tank

Across your property, you’ll need to select a suitable location, considering factors like drainage and accessibility. You should ensure the tank is level and secure to function properly.

Also, as you install the tank, consider the inlet and outlet positions, as well as the overflow mechanism, to ensure your system operates efficiently and safely, and you can enjoy the benefits of collected rainwater.

Conveyance and Storage

All components of your rainwater harvesting system work together to collect and store rainwater for future use. You will need to consider the size and material of your storage tank, as well as the conveyance system that transports water from your roof to the tank.

Gutters and Downspouts

Beneath your roof, gutters and downspouts play a significant role in collecting and directing rainwater into your storage tank. You should ensure that your gutters are clean and clear of debris to prevent clogs and damage to your system.

First Flush Devices

By incorporating a first flush device into your system, you can divert the initial flow of water from your roof, which may contain debris and contaminants, away from your storage tank. You will be able to collect cleaner water for your needs.

Gutters typically collect a significant amount of debris, such as leaves and twigs, during the first flush of water after a dry spell. By using a first flush device, you can allow this initial flow of water to be diverted, taking the debris with it, and then direct the cleaner water into your storage tank, ensuring that you collect the highest quality water for your needs, and you will be able to use your rainwater harvesting system more efficiently.

Treatment and Distribution

For a reliable rainwater harvesting system, you need to consider how you will treat and distribute the collected water. This step ensures the water is safe for use and accessible when needed.

Filtration and Disinfection

Filtering the collected rainwater is crucial to remove debris and contaminants, and you can use various methods such as screens, sedimentation, or filtration systems to achieve this. You will also need to disinfect the water to kill bacteria and other microorganisms, ensuring it’s safe for your use.

Pumping and Piping

Filtering out the details of your pumping and piping system is vital to ensure efficient water distribution, and you should consider factors such as pipe size, material, and insulation to prevent contamination and damage.

A well-designed pumping and piping system will allow you to easily access and use your harvested rainwater, and you should consider installing floats, valves, and other control devices to regulate water flow and pressure, making it easier for you to manage your system and use the collected water for various purposes, such as irrigation or toilet flushing.

Maintenance and Troubleshooting

Now that your rainwater harvesting system is installed, you’ll want to ensure it continues to function properly. Regular upkeep will help you avoid issues and make the most of your system.

Regular Inspection

Beneath the surface of a well-functioning system lies careful maintenance, and you should check your gutters, downspouts, and tanks regularly for debris and damage.

Common Issues and Solutions

Issues with your system can arise, but you can often address them with simple fixes, such as cleaning clogged gutters or checking for leaks in your storage tank.

A closer look at common issues, such as mosquito infestations or sediment buildup, will help you develop a plan to tackle problems as they arise, allowing you to enjoy the benefits of your rainwater harvesting system with minimal hassle, and you’ll be able to make adjustments as needed to keep your system running smoothly.

Summing up

Ultimately, you have taken the first step towards a more self-sufficient lifestyle by learning how to install a rainwater harvesting system. You will now be able to collect and conserve rainwater for your needs, reducing your reliance on municipal water supplies. As you implement your system, you will find that your efforts will contribute to a more sustainable future, and you can take pride in your ability to harness nature’s resources to meet your daily needs, making your life simpler and more fulfilling.

FAQ

Q: What are the benefits of installing a rainwater harvesting system, and how does it work?

A: Installing a rainwater harvesting system provides an alternative source of water for non-potable uses such as flushing toilets, washing cars, and irrigating gardens, thereby reducing the demand on municipal water supplies. The system works by collecting and storing rainwater from rooftops in a tank, which is then treated and distributed for use. This not only helps in conservation of groundwater but also reduces the stormwater runoff, decreasing the risk of flooding and erosion.

Q: What are the basic components required to install a rainwater harvesting system?

A: The basic components required for a rainwater harvesting system include a collection system (roofs, gutters, and downspouts), a storage tank, a first flush device, a conduit or pipe for distribution, and treatment systems such as filters and disinfection units. The choice and size of these components depend on the intended use of the harvested water, the size of the collection area, and the average rainfall in the area.

Q: How do I choose the right size of the storage tank for my rainwater harvesting system?

A: Choosing the right size of the storage tank involves calculating the average annual rainfall, the size of the roof catchment area, and the intended use of the harvested water. A general rule of thumb is to use a tank that can hold at least 1 inch of rainfall from the roof catchment area. However, the actual size may need to be adjusted based on local rainfall patterns, storage space available, and budget considerations. It’s also important to consider the tank material, ensuring it is durable and suitable for storing water.

Q: What maintenance is required for a rainwater harvesting system to ensure it functions effectively and safely?

A: Regular maintenance of a rainwater harvesting system is necessary to ensure it functions effectively and safely. This includes inspecting the roof catchment area, gutters, and downspouts to ensure they are free of debris, cleaning the first flush device regularly, checking the storage tank for sediment, and maintaining the treatment systems. Additionally, it’s important to check the distribution system for leaks and ensure all components are in good working condition. Performing these maintenance tasks will help prevent contamination and ensure the water quality is suitable for its intended use.

Q: Are there any regulations or standards that I need to follow when installing a rainwater harvesting system?

A: Yes, there are regulations and standards that govern the installation of rainwater harvesting systems, which vary by location. These regulations may cover aspects such as system design, water quality standards, and cross-connection control to prevent contamination of potable water supplies. It’s important to check with local authorities to understand the specific requirements and standards that apply to your area. Compliance with these regulations ensures the system is installed safely and functions as intended, providing a reliable source of non-potable water.

The Best Ways to Protect Your Garden During Drought

As you tend to your garden, you notice the withering effects of drought on your once-thriving plants. You watch as the soil dries and cracks, leaving your garden vulnerable to damage. Your green oasis, once full of life and color, now faces the threat of dehydration. You must take action to preserve the beauty and vitality of your garden, and fortunately, there are simple yet effective ways to do so, which you will discover as you probe into the world of drought-resistant gardening techniques.

Key Takeaways:

To shield your garden from the harsh effects of drought, consider the following points:

  • Implement Water Conservation methods such as using drip irrigation systems or soaker hoses to minimize water waste and deliver water directly to the roots of plants.
  • Apply a layer of Organic Mulch to help retain soil moisture, suppress weeds, and regulate soil temperature, thereby reducing the need for frequent watering.
  • Choose Drought-Tolerant Plants that are adapted to survive with minimal watering, and group them together to create a cohesive and resilient garden landscape that can thrive during dry periods.

Preparing for Drought

Your garden’s resilience depends on your ability to prepare for drought, and this requires a thoughtful approach to conservation and planning, allowing you to nurture your plants through times of scarcity.

Assessing Your Garden’s Needs

To determine the best course of action, you must evaluate your garden’s unique needs, considering factors such as soil type, plant species, and climate, which will guide your decisions and help you create a tailored plan.

Creating a Water Conservation Plan

Your water conservation plan should prioritize efficiency and effectiveness, using techniques such as mulching and drip irrigation to minimize waste and maximize absorption, ensuring your garden receives the water it needs to thrive.

Preparing a comprehensive water conservation plan involves considering multiple factors, including the water needs of different plants, the most efficient irrigation methods, and strategies for harvesting and conserving rainwater, all of which will help you maintain a healthy and vibrant garden even in the face of drought, and allow you to tend to your plants with the care and attention they deserve.

Soil Conservation

Even in the driest of times, your garden’s soil can be preserved with mindful practices. You can protect the soil’s structure and fertility, allowing it to retain moisture and support plant life.

Mulching and Composting

Beneath the surface, mulch and compost work together to shield your soil from the harsh effects of drought. You can apply a layer of organic mulch to prevent moisture loss and regulate soil temperature.

Using Cover Crops

With the right approach, cover crops can be a powerful tool in your drought-fighting arsenal. You can plant them to hold the soil in place, reducing erosion and retaining precious moisture.

Further, as you explore the use of cover crops, you’ll find that they can also attract beneficial insects and add nutrients to the soil, creating a resilient and thriving ecosystem that will help your garden weather the drought and bounce back stronger than ever, allowing you to tend to your land with greater ease and harmony.

Efficient Watering

Many of you are seeking ways to conserve water in your garden, and one effective method is to adopt efficient watering techniques. You can learn more about how to save water in all your gardens for a drought-filled future by exploring online resources.

Drip Irrigation and Soaker Hoses

Similarly, one approach to efficient watering is using drip irrigation and soaker hoses, which deliver water directly to the roots of your plants, reducing evaporation and runoff.

Rainwater Harvesting

Likewise, one way to collect and conserve water is through rainwater harvesting, which allows you to gather and store rainwater for later use in your garden.

Further, by implementing rainwater harvesting, you can reduce your reliance on municipal water supplies and create a more sustainable gardening practice, allowing you to tend to your garden with a clearer conscience, knowing you are preserving this precious resource for future generations.

Drought-Tolerant Plants

Once again, you find yourself pondering the best ways to protect your garden from drought. Drought-tolerant plants are an excellent choice, as they can thrive with minimal watering, allowing your garden to flourish even in arid conditions.

Native Plants and Succulents

Prior to selecting plants, you should consider native plants and succulents, which have adapted to survive with limited water, making them perfect for your drought-stricken garden, and will undoubtedly bring a touch of natural beauty to your outdoor space.

Drought-Resistant Grasses

Personally, you may find that drought-resistant grasses are an attractive option, as they can withstand dry spells and require less maintenance, allowing you to enjoy a lush lawn without the burden of frequent watering.

Considering your options for drought-resistant grasses, you may want to explore Buffalo Grass or Blue Grama Grass, which are both excellent choices for dry climates, and can add a soft, natural texture to your garden, while also being environmentally friendly and low-maintenance, allowing you to focus on other aspects of your outdoor space.

Garden Maintenance

All gardens require regular maintenance to thrive, especially during drought. You must focus on preserving water and protecting your plants from harm.

Pruning and Trimming

By cutting back dead or dying branches, you help your plants conserve water and energy. This simple task can make a significant difference in your garden’s overall health.

Weeding and Pest Control

Maintenance of your garden’s soil and ecosystem is vital, as it prevents weeds from competing with your plants for water. You can achieve this by regularly inspecting your garden and removing any unwanted growth.

Hence, as you take care of your garden’s weeding and pest control, you will notice a significant reduction in water loss and an improvement in your plants’ overall health. You will be able to enjoy your lush and thriving garden, even in the midst of a drought, by being mindful of these simple yet effective techniques.

Alternative Solutions

Unlike traditional methods, alternative solutions can help you conserve water and protect your garden during drought. You can consider using grey water systems or DIY irrigation solutions to reduce your water consumption.

Grey Water Systems

After installing a grey water system, you will be able to reuse water from your household for irrigation purposes, reducing your water bill and minimizing waste. You can use this system to water your plants, trees, and even fill your pond.

DIY Irrigation Solutions

Any gardener can create their own DIY irrigation solutions using materials like plastic bottles, pipes, and tubes. You can make a drip irrigation system or a sprinkler system to deliver water directly to the roots of your plants.

Also, as you explore DIY irrigation solutions, you will find that they can be tailored to your specific garden needs, allowing you to control the amount of water each plant receives, and reducing evaporation and runoff, thus making the most of the water you have, and keeping your garden thriving even in drought conditions.

Summing up

Summing up, as you tend to your garden during drought, you nurture not just your plants, but your connection to the natural world. By adopting mindful watering habits, mulching, and choosing resilient species, you create a haven that thrives in harmony with the environment. As you care for your garden, you cultivate a sense of balance and respect for the land, allowing your outdoor space to flourish even in the most challenging conditions, and bringing you closer to the beauty of nature.

FAQ

Q: What are the most effective ways to protect my garden from drought?

A: To protect your garden from drought, start by using drought-tolerant plants, which require less water to thrive. Additionally, applying a layer of mulch can help retain moisture in the soil. Implementing efficient irrigation systems, such as drip irrigation, can also significantly reduce water waste. Furthermore, watering your plants during the cooler parts of the day can minimize evaporation, ensuring that more water reaches the roots of your plants.

Q: How can I conserve water in my garden during a drought?

A: Conserving water in your garden during a drought involves several strategies. One method is to harvest rainwater using barrels or tanks, which can be used for watering plants. Another approach is to avoid overwatering by checking the soil moisture before irrigating. Using covers or plastic sheets to reduce evaporation from the soil surface is also beneficial. Moreover, employing greywater, which is wastewater generated from domestic activities, can be a valuable source of irrigation water for your garden.

Q: What are some drought-tolerant plants that can thrive in dry conditions?

A: There are numerous drought-tolerant plants that can thrive in dry conditions. These include succulents like aloe and agave, which store water in their leaves. Other examples are cacti and plants with deep roots that can access water deep in the soil, such as mesquite trees. Additionally, certain grass species like buffalo grass and blue grama grass are also drought-tolerant and can be excellent choices for lawns. These plants are ideal for gardens in areas prone to drought as they require less maintenance and watering.

Q: How often should I water my plants during a drought?

A: The frequency of watering your plants during a drought depends on the type of plants, the climate, and the soil type. Generally, it is better to water plants deeply but infrequently to encourage deep root growth, making them more resistant to drought. Watering in the early morning or evening helps reduce evaporation. It’s also important to monitor the soil moisture by inserting a finger into the soil or using a moisture meter to determine the best watering schedule for your plants.

Q: Are there any long-term solutions to protect my garden from future droughts?

A: YES, there are several long-term solutions to protect your garden from future droughts. Implementing sustainable gardening practices such as permaculture, which aims to create a self-sufficient ecosystem, can enhance your garden’s resilience to drought. Another approach is to improve soil health through the addition of organic matter, which increases the soil’s water-holding capacity. Investing in advanced irrigation systems that can automatically adjust watering based on weather forecasts and soil conditions can also provide long-term protection against drought. Lastly, designing your garden with drought tolerance in mind from the outset can significantly reduce the impact of future droughts.

How to Design a Garden for Wildlife

You can create a thriving oasis for local wildlife by designing your garden with their needs in mind. As you plan your outdoor space, you’ll want to consider the types of plants, features, and habitats that will attract and support a variety of species. By making a few intentional design choices, you can turn your garden into a haven for birds, bees, and other wildlife, enhancing your outdoor experience and contributing to the local ecosystem.

Key Takeaways:

To create a garden that attracts and supports local wildlife, consider the following points:

  • Provide a source of water, such as a pond or birdbath, to attract a variety of species and support their hydration needs.
  • Incorporate a mix of native plants that offer food and shelter for animals, such as birds, bees, and butterflies, and choose plants that thrive in your local climate.
  • Create a diverse garden landscape with a variety of habitats, including trees, shrubs, and flower beds, to support a wide range of wildlife and promote biodiversity.

Assessing Your Yard

Your yard’s potential for supporting wildlife can be determined by assessing its current state, considering factors like sunlight, water sources, and existing vegetation, and taking cues from resources like Cues to Care – Wild by Design for inspiration.

Evaluating Soil and Climate

Around your yard, observe the soil type, moisture levels, and climate conditions to determine which plants and features will thrive, helping you create a welcoming environment for wildlife.

Identifying Native Species

The types of plants and animals native to your area will be crucial in designing a garden that supports local wildlife, so take note of the species you already have in your yard.

Evaluating the native species in your area will help you choose plants that provide the right food and shelter for local wildlife, allowing you to create a balanced and sustainable ecosystem that benefits both you and the environment, as you design your garden with their needs in mind, you will be able to attract a diverse range of species to your yard.

Choosing the Right Plants

Clearly, the type of plants you choose will greatly impact the wildlife that visits your garden. You’ll want to select plants that provide a source of food, shelter, and habitat for various species, taking into account the local climate and soil conditions.

Selecting Plants for Pollinators

Beneath the surface of a thriving garden, you’ll find a variety of plants that attract pollinators like bees and butterflies, and you can achieve this by incorporating a mix of native flowers, shrubs, and trees that provide nectar and pollen.

Incorporating Plants for Wildlife Shelter

Similar to designing a home, you’ll want to choose plants that provide shelter and protection for wildlife, such as native grasses, shrubs, and trees that offer hiding places and nesting sites.

This type of shelter can be especially beneficial for small animals, like birds and insects, which need a safe place to hide from predators and harsh weather conditions, and by incorporating these plants into your garden design, you can create a haven for wildlife to thrive, and as you do so, you’ll be able to observe and enjoy the various species that visit your garden.

Creating a Water Feature

Once again, you have the opportunity to get creative and make a significant impact on your garden’s ecosystem by incorporating a water feature, which will attract a wide variety of wildlife to your outdoor space.

Designing a Pond or Birdbath

Among the various options available, you can choose a design that suits your garden’s style and size, considering factors such as depth, material, and placement to create an ideal spot for wildlife to drink, bathe, and thrive.

Maintaining a Healthy Water Source

Hygienic practices are important to prevent the growth of harmful bacteria and algae, ensuring your water feature remains a safe haven for visiting wildlife, and you can achieve this by regularly cleaning and monitoring your pond or birdbath.

Water quality is vital to the well-being of the wildlife that visits your garden, and you can maintain a healthy water source by ensuring adequate circulation, using natural methods to control algae, and avoiding the use of harsh chemicals, which will help you create a thriving ecosystem that supports a diverse range of wildlife.

Providing Food Sources

After designing your garden layout, it’s time to think about the food sources you’ll provide for wildlife. You’ll want to create a diverse and abundant supply of food to attract a variety of species to your garden.

Planting Fruit and Berry-Bearing Shrubs

The key to attracting wildlife is to plant a variety of fruit and berry-bearing shrubs that produce food throughout the year. You can choose shrubs like dogwood, hawthorn, or elderberry that produce berries in winter, and perennials like coneflower or black-eyed susan that produce seeds in summer.

Installing a Bird Feeder or Suet Station

Birds are attracted to easy food sources, so installing a bird feeder or suet station is a great way to provide them with energy-rich food. You can choose from a variety of feeder types, such as tube feeders or hopper feeders, and offer different types of seed or suet to attract different species.

With a bird feeder or suet station in place, you can expect to attract a variety of bird species to your garden, from finches and sparrows to woodpeckers and nuthatches. You’ll need to maintain your feeder or suet station regularly, refilling it with fresh seed or suet and cleaning it to prevent mold and bacterial growth, to keep your feathered visitors happy and healthy.

Minimizing Hazards

Many gardeners are unaware of the hazards that their gardens can pose to wildlife. You can learn more about creating a safe garden by visiting 10 Ways to Start Building a Garden for Wildlife to get started on your wildlife-friendly garden journey.

Removing Pesticides and Herbicides

The first step in minimizing hazards is to remove pesticides and herbicides from your garden, as these can harm or kill wildlife that come into contact with them, so you should prioritize their removal.

Creating a Safe Haven for Wildlife

Behind every successful wildlife garden is a safe and welcoming space, you can achieve this by considering the needs of the wildlife you want to attract and taking steps to meet those needs.

To create a safe haven for wildlife, you should consider providing a source of water, such as a pond or birdbath, and incorporating native plants that provide food and shelter for wildlife, allowing you to create a thriving ecosystem in your garden that will attract a variety of wildlife species.

Maintenance and Enjoyment

Despite the initial effort, maintaining a wildlife garden is relatively easy, allowing you to enjoy the fruits of your labor and the company of the wildlife that inhabits it.

Regularly Monitoring and Maintaining Your Garden

For instance, you will need to regularly inspect your garden to ensure that it continues to meet the needs of the wildlife that visits it, making adjustments as necessary to maintain a balanced ecosystem.

Observing and Appreciating Wildlife

With patience and practice, you can develop a deeper understanding and appreciation of the wildlife that inhabits your garden, learning to identify the different species and their habits.

A key part of enjoying your wildlife garden is taking the time to observe and appreciate the variety of species that visit, from the birds and bees to the butterflies and other insects, allowing you to connect with nature and feel a sense of wonder and awe at the beauty and complexity of the natural world, and you can do this by sitting quietly in your garden, equipped with a pair of binoculars and a field guide to help you identify the different species.

Final Words

So, you have learned how to design a garden for wildlife, now it’s time to put your knowledge into practice. You will be creating a haven for local wildlife, and your efforts will contribute to a larger conservation effort. By following these steps, you can make a positive impact on the environment and enjoy the benefits of a thriving ecosystem in your own backyard, enhancing your outdoor experience and connecting with nature through your beautifully designed wildlife garden.

FAQ

Q: What are the key elements to consider when designing a garden for wildlife?

A: When designing a garden for wildlife, it’s crucial to consider the needs of various species, including plants, animals, and insects. Key elements to include are a source of water, such as a pond or birdbath, a variety of native plants that provide food and shelter, and a mix of open spaces and dense areas for habitat diversity. Additionally, consider the types of wildlife you want to attract, such as birds, bees, or butterflies, and incorporate features that cater to their specific needs.

Q: How can I choose the right plants for a wildlife-friendly garden?

A: Choosing the right plants is vital for creating a wildlife-friendly garden. Opt for native plants, shrubs, and trees that are adapted to your local climate and soil type. Consider plants that provide nectar, pollen, seeds, or berries, as these will attract a variety of wildlife. Also, include a mix of plants that offer different heights, textures, and growth habits to provide shelter and habitat for various species. Consult with local nurseries, gardening experts, or online resources to select the best plants for your area and the type of wildlife you want to attract.

Q: What features can I include to provide a source of water for wildlife in my garden?

A: Providing a source of water is crucial for attracting wildlife to your garden. Consider installing a pond, fountain, or birdbath, and make sure it’s shallow and has a rough surface for easy access. You can also add a few rocks or twigs for perching and a source of fresh water, such as a dripping faucet or a rainwater harvesting system. Change the water regularly to keep it clean and free of bacteria, and avoid using chemicals or pesticides that can harm wildlife.

Q: How can I create a wildlife-friendly garden in a small or urban space?

A: Even in small or urban spaces, you can create a wildlife-friendly garden by incorporating a few key elements. Start by choosing compact or dwarf varieties of plants that are suitable for small spaces, and consider using containers or vertical planters to maximize space. Incorporate a small water feature, such as a birdbath or a self-watering planter, and add a few rocks or logs to provide shelter and habitat for wildlife. You can also use a trellis or a pergola to provide a climbing structure for plants and a habitat for insects and small animals.

Q: How can I maintain my wildlife-friendly garden and ensure its continued success?

A: To maintain your wildlife-friendly garden and ensure its continued success, adopt a few simple habits. Avoid using pesticides, herbicides, or fertilizers, as these can harm wildlife and the environment. Instead, use natural methods to control pests and weeds, such as hand-picking or using physical barriers. Keep your garden well-watered, but avoid overwatering, which can lead to erosion and water waste. Also, consider keeping a gardening journal to track the types of wildlife that visit your garden and the plants that attract them, and make adjustments as needed to create a thriving wildlife-friendly ecosystem.

The Benefits of Growing Perennials in Your Yard

As you step into your yard, you’re surrounded by the vibrant sights and sounds of nature. Consider embracing the simple beauty of perennials, which return year after year, bringing joy and serenity to your outdoor space. You can learn more about the advantages of these plants in Perennial Power: Why You Need Perennials in Your Garden, and discover how they can enhance your yard’s resiliency and charm.

Key Takeaways:

  • The low maintenance aspect of growing perennials in your yard is a significant advantage, as they require less care and attention compared to annuals, making them an ideal choice for busy individuals.
  • Diversified ecosystems can be created by incorporating perennials into your yard, which attract a variety of pollinators and support local biodiversity, contributing to a healthier environment.
  • Adding perennials to your yard can also increase its aesthetic appeal, as they provide a burst of color and texture throughout the growing season, enhancing the overall landscape and curb appeal of your property.

    Benefits of Perennials

    Your yard can flourish with a vibrant display of perennials, offering numerous advantages for you to enjoy. These plants provide a beautiful and dynamic landscape, attracting wildlife and creating a sense of tranquility.

    Low Maintenance

    Beneath the surface of perennial care lies a surprisingly simple routine, allowing you to appreciate the beauty of nature with minimal upkeep, letting you focus on the joy of growth and development in your garden.

    Year-Round Interest

    The changing seasons bring unique charm to your perennial garden, as different plants bloom and flourish, creating a captivating display of color and texture that invites you to step outside and connect with nature.

    Due to the diverse range of perennial plants, you can design a garden that remains engaging throughout the year, with some plants providing winter interest, while others bloom in the spring, summer, or fall, ensuring your yard remains a dynamic and ever-changing tapestry of natural beauty.

    Choosing the Right Perennials

    Some perennials thrive in various conditions, while others have specific needs. As you consider which perennials to grow, think about your yard’s unique characteristics and how they will interact with the plants. You’ll want to select perennials that will flourish in your environment, allowing you to enjoy their beauty for years to come.

    Climate Considerations

    Above all, you’ll need to consider the climate in your area when choosing perennials. You should think about the average temperature, precipitation, and sunlight your yard receives, and select plants that are tolerant of these conditions. This will help ensure the perennials you choose will thrive and provide beauty to your yard.

    Soil Requirements

    Towards understanding the needs of your perennials, you’ll need to consider the soil requirements for each plant. You’ll want to test the pH level and nutrient content of your soil to determine which perennials will grow best in it. This information will help you make informed decisions about which plants to choose and how to care for them.

    This understanding of your soil will also allow you to prepare it properly for your perennials, if necessary. You may need to amend the soil with organic matter or fertilizers to create a nurturing environment for your plants. By taking the time to understand your soil, you’ll be able to provide your perennials with the best possible foundation for growth and enjoyment, allowing you to appreciate their beauty and simplicity in your yard.

    Designing a Perennial Garden

    To create a beautiful and thriving perennial garden, you’ll want to consider the overall aesthetic and feel you want to achieve. As you begin designing, think about the unique characteristics of your yard and how you can work with them to create a harmonious space.

    Color and Texture

    One of the most delightful aspects of perennials is the vast array of colors and textures they offer. You can choose plants with varying bloom times and foliage to create a dynamic display of color and texture that changes throughout the seasons, inviting you to slow down and appreciate the simple beauty of nature.

    Structure and Balance

    On the path to creating a stunning perennial garden, you’ll need to consider the structure and balance of your space. You can achieve this by selecting plants of varying heights and growth habits, allowing you to craft a visually appealing landscape that reflects your personal style and connection to the natural world.

    Garden design is an iterative process, and as you work on achieving structure and balance, you’ll find that your perennial garden begins to take on a life of its own. You’ll start to notice the way the plants interact with each other, and how they contribute to the overall ambiance of your outdoor space, encouraging you to step outside and immerse yourself in the serenity of nature.

    Planting and Care

    Not all plants are created equal, and perennials are a great choice for your yard. They come back year after year, providing beauty and simplicity to your outdoor space.

    Preparation and Planting

    Once you have chosen the perfect perennials for your yard, you can begin preparing the soil and planting them. Outside of this initial effort, you will find that they are relatively easy to care for.

    Ongoing Maintenance

    Within the first few weeks of planting, you will need to water your perennials regularly, but as they become established, they will be more drought-tolerant, allowing you to enjoy your beautiful flowers with minimal upkeep.

    Hence, as you tend to your perennials, you will find that the gentle rhythm of nurturing them becomes a soothing part of your daily routine, allowing you to connect with nature and appreciate the simple joys of your outdoor space, and you will be able to sit back and enjoy the beauty that your perennials bring to your yard.

    Wildlife and Ecosystem Benefits

    All around your yard, perennials can have a profound impact on the local ecosystem. As you consider planting perennials, you may want to learn more about Why Plant Perennials? Top 3 Reasons We Love Them, and how they can benefit your yard.

    Attracting Pollinators

    Around the time when perennials bloom, you’ll notice an increase in pollinators visiting your yard, bringing life and vibrancy to your outdoor space.

    Supporting Local Ecosystems

    Any effort you put into planting perennials will be rewarded with a thriving ecosystem, as these plants provide food and shelter for various species, supporting the delicate balance of nature in your yard.

    Consequently, as you nurture your perennial garden, you’ll be contributing to the well-being of your local environment, and you’ll have the opportunity to observe the intricate relationships between plants, animals, and insects, fostering a deeper appreciation for the natural world and your place within it.

    Creative Uses for Perennials

    Many perennials offer a multitude of uses beyond their aesthetic appeal, allowing you to tap into your creativity and make the most of your garden. You can explore various ways to utilize your perennials, from cut flowers to medicinal uses, and discover the joy of self-sufficiency in your own yard.

    Cut Flowers and Arrangements

    Akin to a painter with a colorful palette, you can select a variety of perennial flowers to create stunning cut flower arrangements, adding a touch of elegance to your home and sharing your bounty with friends and family.

    Medicinal and Culinary Uses

    Around your garden, you will find perennials with medicinal and culinary properties, waiting to be discovered and utilized in your daily life, allowing you to harness the power of nature to nourish your body and soul.

    To research deeper into the medicinal and culinary uses of perennials, you can start by researching the specific properties of the plants in your garden, and then experiment with incorporating them into your cooking and self-care routines, discovering the simple pleasures of using nature’s gifts to enhance your well-being.

    Summing up

    Drawing together the threads of our conversation, you’ll find that growing perennials in your yard brings numerous benefits. As you cultivate these plants, you’ll discover a deeper connection with nature. For more information on the advantages of perennials, consider exploring the differences between Annual vs. Perennial Plants. By choosing perennials, you’ll create a thriving, low-maintenance oasis that nourishes your soul and enhances your outdoor space.

    FAQ

    Q: What are the advantages of growing perennials in my yard compared to annuals?

    A: Growing perennials in your yard offers several advantages over annuals. Perennials come back year after year, which can save you time and money in the long run. They also tend to have deeper root systems, which can help to prevent soil erosion and improve soil health. Additionally, perennials often require less maintenance than annuals, as they are more adapted to the local climate and soil conditions, and therefore may need less watering, fertilizing, and pruning.

    Q: How do perennials contribute to biodiversity in my garden?

    A: Perennials play a significant role in contributing to biodiversity in your garden. Since they provide a constant source of food and shelter for various wildlife, such as bees, butterflies, and birds, they help support local ecosystems. Different types of perennials bloom at different times, providing a constant source of nectar and pollen throughout the growing season. This helps to attract a diverse range of pollinators and other beneficial insects to your garden.

    Q: Can perennials be used to improve the aesthetic appeal of my yard?

    A: Yes, perennials can greatly improve the aesthetic appeal of your yard. With their wide range of colors, textures, and shapes, perennials can add visual interest to your garden throughout the growing season. Many perennials produce beautiful flowers, while others have striking foliage or attractive seed heads. By carefully selecting and combining different perennials, you can create a dynamic and beautiful landscape that changes and evolves over time.

    Q: How do perennials help with soil conservation and erosion control?

    A: Perennials have an extensive root system that helps to hold soil in place, preventing erosion and landslides. Their deep roots also help to break up compacted soil and improve its structure, allowing for better water infiltration and aeration. This can be especially beneficial in areas with heavy rainfall or sloping land, where soil erosion can be a significant problem. By planting perennials in these areas, you can help to stabilize the soil and prevent erosion.

    Q: Are perennials suitable for low-maintenance gardening, and if so, why?

    A: Yes, perennials are often well-suited for low-maintenance gardening. Since they are adapted to the local climate and soil conditions, they generally require less care and attention than annuals. Many perennials are drought-tolerant, and once established, they can survive with minimal watering. They also tend to be less prone to pests and diseases, reducing the need for pesticides and other chemicals. Additionally, perennials often require less fertilizing, as they are able to tap into deeper soil nutrients with their extensive root systems.

Opaye Skip to content