You’re looking to save time and water by installing a DIY watering system. You’ve come to the right place. Your garden will thrive with a well-planned irrigation system, and you can set it up yourself with a few simple steps. You’ll learn how to design and install a system that meets your garden’s unique needs, and you’ll be enjoying the benefits of a lush, healthy garden in no time. You’ll find the process easier than you think, and your plants will thank you.
Key Takeaways:
To set up an efficient irrigation system for your garden or yard, consider the following points:
- Start by planning the layout of your DIY watering system, taking into account the water source, pipe size, and valve placement to ensure adequate water pressure and distribution.
- Choose the right irrigation components, including tubes, sprinklers, and drip irrigation systems, to suit your specific plant needs and climate conditions.
- Test and maintain your DIY watering system regularly to prevent leaks, clogs, and other issues, and make adjustments as needed to optimize water efficiency and plant growth.
Planning Your System
The first step in installing a DIY watering system is to plan your system carefully. You will need to consider your garden’s size, layout, and watering needs to determine the best approach.
Assessing Your Garden Needs
Any gardener knows that understanding your garden’s specific requirements is key to creating an effective watering system. You should assess your garden’s soil type, climate, and plant species to determine the right amount of water and frequency of watering.
Choosing the Right Materials
Adept gardeners select materials that are durable and suitable for their garden’s conditions. You should choose pipes, fittings, and irrigation heads that are resistant to corrosion and can withstand your garden’s climate.
This selection process involves considering factors such as water pressure, flow rate, and UV resistance. You will need to evaluate your options and choose materials that meet your garden’s specific needs, ensuring a reliable and efficient watering system that will save you time and water.
Preparing the Site
Any homeowner can install a DIY watering system with ease, and you can start by checking out this guide on how to Create a DIY Sprinkler System for Watering Your Garden to get an idea of what you’ll need.
Clearing the Area
Beneath the surface of your yard, you’ll find the perfect spot to begin, so start by clearing the area of any debris or obstructions that could interfere with your system.
Laying Out the System
Preferably, you’ll want to lay out your system in a way that maximizes water distribution, so consider the size and shape of your yard as you plan.
To ensure your system is effective, you’ll need to map out the best route for your pipes and sprinklers, taking into account the water pressure and flow rate, and you can use a garden hose to test the layout before you start digging.
Installing Pipes and Fittings
Once again, you’ll need to gather your materials and tools before starting this step. You’ll be working with pipes, fittings, and valves to create a network that distributes water to your plants. Make sure you have a clear plan and layout to follow.
Cutting and Connecting Pipes
Across the board, cutting and connecting pipes requires precision and attention to detail. You’ll need to measure and cut your pipes to the right length, then connect them using fittings such as couplers and elbows.
Securing Fittings and Valves
Similarly, securing your fittings and valves is imperative to prevent leaks and ensure a smooth flow of water. You’ll need to tighten all connections firmly, but avoid over-tightening, which can damage the pipes or fittings.
Consequently, as you secure your fittings and valves, you’ll want to double-check your work to make sure everything is tightened properly. You can test your system by turning on the water supply and checking for leaks. This will help you identify any issues before you’ve completed the installation, saving you time and hassle in the long run. You’ll be able to enjoy the benefits of your DIY watering system, knowing that you’ve done the job correctly.
Setting Up the Water Source
Despite the variety of options, choosing the right water source is straightforward. You’ll need to select a water source, such as a hose or rainwater tank, to supply your DIY watering system.
Connecting to a Water Supply
Across your yard, you’ll find the perfect spot to connect your watering system to a water supply, ensuring it’s easily accessible and out of the way.
Installing a Pump or Timer
For your system to work efficiently, you’ll need to install a pump or timer, which will help regulate water flow and pressure, allowing you to customize your watering schedule.
Plus, when installing a pump or timer, you’ll want to consider factors such as water pressure, flow rate, and power source, ensuring your system operates smoothly and effectively, and you can enjoy the benefits of your new DIY watering system, with your plants thriving under your careful management.
Implementing Water Conservation Measures
All water conservation efforts start with a plan, and you can find valuable information on How To Install An Irrigation System to get started. This will help you make the most of your DIY watering system.
Using Rainwater Collection Systems
Around your home, you can implement rainwater collection systems to reduce your water bill and minimize waste.
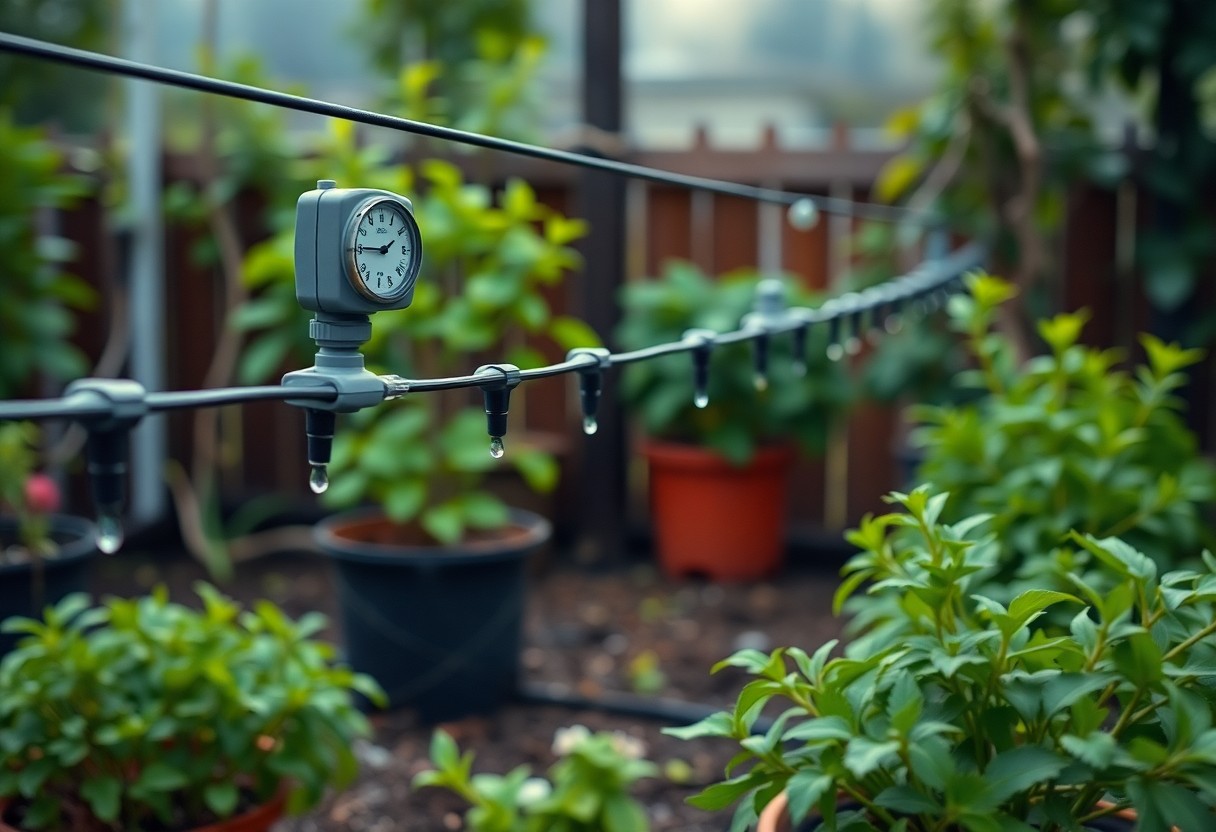
Incorporating Drip Irrigation
By installing drip irrigation, you will be able to deliver water directly to the roots of your plants, reducing evaporation and runoff.
Conservation of water is key when designing your DIY watering system, and incorporating drip irrigation is an effective way to achieve this, as you will be able to control the amount of water your plants receive, ensuring that they get exactly what they need to thrive, and you can make adjustments as you see fit to optimize your system for your specific plants and climate.
Testing and Maintenance
Many factors can affect your DIY watering system’s performance, so it’s vital to test and maintain it regularly. You’ll want to ensure your system is working correctly and make any necessary adjustments.
Initial System Test
Maintenance begins with an initial test to verify that your system is functioning as expected. You should check for leaks, proper water pressure, and that all components are working together seamlessly.
Regular Maintenance Tasks
Guarding against issues like clogs and wear on your system requires regular checks. You should inspect your DIY watering system periodically to ensure it continues to operate efficiently.
In fact, performing these regular maintenance tasks will help you identify and fix problems before they become major issues, saving you time and money in the long run. You’ll be able to enjoy the benefits of your DIY watering system, knowing that your plants are receiving the right amount of water, and that your system is running smoothly and effectively.
Final Words
Upon reflecting on your DIY watering system installation, you should feel accomplished knowing you’ve created a efficient way to care for your plants. You’ve successfully set up a system that will save you time and water, and your plants will thrive as a result. With your new system in place, you can now enjoy the benefits of a well-hydrated garden with minimal maintenance, and you can be proud of the work you’ve done to make it happen with your own hands.
FAQ
Q: What are the basic components of a DIY watering system and where can I find them?
A: A DIY watering system typically consists of a water source, tubing, fittings, emitters or sprinklers, and a timer or controller. You can find these components at most hardware stores, home improvement centers, or online retailers that specialize in gardening and irrigation supplies. Make sure to choose components that are compatible with each other and suitable for your specific watering needs.
Q: How do I determine the right size and type of tubing for my DIY watering system?
A: The size and type of tubing you need will depend on the size of your garden, the water pressure in your area, and the type of plants you are watering. Generally, 1/2″ or 1/4″ tubing is suitable for most residential gardens. Consider using tubing made from durable, UV-resistant materials such as PVC or polyethylene. You can also use online calculators or consult with a gardening expert to determine the optimal tubing size for your specific needs.
Q: How do I design a DIY watering system that ensures even water distribution and prevents overwatering?
A: To design an efficient DIY watering system, start by creating a map of your garden, including the location of plants, trees, and other features. Determine the water requirements of each plant species and group plants with similar watering needs together. Use emitters or sprinklers that are designed to deliver water at a consistent rate, and space them evenly to ensure uniform coverage. Consider using a drip irrigation system, which delivers water directly to the roots of the plants, reducing evaporation and runoff.
Q: Can I install a DIY watering system on a slope or uneven terrain, and if so, how?
A: Yes, you can install a DIY watering system on a slope or uneven terrain. To do so, use fittings and tubing that can accommodate the changing elevation and ensure a consistent water flow. You may need to use additional components such as risers, reducers, or elbow fittings to navigate the terrain. Consider using a pressure-compensating drip irrigation system, which can maintain a consistent water flow even on slopes or uneven terrain. It’s also important to ensure that the system is properly secured to the ground to prevent damage from wind or erosion.
Q: How often should I inspect and maintain my DIY watering system to ensure it continues to function efficiently?
A: Regular inspection and maintenance are important to ensure your DIY watering system continues to function efficiently and effectively. Check the system at least once a month for signs of wear, tears, or clogs, and inspect the emitters or sprinklers for mineral buildup or debris. Clean or replace clogged emitters or filters, and check the tubing for cracks or damage. Additionally, adjust the timer or controller as needed to account for changes in weather patterns or plant growth, and consider running the system for a few minutes after maintenance to ensure it’s working correctly.

