DIY

10 Simple DIY Home Decor Ideas

As you look to give your space a personal touch, you’ll find that DIY decor can be a game-changer. With a little creativity, you can transform your home into a reflection of your style. For inspiration, check out 46 Easy DIY Home Decor Ideas for Your Next Project to get started. You’ll be amazed at how simple and fun it is to create your own unique pieces, and your home will thank you for the personal touch.
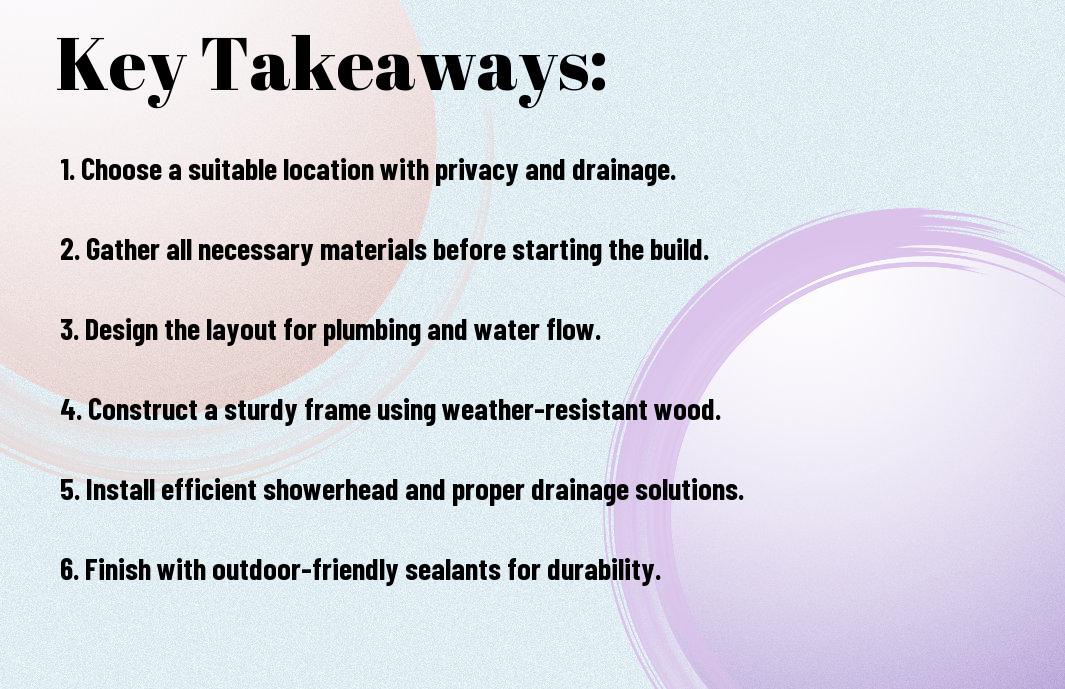
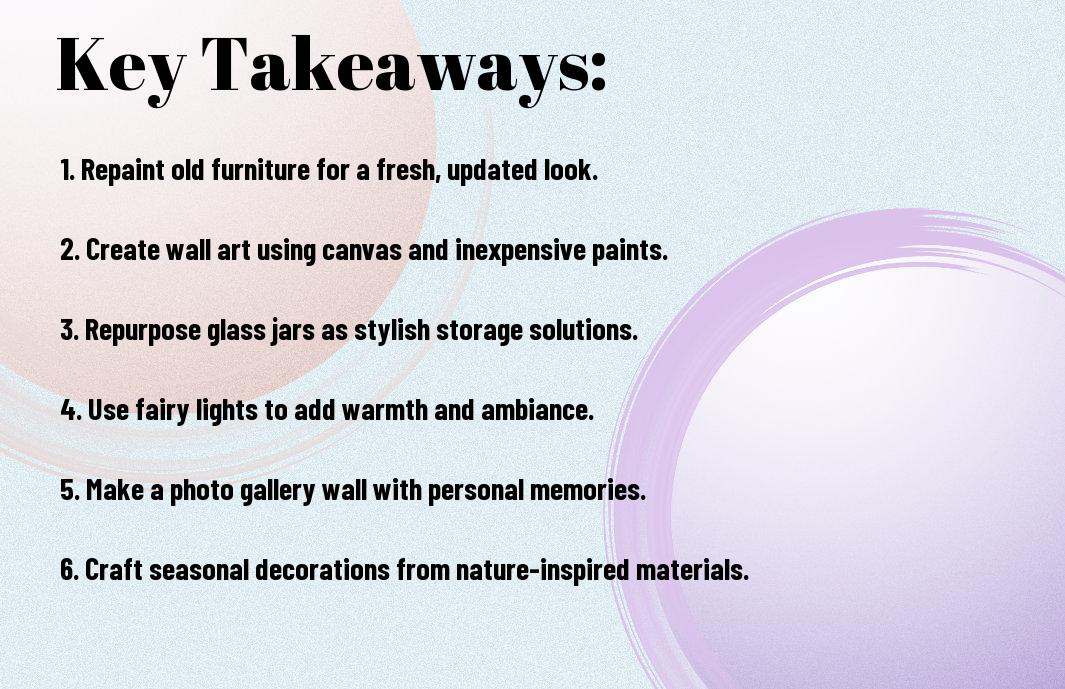
Key Takeaways:

To enhance your living space with ease, consider the following simple and creative ideas:

  • Start with affordable materials and repurpose old items to create unique decorative pieces, such as turning old jars into vases or using fabric scraps to create a quilt.
  • Utilize natural elements like plants, branches, and stones to bring a touch of warmth and texture to your home decor, and arrange them in a way that adds visual interest.
  • Experiment with color and pattern by painting a statement wall, creating a gallery with frames, or using rugs and throw pillows to add a pop of color and personality to your space.

Budget-Friendly Ideas

Before you start decorating your home, consider budget-friendly options that won’t break the bank. You can create a beautiful space without spending a fortune. Look for affordable alternatives that fit your style and budget.

Repurposing Old Items

Items like old jars, bottles, and furniture can be repurposed to create unique decor pieces. You can turn them into vases, planters, or shelves to add a personal touch to your space.

Thrift Store Finds

Against all odds, thrift stores can be a treasure trove of hidden gems. You can find one-of-a-kind pieces that reflect your personal style and add character to your home.

It is amazing what you can find at thrift stores with a little patience and creativity. You can refinish, repaint, or reupholster items to match your decor, giving your home a unique and personalized touch. You’ll be surprised at how these finds can elevate your space and make it truly special.

Wall Decor

Any room can be transformed with the right wall decor, and the best part is that you don’t have to break the bank to achieve a beautiful look. You can create a personalized and stylish space that reflects your personality and taste.

Creating a Gallery Wall

Amidst the various wall decor options, creating a gallery wall is a great way to add visual interest to your space. You can mix and match frames, sizes, and styles to create a unique display that showcases your favorite photos, artwork, or collectibles.

DIY Wall Art

After exploring various wall decor ideas, you may want to try your hand at creating your own DIY wall art. You can use a variety of materials like paint, fabric, or paper to create a one-of-a-kind piece that adds a personal touch to your room.

With your DIY wall art, you can experiment with different techniques, such as stenciling, decoupage, or collage, to create a unique and eye-catching piece. You can also incorporate personal items like quotes, lyrics, or photos to make your wall art truly special and meaningful to you.

Lighting Makeover

All you need is a little creativity to give your space a lighting makeover. Check out 10 Quick and Easy Home Decorating Ideas for a Fast Refresh to get inspired and transform your home.

String Lights

On a budget, you can add ambiance with string lights, which are easy to hang and can instantly elevate your space.

Lamp Revamp

One simple way to update your lighting is to revamp your lamps with new shades or bases, giving your room a fresh new look.

Lighting can make or break the atmosphere of your home, and with a lamp revamp, you can create a warm and inviting space that reflects your personal style, allowing you to unwind and relax in your newly refreshed environment, and with these easy DIY ideas, you can achieve this without breaking the bank, and make your home feel cozy and inviting, just the way you like it.

Furniture Revival

Many old furniture pieces can be transformed into beautiful and functional items with a little creativity. You can give your home a unique touch by reviving your old furniture instead of replacing it.

Upcycling Old Furniture

Any piece of old furniture can be upcycled into something new and exciting. You can turn an old door into a coffee table or an old ladder into a bookshelf, adding a personal touch to your home decor.

Refinishing Wood Pieces

Once you have selected a piece of wood furniture to refinish, you can start the process. You will need to sand and stain the wood to give it a new look, and with a little patience, you can achieve professional-looking results.

Wood refinishing is a great way to update your old wood furniture and give it a fresh new look. You can choose from a variety of stains and finishes to match your home decor, and with your own two hands, you can create a beautiful and unique piece of furniture that reflects your personal style.

Textile Inspiration

For a cozy and inviting atmosphere, you can draw inspiration from various textiles to decorate your home. You can use different patterns, colors, and materials to create a unique look that reflects your personal style.

DIY Throw Pillows

Following your own design, you can create throw pillows that add a pop of color and texture to your space. You can choose fabrics that match your furniture or add a contrasting pattern to create visual interest.

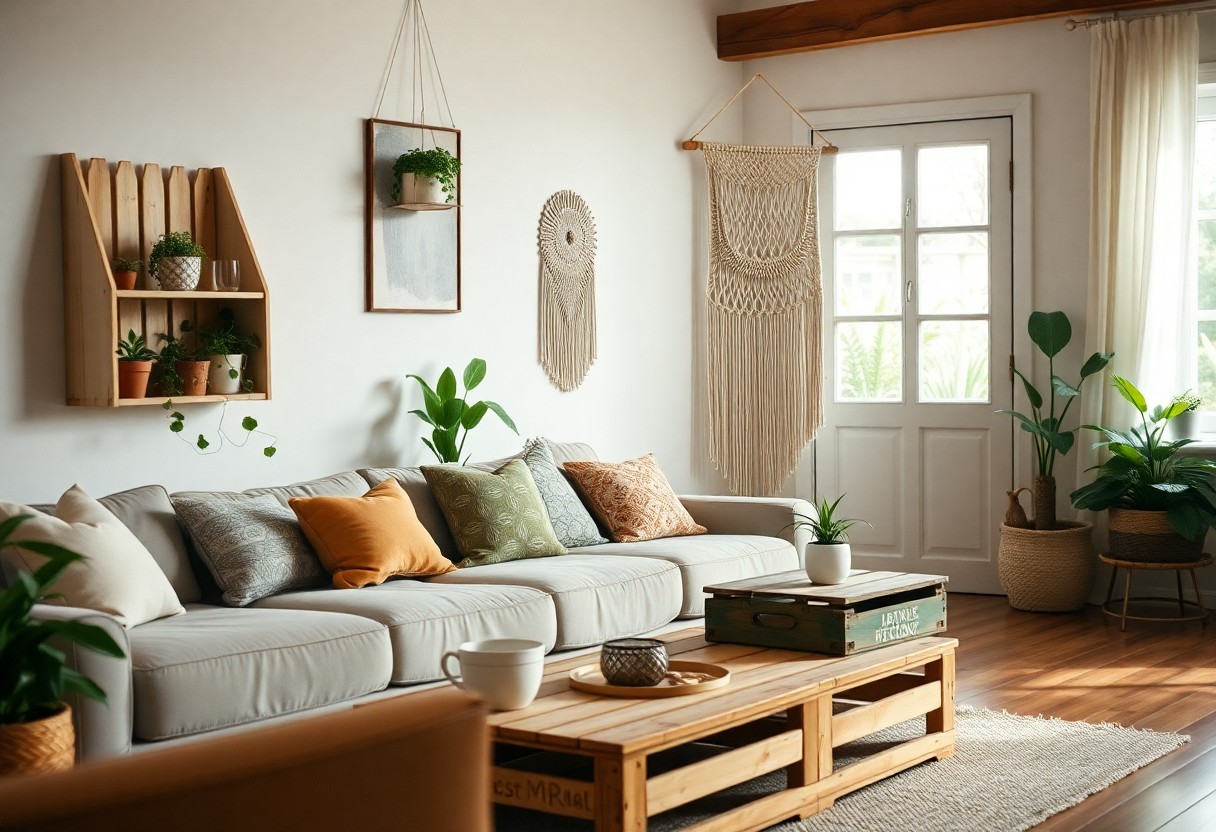
Macrame Wall Hangings

The beauty of macrame wall hangings lies in their intricate patterns and bohemian charm, which you can incorporate into your home decor. You can create your own macrame wall hanging using cotton rope, wooden dowels, and a few basic knots.

Due to the versatility of macrame, you can customize your wall hanging to fit your personal style and decor. You can add beads, shells, or other decorative elements to give it a unique touch, and hang it above your sofa, bed, or fireplace to add a cozy ambiance to your room.

Nature-Inspired Decor

Despite the trend towards modern and sleek decor, you can still bring a touch of the outdoors into your home with nature-inspired elements, creating a warm and inviting atmosphere that reflects your personal style.

Bringing the Outdoors In

To add a natural feel to your space, you can incorporate elements like wood, stone, and plants, which will help you achieve a cozy and organic look that complements your existing decor, allowing you to enjoy the beauty of nature indoors.

Potted Plant Arrangements

The simplest way to bring nature indoors is by using potted plants, which can be arranged in a variety of ways to add texture and color to your space, and with so many types of plants to choose from, you can select the ones that fit your style and maintenance level, making it easy to get started.

Considering the wide range of plants and containers available, you can create unique and beautiful potted plant arrangements that reflect your personal taste and complement your home’s aesthetic, from modern and sleek to rustic and charming, allowing you to experiment with different combinations to find the perfect fit for your space, and as you care for your plants, you’ll enjoy the many benefits they bring to your indoor environment, including purifying the air and boosting your mood.

Summing up

As a reminder, you now have the power to transform your space with these 10 simple DIY home decor ideas. You can personalize your home to reflect your style, making it a haven that showcases your unique taste. With your creativity and imagination, you can turn your house into a beautiful home that you’ll love and cherish, and where you can create lasting memories with your loved ones.

FAQ

Q: What are some easy and affordable DIY home decor ideas to enhance my living space?

A: There are many simple and budget-friendly DIY home decor ideas that can enhance your living space. Some ideas include repurposing old furniture, adding a fresh coat of paint, creating a gallery wall, using natural elements like plants and branches, and making your own textiles like throw pillows and blankets.

Q: What are some DIY decor ideas for a small living room?

A: For a small living room, consider DIY decor ideas that create the illusion of more space, such as using mirrors, minimal decor, and light colors. You can also try DIY projects like building a floating shelf, creating a window seat, or making a statement light fixture to add visual interest without taking up too much space.

Q: How can I give my home a seasonal makeover with DIY decor?

A: To give your home a seasonal makeover with DIY decor, try incorporating seasonal elements like pumpkins and leaves for fall, or snowflakes and evergreen branches for winter. You can also make seasonal-themed decorations like wreaths, garlands, and centerpieces using natural materials and craft supplies. Swap out throw pillows, blankets, and wall art to reflect the current season and create a cohesive look.

Q: What are some eco-friendly DIY home decor ideas?

A: Eco-friendly DIY home decor ideas include upcycling old materials, repurposing vintage items, and using sustainable materials like bamboo, reclaimed wood, and low-VOC paint. You can also try making your own natural dyes, using plants as air purifiers, and creating a DIY terrarium or indoor garden to bring some greenery into your space.

Q: Can I DIY my own wall art and decorative accessories?

A: Yes, you can definitely DIY your own wall art and decorative accessories. Try making a photo gallery, creating a collage, or painting your own artwork. You can also make decorative accessories like macrame plant hangers, woven baskets, and ceramic pottery using simple materials and techniques. Get creative and experiment with different materials and styles to add a personal touch to your space.

How to Make Your Own Natural Cleaning Products

As you strive to create a healthier and more sustainable home, you’re likely looking for ways to reduce your reliance on harsh chemicals. You can start by making your own natural cleaning products, a simple and effective way to keep your space clean and green. With just a few simple ingredients, you can create a range of effective and eco-friendly cleaners that are perfect for your home. You’ll be amazed at how easy it is to get started and make a positive impact on your health and the environment.

Key Takeaways:

To create your own natural cleaning products, consider the following points:

  • Using necessary oils and plant-based ingredients can help you make effective and eco-friendly cleaning solutions that are gentle on surfaces and the environment.
  • Combining baking soda and vinegar can create a powerful cleaning agent for tackling tough dirt and grime without the need for harsh chemicals.
  • Making your own natural cleaning products allows you to avoid toxic chemicals found in many commercial cleaners, promoting a healthier home and reducing your environmental footprint.

Benefits of Natural Cleaning Products

Before making the switch to natural cleaning products, you’ll want to understand the advantages they offer. Not only are they better for the environment, but they also provide a healthier alternative for you and your family.

Environmental Advantages

Behind the scenes, traditional cleaning products can harm the planet, but natural cleaning products offer a more eco-friendly solution. By choosing natural ingredients, you reduce your carbon footprint and help preserve the environment for future generations.

Health Benefits

Benefits of natural cleaning products extend to your well-being, as they reduce exposure to harsh chemicals and toxins found in traditional cleaning products. You can breathe easier knowing your home is clean and safe.

Another advantage of using natural cleaning products is that they can help alleviate allergies and respiratory issues. As you make your own natural cleaning products, you’ll be able to avoid harmful ingredients and create a healthier living space for you and your loved ones.

Essential Ingredients

Clearly, making your own natural cleaning products requires a few basic ingredients that you likely have at home. You’ll need items like baking soda, white vinegar, and castile soap to get started.

Natural Oils

Ingredients like coconut oil, olive oil, and tea tree oil are excellent additions to your cleaning arsenal, offering antibacterial and antifungal properties that will help you tackle tough messes.

Herbs and Spices

Among the many herbs and spices you can use, lavender, rosemary, and cinnamon are popular choices for their pleasant scents and cleaning properties, which you can incorporate into your homemade cleaning products.

With herbs and spices, you can create unique and effective cleaning solutions that not only clean your home but also leave it smelling fresh and inviting; you can use them to make infusions, tinctures, or even add them directly to your cleaning products for an extra boost of fragrance and cleaning power.

Cleaning Product Recipes

Your journey to a cleaner and greener home starts with exploring various recipes, such as the 21 Natural Cleaner Recipes for Every Area of Your Home found on Martha Stewart’s guide to natural cleaners, which provides you with a comprehensive list to get you started.

All-Purpose Cleaner

Product mixes like baking soda and vinegar can be used to create an all-purpose cleaner that you can use on various surfaces, allowing you to tackle multiple cleaning tasks with ease, making cleaning more efficient and fun for you.

Glass Cleaner

Below are some simple ingredients you can combine to create your own glass cleaner, letting you achieve sparkling windows and surfaces without harsh chemicals, giving you the satisfaction of a job well done.

Another great aspect of making your own glass cleaner is the ability to customize the ingredients to your preference, such as using club soda for a streak-free shine or adding a few drops of lemon necessary oil for a refreshing scent, making the experience of cleaning more enjoyable for you.

Tips for Effective Cleaning

Despite the many benefits of natural cleaning products, you may still encounter some challenges. Consider the following:

  • Always spot test
  • Use microfiber cloths

For more ideas, visit Natural Cleaning Recipes – 20 DIY Chemical Free Vegan Tips. Assume that with practice, you’ll become more efficient at cleaning your home naturally.

Cleaning Techniques

Techniques for effective cleaning include using the right tools and taking your time. You’ll find that with the right approach, cleaning can be easier and more enjoyable, allowing you to keep your home sparkling and clean.

Organization Strategies

Organizing your cleaning supplies and schedule can help you stay on track. You’ll be able to find what you need quickly and easily, making the cleaning process more efficient.

The key to successful organization is creating a system that works for you. You can start by designating a specific area for your cleaning supplies and setting aside time each week to tidy up. As you get into a routine, you’ll find that your home stays cleaner and you have more free time to enjoy the things you love. You can also consider implementing a seasonal cleaning schedule to tackle deeper cleaning tasks throughout the year.

Safety Precautions

Unlike commercial cleaning products, your homemade solutions may not have childproof packaging or clear warning labels, so you’ll need to take extra care when using and storing them.

Handling Chemicals

Handling hazardous materials requires attention to detail, and you should always wear gloves and work in a well-ventilated area to avoid exposure to harsh fumes or skin irritation.

Storage and Disposal

Behind every successful homemade cleaning product is a thoughtful storage plan, and you’ll want to keep your solutions out of reach of children and pets, and label them clearly so you can easily identify their contents.

Chemicals can be hazardous if not disposed of properly, so you’ll want to check local regulations for guidance on how to safely dispose of any leftover materials or containers, and take steps to minimize your environmental footprint by reusing or recycling whenever possible, making your cleaning routine not only effective but also eco-friendly, and you can feel good about the positive impact you’re having on your home and the planet.

Customizing Your Cleaning Products

Now that you have the basics of making your own natural cleaning products, you can start customizing them to fit your preferences and needs. You can experiment with different ingredients and recipes to create unique and effective cleaning solutions that work best for you and your home.

Fragrance Options

Across the wide range of necessary oils available, you can choose the ones that you like best to add a pleasant scent to your cleaning products, making cleaning a more enjoyable experience for you.

Texture and Consistency

Against the backdrop of various textures and consistencies, you can adjust the ingredients to achieve the desired feel and performance for your cleaning products, whether you prefer a smooth paste or a liquid solution.

Also, considering your specific cleaning tasks and the surfaces you will be cleaning, you can modify the texture and consistency of your products to ensure they are effective and gentle on the surfaces, making it easier for you to get the job done efficiently and effectively.

Final Words

Drawing together all the tips and tricks, you now have the knowledge to create your own natural cleaning products. You can confidently make your own cleaning solutions, and for more inspiration, visit How to Make Simple Homemade Cleaning Sprays. With your new skills, you’ll enjoy a cleaner, healthier home, and the satisfaction of doing it yourself.

FAQ

Q: What are the benefits of making my own natural cleaning products?

A: Making your own natural cleaning products offers several benefits, including reducing exposure to harsh chemicals, customizing products to your specific cleaning needs, and saving money. Natural ingredients like baking soda, vinegar, and lemon juice are often cheaper and more environmentally friendly than commercial cleaning products. Additionally, homemade cleaning products can be tailored to your specific allergies or sensitivities, making them a great option for those with sensitive skin or respiratory issues.

Q: What are some common natural ingredients used in homemade cleaning products?

A: Some common natural ingredients used in homemade cleaning products include baking soda, white vinegar, lemon juice, castile soap, and important oils. Baking soda is a natural abrasive and can be used for scrubbing surfaces, while white vinegar is a natural disinfectant and can be used to clean countertops and sinks. Lemon juice has antiseptic properties and can be used to clean surfaces and remove stains. Castile soap is a gentle and biodegradable soap that can be used for a variety of cleaning tasks, and important oils like tea tree oil and lavender oil have antibacterial properties and can be used to freshen and clean the air.

Q: How do I get started with making my own natural cleaning products?

A: To get started with making your own natural cleaning products, you’ll need to gather some basic ingredients and supplies, such as a spray bottle, a mixing bowl, and a funnel. You can find many simple recipes online or in books, and you can start by making a few basic products like all-purpose cleaner and dish soap. It’s also a good idea to labels and date your homemade cleaning products, so you can keep track of what you have and how long it’s been since you made it. Additionally, be sure to follow safety precautions when handling and storing your homemade cleaning products, such as keeping them out of reach of children and pets.

Q: Are homemade natural cleaning products as effective as commercial cleaning products?

A: Homemade natural cleaning products can be just as effective as commercial cleaning products, but it may take some trial and error to find the right recipes and techniques for your specific cleaning needs. Natural ingredients can be just as powerful as chemical-based ingredients, but they may require a bit more elbow grease and time to work. For example, a mixture of baking soda and vinegar can be just as effective at removing tough stains as a commercial cleaner, but it may require some scrubbing and rinsing to get the job done. With a little patience and practice, you can find homemade natural cleaning products that work just as well as commercial products.

Q: Can I customize my homemade natural cleaning products to suit my specific cleaning needs and preferences?

A: Yes, one of the best things about making your own natural cleaning products is that you can customize them to suit your specific cleaning needs and preferences. For example, if you have allergies or sensitivities, you can avoid using ingredients that trigger your allergies and opt for gentler alternatives instead. You can also customize the scent and texture of your homemade cleaning products by using different important oils and ingredients. Additionally, you can adjust the concentration and consistency of your homemade cleaning products to suit the specific task at hand, such as making a stronger solution for tough messes or a gentler solution for delicate surfaces.

How to Create a DIY Outdoor Bar Area

You stand in your backyard, envisioning a space to gather and share drinks with friends. Your outdoor bar area starts with a plan, and you’re about to build it yourself. With a few simple steps, you’ll transform your yard into a welcoming spot. You’ll choose materials, design the layout, and construct your bar, creating a space that’s uniquely yours.

Key Takeaways:

To create a functional and enjoyable DIY outdoor bar area, consider the following points:

  • Define your space and budget to determine the size and features of your bar area, ensuring it fits your needs and lifestyle.
  • Choose the right materials and furniture, such as durable wood or metal frames, and weather-resistant fabrics, to withstand outdoor conditions and provide comfortable seating.
  • Combine lighting, decor, and entertainment elements, like string lights, plants, and a sound system, to create a warm and inviting atmosphere that enhances your outdoor entertaining experience.

Planning Your Outdoor Bar Area

Before you start building, consider your space and needs. Check out a Weekend DIY: Building an Outdoor Bar for inspiration.

Assessing Your Space

Plotting your yard’s layout, you’ll determine the best spot for your bar. Consider the sunlight, shade, and foot traffic.

Defining Your Style

By thinking about your entertaining style, you’ll choose the right design and features for your bar.

And as you envision your outdoor bar, think about the materials and decor that reflect your taste, from rustic to modern, and the activities you’ll be doing there, like cocktail-making or dining.

Choosing the Right Materials

It is imperative to select materials that can withstand the elements when creating your DIY outdoor bar area. You need to consider the climate and weather conditions in your area to ensure your bar area remains functional and aesthetically pleasing.

Durable Fabrics and Surfaces

Along with the frame and structure, you should choose durable fabrics and surfaces for your outdoor bar area, such as waterproof fabrics, stainless steel, and recycled plastic.

Weather-Resistant Equipment

With the right equipment, your outdoor bar area will be able to withstand various weather conditions. You should opt for weather-resistant equipment, such as a balcony bar or an outdoor refrigerator, to keep your drinks cold and fresh.

Choosing the right weather-resistant equipment for your outdoor bar area can make all the difference in its durability and functionality. You will want to select equipment that is designed to withstand extreme temperatures, humidity, and exposure to the sun, ensuring your outdoor bar area remains functional and enjoyable for years to come. You should look for equipment with features such as rust-proof coating, waterproof seals, and UV-resistant materials to protect your investment.

Building the Bar Structure

Keep your outdoor bar design simple, using durable materials like wood or metal. You’ll need to construct a solid frame to support your bar top and any additional features. Consider the space you have available and the style you’re aiming for.

Framing and Support

Around this time, you’ll start thinking about the framing and support for your bar. You’ll need to ensure it’s sturdy enough to hold the weight of the bar top, shelves, and any appliances or decor you plan to add.

Adding Shelves and Countertops

Among the final touches, you’ll add shelves and countertops to your bar. You can choose from a variety of materials, such as wood, stone, or stainless steel, depending on your budget and the look you want to achieve.

Plus, when adding shelves and countertops, you’ll want to think about the functionality of your bar. You’ll need to decide how much storage space you need, and what type of countertops will be easiest to clean and maintain. You can also add features like a sink, fridge, or ice maker to make your outdoor bar a fully functional entertaining space.

Installing Essential Features

To create a functional outdoor bar area, you’ll need to install the necessary features. This includes lighting, electrical outlets, and plumbing fixtures. You’ll want to ensure that your bar area is well-lit and has access to power and water.

Lighting and Electrical

Features like string lights or lanterns can add ambiance to your outdoor bar. You can also install electrical outlets to power your appliances and decorations. Make sure to follow safety guidelines when working with electricity.

Plumbing and Fixtures

Installing a sink or a kegerator requires plumbing and fixtures. You’ll need to connect water and drain lines, and ensure that your fixtures are durable and weather-resistant. Choose materials that can withstand the elements.

In addition, you’ll want to consider the size and layout of your plumbing and fixtures. You should place them in a way that creates a functional and efficient workflow, making it easy for you to mix drinks and serve guests. This will help you to create a bar area that is both functional and enjoyable to use.

Adding Decor and Ambiance

After setting up your outdoor bar, focus on decor and ambiance. You’ll transform your space into a welcoming oasis with a few simple touches.

Furniture and Textiles

At this stage, you’ll choose furniture and textiles that fit your style. You’ll pick sturdy, weather-resistant pieces that reflect your taste and create a cohesive look.

Landscaping and Accessories

Adding some greenery and accessories will elevate your outdoor bar. You’ll select plants, lighting, and decor that enhance the ambiance and create a unique atmosphere.

It is here that you can let your personality shine through. You’ll arrange your plants, hang lanterns, and add decorative elements that make your outdoor bar area feel like your own private retreat, a place where you can unwind and entertain friends.

Safety and Maintenance

Now that your DIY outdoor bar area is set up, consider checking out expert advice on How to Build an Outdoor Bar for additional tips. You’ll want to ensure your bar is stable and secure.

Ensuring Stability and Security

Stability is key when it comes to your outdoor bar. You’ll want to make sure it’s anchored firmly to the ground to prevent it from toppling over.

Regular Upkeep and Repairs

In fact, keeping your outdoor bar clean and well-maintained will not only ensure your safety but also make your gatherings more enjoyable. You’ll be able to focus on socializing with your guests instead of worrying about your bar’s condition.

Conclusion

Summing up, you’ve got your DIY outdoor bar area coming together. You’ve picked your spot, built your bar, and added your touches. Your outdoor space is now a place where you can pour a drink, sit back, and enjoy the fresh air. You’ve done it yourself, with your own hands, and that’s something to be proud of. Now, grab a drink and take a seat at your new bar, you’ve earned it.

FAQ

Q: What are the imperative components to consider when creating a DIY outdoor bar area?

A: When creating a DIY outdoor bar area, there are several imperative components to consider. First, you’ll need a sturdy base, such as a wooden or metal frame, to support your bar. Next, you’ll want to choose a durable and weather-resistant countertop material, such as granite, marble, or recycled plastic. Additionally, you’ll need to consider the type of seating and lighting you want to include, as well as any electrical or plumbing components, such as a sink or refrigerator. Finally, think about the style and ambiance you want to create, and choose decorative elements, such as plants, string lights, or a fire pit, to enhance the space.

Q: How do I choose the perfect location for my DIY outdoor bar area?

A: Choosing the perfect location for your DIY outdoor bar area depends on several factors, including the layout of your yard, the amount of sunlight and shade, and the proximity to your home and other outdoor living spaces. Consider a spot that is easily accessible and visible from the house, yet far enough away to create a sense of separation and relaxation. You’ll also want to think about the wind direction, noise levels, and any potential obstacles, such as trees or slopes. Ideally, your DIY outdoor bar area should be located in a spot that receives partial shade, especially during the hottest part of the day, to ensure comfort and safety for your guests.

Q: What type of materials should I use to build my DIY outdoor bar area?

A: The type of materials you use to build your DIY outdoor bar area will depend on your budget, style preferences, and the level of durability you need. Some popular materials for outdoor bars include pressure-treated wood, cedar, and reclaimed wood, which can add a rustic touch to your space. You can also consider using metal or aluminum frames, which are durable and low-maintenance. For the countertop, choose a material that is resistant to heat, moisture, and UV light, such as stone, concrete, or recycled plastic. Don’t forget to add a waterproof sealant to protect your bar from the elements and ensure it withstands the test of time.

Q: How can I add electrical and plumbing components to my DIY outdoor bar area?

A: Adding electrical and plumbing components to your DIY outdoor bar area can enhance the functionality and convenience of your space. For electrical components, such as lighting, outlets, and appliances, be sure to hire a licensed electrician to ensure safe and proper installation. For plumbing components, such as a sink or refrigerator, you’ll need to connect to a water source and install a drainage system. Make sure to check local building codes and regulations before starting your project, and consider hiring a professional if you’re not experienced with electrical or plumbing work. It’s also a good idea to install GFCI outlets and use weather-resistant materials to protect your components from the elements.

Q: How can I decorate and furnish my DIY outdoor bar area to create a unique and inviting atmosphere?

A: Decorating and furnishing your DIY outdoor bar area is where you can get creative and add your personal touch. Start by choosing a color scheme and style that reflects your personality and complements your outdoor living space. Add some comfortable seating, such as bar stools or a sectional sofa, and consider incorporating decorative elements, such as plants, artwork, or sculptures. String lights, lanterns, or a fire pit can add warmth and ambiance to your space, while a few well-placed throw pillows and blankets can create a cozy and inviting atmosphere. Don’t forget to add some functional elements, such as a cooler, ice bucket, or wine rack, to make your DIY outdoor bar area a fun and functional space for entertaining friends and family.

How to Install a DIY Watering System

You’re looking to save time and water by installing a DIY watering system. You’ve come to the right place. Your garden will thrive with a well-planned irrigation system, and you can set it up yourself with a few simple steps. You’ll learn how to design and install a system that meets your garden’s unique needs, and you’ll be enjoying the benefits of a lush, healthy garden in no time. You’ll find the process easier than you think, and your plants will thank you.

Key Takeaways:

To set up an efficient irrigation system for your garden or yard, consider the following points:

  • Start by planning the layout of your DIY watering system, taking into account the water source, pipe size, and valve placement to ensure adequate water pressure and distribution.
  • Choose the right irrigation components, including tubes, sprinklers, and drip irrigation systems, to suit your specific plant needs and climate conditions.
  • Test and maintain your DIY watering system regularly to prevent leaks, clogs, and other issues, and make adjustments as needed to optimize water efficiency and plant growth.

Planning Your System

The first step in installing a DIY watering system is to plan your system carefully. You will need to consider your garden’s size, layout, and watering needs to determine the best approach.

Assessing Your Garden Needs

Any gardener knows that understanding your garden’s specific requirements is key to creating an effective watering system. You should assess your garden’s soil type, climate, and plant species to determine the right amount of water and frequency of watering.

Choosing the Right Materials

Adept gardeners select materials that are durable and suitable for their garden’s conditions. You should choose pipes, fittings, and irrigation heads that are resistant to corrosion and can withstand your garden’s climate.

This selection process involves considering factors such as water pressure, flow rate, and UV resistance. You will need to evaluate your options and choose materials that meet your garden’s specific needs, ensuring a reliable and efficient watering system that will save you time and water.

Preparing the Site

Any homeowner can install a DIY watering system with ease, and you can start by checking out this guide on how to Create a DIY Sprinkler System for Watering Your Garden to get an idea of what you’ll need.

Clearing the Area

Beneath the surface of your yard, you’ll find the perfect spot to begin, so start by clearing the area of any debris or obstructions that could interfere with your system.

Laying Out the System

Preferably, you’ll want to lay out your system in a way that maximizes water distribution, so consider the size and shape of your yard as you plan.

To ensure your system is effective, you’ll need to map out the best route for your pipes and sprinklers, taking into account the water pressure and flow rate, and you can use a garden hose to test the layout before you start digging.

Installing Pipes and Fittings

Once again, you’ll need to gather your materials and tools before starting this step. You’ll be working with pipes, fittings, and valves to create a network that distributes water to your plants. Make sure you have a clear plan and layout to follow.

Cutting and Connecting Pipes

Across the board, cutting and connecting pipes requires precision and attention to detail. You’ll need to measure and cut your pipes to the right length, then connect them using fittings such as couplers and elbows.

Securing Fittings and Valves

Similarly, securing your fittings and valves is imperative to prevent leaks and ensure a smooth flow of water. You’ll need to tighten all connections firmly, but avoid over-tightening, which can damage the pipes or fittings.

Consequently, as you secure your fittings and valves, you’ll want to double-check your work to make sure everything is tightened properly. You can test your system by turning on the water supply and checking for leaks. This will help you identify any issues before you’ve completed the installation, saving you time and hassle in the long run. You’ll be able to enjoy the benefits of your DIY watering system, knowing that you’ve done the job correctly.

Setting Up the Water Source

Despite the variety of options, choosing the right water source is straightforward. You’ll need to select a water source, such as a hose or rainwater tank, to supply your DIY watering system.

Connecting to a Water Supply

Across your yard, you’ll find the perfect spot to connect your watering system to a water supply, ensuring it’s easily accessible and out of the way.

Installing a Pump or Timer

For your system to work efficiently, you’ll need to install a pump or timer, which will help regulate water flow and pressure, allowing you to customize your watering schedule.

Plus, when installing a pump or timer, you’ll want to consider factors such as water pressure, flow rate, and power source, ensuring your system operates smoothly and effectively, and you can enjoy the benefits of your new DIY watering system, with your plants thriving under your careful management.

Implementing Water Conservation Measures

All water conservation efforts start with a plan, and you can find valuable information on How To Install An Irrigation System to get started. This will help you make the most of your DIY watering system.

Using Rainwater Collection Systems

Around your home, you can implement rainwater collection systems to reduce your water bill and minimize waste.

Incorporating Drip Irrigation

By installing drip irrigation, you will be able to deliver water directly to the roots of your plants, reducing evaporation and runoff.

Conservation of water is key when designing your DIY watering system, and incorporating drip irrigation is an effective way to achieve this, as you will be able to control the amount of water your plants receive, ensuring that they get exactly what they need to thrive, and you can make adjustments as you see fit to optimize your system for your specific plants and climate.

Testing and Maintenance

Many factors can affect your DIY watering system’s performance, so it’s vital to test and maintain it regularly. You’ll want to ensure your system is working correctly and make any necessary adjustments.

Initial System Test

Maintenance begins with an initial test to verify that your system is functioning as expected. You should check for leaks, proper water pressure, and that all components are working together seamlessly.

Regular Maintenance Tasks

Guarding against issues like clogs and wear on your system requires regular checks. You should inspect your DIY watering system periodically to ensure it continues to operate efficiently.

In fact, performing these regular maintenance tasks will help you identify and fix problems before they become major issues, saving you time and money in the long run. You’ll be able to enjoy the benefits of your DIY watering system, knowing that your plants are receiving the right amount of water, and that your system is running smoothly and effectively.

Final Words

Upon reflecting on your DIY watering system installation, you should feel accomplished knowing you’ve created a efficient way to care for your plants. You’ve successfully set up a system that will save you time and water, and your plants will thrive as a result. With your new system in place, you can now enjoy the benefits of a well-hydrated garden with minimal maintenance, and you can be proud of the work you’ve done to make it happen with your own hands.

FAQ

Q: What are the basic components of a DIY watering system and where can I find them?

A: A DIY watering system typically consists of a water source, tubing, fittings, emitters or sprinklers, and a timer or controller. You can find these components at most hardware stores, home improvement centers, or online retailers that specialize in gardening and irrigation supplies. Make sure to choose components that are compatible with each other and suitable for your specific watering needs.

Q: How do I determine the right size and type of tubing for my DIY watering system?

A: The size and type of tubing you need will depend on the size of your garden, the water pressure in your area, and the type of plants you are watering. Generally, 1/2″ or 1/4″ tubing is suitable for most residential gardens. Consider using tubing made from durable, UV-resistant materials such as PVC or polyethylene. You can also use online calculators or consult with a gardening expert to determine the optimal tubing size for your specific needs.

Q: How do I design a DIY watering system that ensures even water distribution and prevents overwatering?

A: To design an efficient DIY watering system, start by creating a map of your garden, including the location of plants, trees, and other features. Determine the water requirements of each plant species and group plants with similar watering needs together. Use emitters or sprinklers that are designed to deliver water at a consistent rate, and space them evenly to ensure uniform coverage. Consider using a drip irrigation system, which delivers water directly to the roots of the plants, reducing evaporation and runoff.

Q: Can I install a DIY watering system on a slope or uneven terrain, and if so, how?

A: Yes, you can install a DIY watering system on a slope or uneven terrain. To do so, use fittings and tubing that can accommodate the changing elevation and ensure a consistent water flow. You may need to use additional components such as risers, reducers, or elbow fittings to navigate the terrain. Consider using a pressure-compensating drip irrigation system, which can maintain a consistent water flow even on slopes or uneven terrain. It’s also important to ensure that the system is properly secured to the ground to prevent damage from wind or erosion.

Q: How often should I inspect and maintain my DIY watering system to ensure it continues to function efficiently?

A: Regular inspection and maintenance are important to ensure your DIY watering system continues to function efficiently and effectively. Check the system at least once a month for signs of wear, tears, or clogs, and inspect the emitters or sprinklers for mineral buildup or debris. Clean or replace clogged emitters or filters, and check the tubing for cracks or damage. Additionally, adjust the timer or controller as needed to account for changes in weather patterns or plant growth, and consider running the system for a few minutes after maintenance to ensure it’s working correctly.

How to Build a DIY Outdoor Shower

You can create a refreshing outdoor shower in your own backyard with a few simple steps. As you consider building a DIY outdoor shower, you’ll need to assess your space and determine your water source. You’ll have to choose the right materials and design a system that meets your needs. With some planning and basic construction skills, you can build a functional and enjoyable outdoor shower that enhances your outdoor living experience.

Key Takeaways:

To build a successful DIY outdoor shower, consider the following points:

  • Choose a suitable location for your outdoor shower, taking into account drainage, privacy, and access to a water supply.
  • Select durable and water-resistant materials for the shower enclosure, floor, and walls, such as cedar wood, recycled plastic, or stainless steel.
  • Consider installing a solar-powered or low-flow showerhead to minimize water consumption and reduce your environmental impact while enjoying your outdoor shower.

Planning Your Outdoor Shower

While building a DIY outdoor shower, you’ll want to start by planning and researching different ideas, such as the 24 Beautiful Outdoor Shower Ideas for Your Backyard to get inspiration for your project.

Choosing the Perfect Location

Sheltered from the elements, you’ll want to choose a location for your outdoor shower that is level and well-drained, ensuring a safe and comfortable showering experience.

Considering Plumbing and Drainage

The first step in planning your outdoor shower is to consider the plumbing and drainage needs, taking into account the water source and waste management to ensure a functional and eco-friendly shower.

But as you examine deeper into the plumbing and drainage aspects, you’ll need to think about the type of shower head and handle you’ll use, as well as the drainage system, to ensure that your outdoor shower is not only functional but also efficient and environmentally friendly, and you can enjoy a refreshing shower in the comfort of your own backyard.

Gathering Materials and Tools

Now that you’re ready to start building your DIY outdoor shower, it’s time to gather the necessary materials and tools. You’ll need a list of specific items, including pipes, fixtures, and a water heater, to ensure your shower is functional and safe.

Essential Equipment for the Job

Before you begin, make sure you have the imperative equipment, such as a drill, saw, and wrench, to complete the task efficiently. You’ll also need a level, tape measure, and safety gear to protect yourself during the construction process.

Optional Features for a Luxury Shower

Along with the basic necessities, you may want to consider adding optional features to create a luxury shower experience. You can add a rain showerhead, body sprays, or a heated floor to make your outdoor shower feel like a spa.

Indeed, adding these luxury features can enhance your outdoor shower experience, and you can customize them to fit your personal preferences and budget. You can choose from a variety of materials and designs to create a unique and relaxing outdoor space that you’ll enjoy for years to come.

Building the Shower Base

For a sturdy outdoor shower, you need a solid base. You will be building the foundation, installing drainage, and ensuring the area is level and secure.

Constructing a Stable Foundation

By creating a level surface, you can ensure your shower base is stable and secure. You will be using materials like wood or concrete to create a flat surface, allowing you to build your shower with confidence.

Installing a Drainage System

To prevent water from accumulating, you will be installing a drainage system. You can use a french drain or a slope to direct water away from your shower area, keeping it safe and functional.

Stable drainage is key to a successful outdoor shower. As you install your drainage system, you will want to consider the slope and direction of the water flow, ensuring that it moves away from your shower and does not accumulate in the surrounding area, allowing you to enjoy your outdoor shower without worrying about water damage or accumulation.

Installing Plumbing and Fixtures

Once again, you’ll need to consider your outdoor shower’s specific needs when installing plumbing and fixtures, taking into account the water pressure and drainage system you have in place.

Connecting Water Supply Lines

By following the manufacturer’s instructions, you can connect your water supply lines to the outdoor shower, ensuring a secure and leak-free connection that will withstand the elements and regular use.

Choosing the Right Showerhead

Choosing a showerhead that suits your needs is important, as it will affect your overall showering experience, and you should consider factors such as water pressure, flow rate, and your personal preference for spray patterns.

Plumbing considerations will also play a role in selecting the right showerhead, as you’ll need to ensure it’s compatible with your outdoor shower’s plumbing system, and you may want to consider a showerhead with a built-in filter or other features that enhance your showering experience.

Adding Enclosure and Privacy

Many homeowners prefer to add an enclosure or screen around their outdoor shower to create a sense of seclusion. You can use natural materials like bamboo or wooden panels to create a beautiful and functional enclosure. This will not only provide privacy but also protect your outdoor shower from the elements.

Building a Fence or Screen

Above all, you’ll want to ensure that your enclosure is sturdy and well-constructed. You can use a variety of materials, including wood, metal, or plants, to create a unique and functional screen or fence around your outdoor shower.

Adding Doors or Curtains

Doors or curtains can be a great way to add an extra layer of privacy to your outdoor shower. You can choose from a variety of materials, including waterproof curtains or sliding doors, to create a comfortable and functional entrance to your shower.

Consequently, when choosing doors or curtains for your outdoor shower, you’ll want to consider the style and design of your enclosure. You can select doors or curtains that match your existing decor, or choose a bold and colorful option to add some personality to your outdoor space. As you make your selection, be sure to consider factors like durability, maintenance, and ease of use to ensure that your doors or curtains meet your needs and provide you with a comfortable and enjoyable outdoor shower experience.

Final Touches and Maintenance

Despite the DIY outdoor shower being functional, you’ll want to add some finishing touches to make it more enjoyable and durable, ensuring your outdoor shower remains a pleasant space for years to come.

Adding Decorative Elements

Against a backdrop of natural surroundings, you can add decorative elements like plants, stones, or a shower curtain to enhance the ambiance of your outdoor shower, making it a serene oasis.

Regular Cleaning and Upkeep

Regularly, you should inspect your outdoor shower for any damage or wear, taking care of issues promptly to prevent them from becoming major problems, and keeping your shower clean and safe for use.

Considering the exposure of your outdoor shower to the elements, you will need to establish a routine for cleaning and maintenance, checking for and replacing worn-out parts, and ensuring the water supply and drainage systems are functioning properly, allowing you to enjoy your outdoor shower throughout the seasons without any hassles.

Summing up

Presently, you have all the necessary information to build your own DIY outdoor shower. You can now design and construct a functional and enjoyable outdoor space that meets your needs. With your skills and creativity, you will be able to create a unique shower that enhances your outdoor experience. Your DIY outdoor shower will provide you with a refreshing and invigorating experience, allowing you to relax and unwind in the comfort of your own backyard.

FAQ

Q: What are the basic materials needed to build a DIY outdoor shower?

A: To build a DIY outdoor shower, you will need a few basic materials, including a shower enclosure or stall, a showerhead and faucet, a water heater or access to a hot water supply, a drainage system, and a floor or platform. You may also want to consider adding a roof or canopy, as well as a door or curtain for privacy. Additionally, you will need a variety of tools, such as a drill, saw, and wrench, to assemble and install the various components.

Q: How do I choose the right location for my DIY outdoor shower?

A: When choosing a location for your DIY outdoor shower, consider a spot that is level, well-drained, and protected from the wind. You will also want to ensure that the location is close to a water source and has access to a drainage system. Additionally, consider the proximity to your house and other outdoor living spaces, as well as any local building codes or regulations that may apply. It’s also a good idea to choose a location that receives some shade, especially if you plan to use the shower during the hottest part of the day.

Q: What type of water heater is best for a DIY outdoor shower?

A: There are several types of water heaters that can be used for a DIY outdoor shower, including tankless water heaters, solar water heaters, and propane-powered water heaters. The best type of water heater for your outdoor shower will depend on your budget, the size of the shower, and your access to electricity and other utilities. Tankless water heaters are a popular choice because they are energy-efficient and can provide a continuous supply of hot water. Solar water heaters are also a good option, especially if you live in a sunny climate, as they can provide free hot water and are environmentally friendly.

Q: How do I ensure that my DIY outdoor shower is safe and functional?

A: To ensure that your DIY outdoor shower is safe and functional, make sure to follow all safety guidelines and regulations, including those related to electrical and plumbing installations. Use high-quality materials and components, and follow the manufacturer’s instructions for installation and use. You should also test the shower regularly to ensure that it is working properly and make any necessary repairs. Additionally, consider adding safety features such as non-slip flooring, handrails, and a thermostat to regulate the water temperature.

Q: Can I build a DIY outdoor shower without any plumbing or construction experience?

A: While it is possible to build a DIY outdoor shower without any plumbing or construction experience, it may be more challenging and could potentially lead to safety issues or costly repairs. If you are not experienced in these areas, it’s a good idea to consider hiring a professional or seeking guidance from a knowledgeable friend or family member. You can also find many online resources and tutorials that can provide step-by-step instructions and helpful tips for building a DIY outdoor shower. Additionally, consider starting with a simple design and gradually adding more complex features as you gain experience and confidence in your abilities.

Opaye Skip to content