Tips

The Top Tips for Growing Healthy Cucumbers

If you’re looking to add a refreshing twist to your garden, growing cucumbers is a great idea. As you initiate on this journey, you’ll want to ensure your cucumbers are healthy and thriving. You can start by checking out a comprehensive guide on How to Grow Cucumbers: Beginner’s Starter Guide to get the basics right. With the right techniques, you’ll be enjoying your homegrown cucumbers in no time, and your harvest will be plentiful and delicious.
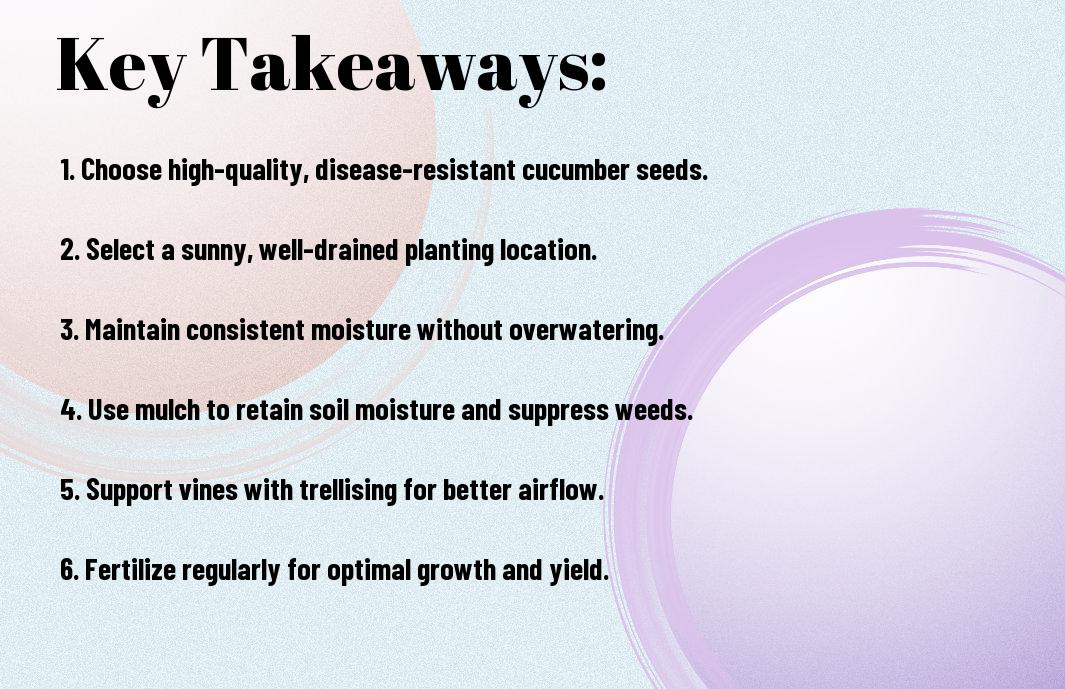
Key Takeaways:

To achieve success in growing healthy cucumbers, consider the following points:

  • Provide your cucumbers with adequate sunlight and water to promote healthy growth and development.
  • Use well-draining soil and a trellis to support the cucumber plants as they grow, keeping them off the ground to prevent disease.
  • Keep an eye out for pests and diseases, and take action promptly if you notice any issues to prevent them from spreading and damaging your crop.

    Soil Preparation

    A key factor in growing healthy cucumbers is preparing the right soil, you can learn more about it at How To Grow Cucumbers: Tips on Planting And Caring.

    Choosing the Right Soil

    Beneath the surface, you’ll find that well-draining soil with a pH between 6.0 and 7.0 is ideal for cucumbers, allowing your plants to thrive.

    Preparing the Soil for Planting

    By loosening the soil to a depth of 12-18 inches, you’ll be able to create a suitable environment for your cucumber seeds to grow.

    Soil preparation is an necessary step in the process, as it allows you to create a fertile ground for your cucumbers to develop, you can add organic matter like compost to improve soil structure and fertility, which will help your plants grow strong and healthy.

    Selecting the Right Variety

    Any gardener looking to grow healthy cucumbers should consider the type of variety that suits their needs.

    Types of Cucumbers

    You can choose from:

    • Slicing cucumbers
    • Pickling cucumbers

    Any variety you choose will have its unique characteristics.

    Variety Characteristics
    Slicing Long, thin, and dark green
    Pickling Short, stout, and light green
    English Long, thin, and seedless
    Persian Short, thin, and sweet

    Considerations for Climate and Space

    One of the key factors in selecting a cucumber variety is considering your climate and available space. You should think about the temperature, humidity, and sunlight your garden receives.

    Plus, you need to ensure that your cucumber plants have enough space to spread out and grow, taking into consideration the mature size of the plant and its watering needs, so you can provide your cucumbers with the best conditions for optimal growth.

    Sowing and Germination

    After preparing your soil, you can start sowing your cucumber seeds, and for more information, you can visit How to Grow Cucumber Plants: The Complete Guide to get the best results.

    Sowing Seeds

    Adept gardeners know that sowing seeds at the right depth and spacing is crucial for healthy growth, and you should sow your seeds about 1 inch deep and 6-8 inches apart.

    Providing Adequate Water and Light

    By ensuring your cucumber plants receive sufficient water and light, you will be able to promote healthy growth and development, and your plants will thrive in a sunny location with well-drained soil.

    Indeed, providing adequate water and light is vital for your cucumber plants, and you should water them deeply once or twice a week, depending on weather conditions, and ensure they receive full sun to partial shade, which will help them grow strong and produce plenty of fruit.

    Supporting and Training

    Many cucumber plants need support as they grow, and providing the right structure can help you maximize your harvest. You can use a variety of methods to train your cucumbers, from simple stakes to more complex trellises and cages.

    Using Trellises and Cages

    Previously, gardeners had to rely on makeshift supports, but now you have access to a wide range of trellises and cages specifically designed for cucumbers, allowing you to provide your plants with the support they need to thrive.

    Pruning and Training Vines

    Teaching your cucumber vines to climb can be a simple process, and you can start by gently twining the stems around the support, encouraging them to grow upwards and outwards, making the most of your space.

    Trellises can be especially useful when pruning and training vines, as they provide a clear structure for you to follow, allowing you to trim back any stray growth and encourage your cucumbers to focus their energy on producing fruit, resulting in a healthier and more productive plant, and a better harvest for you.

    Pest and Disease Management

    To ensure your cucumbers grow healthy, you need to manage pests and diseases effectively. This involves monitoring your plants regularly and taking action at the first sign of trouble.

    Common Pests and Diseases

    Besides regular inspections, you should be aware of common pests and diseases that can affect your cucumber plants, such as aphids, whiteflies, and powdery mildew.

    Organic and Integrated Pest Management

    Behind every successful cucumber crop is a well-planned pest management strategy, which includes using organic methods to control pests and diseases, such as introducing beneficial insects or using physical barriers.

    Pests can quickly destroy your cucumber crop if left unchecked, so you will want to use a combination of techniques, including crop rotation, biological control, and organic pesticides, to keep them under control and maintain a healthy balance in your garden, allowing your cucumbers to thrive.

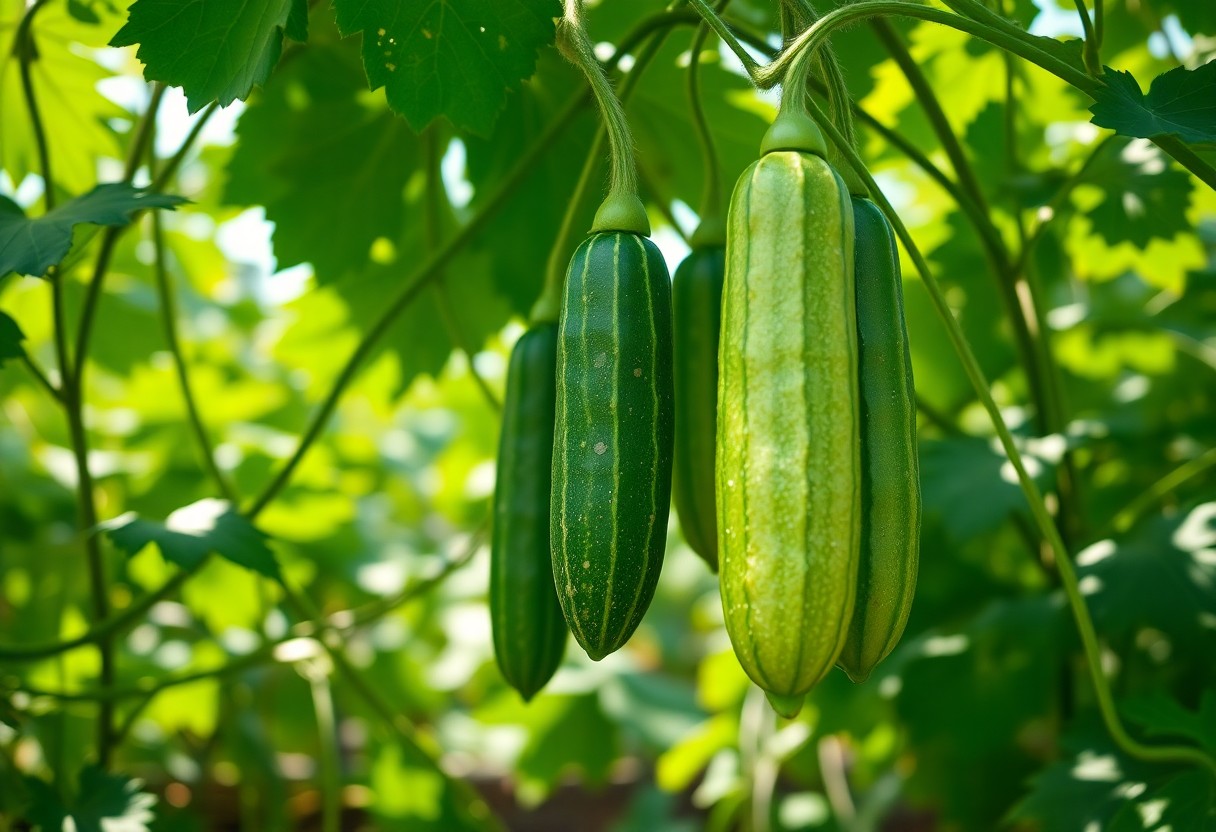
    Harvesting and Enjoying

    Unlike other vegetables, cucumbers are ready to harvest when they are dark green and around 6-8 inches long. You can enjoy your cucumbers in a variety of ways, from slicing them up for a refreshing snack to incorporating them into your favorite recipes.

    When to Harvest

    Beneath the vine, you’ll find your cucumbers ready to be picked when they reach the desired size. You can check on them daily, as they can quickly become too large and seedy.

    Using Cucumbers in Recipes

    Beyond the classic salad, you can use your cucumbers in a wide range of dishes, from sandwiches and wraps to yogurts and smoothies. You can also pickle or ferment them for a tangy snack.

    Hence, as you explore the various ways to use your cucumbers, you’ll discover that they can add a cool and refreshing touch to many of your favorite recipes. You can slice them thinly and add them to sandwiches, or dice them up and toss them into a salad. Your cucumbers will be a versatile and delicious addition to your kitchen, and you’ll enjoy finding new ways to incorporate them into your meals.

    To wrap up

    Summing up, you now have the imperative knowledge to grow healthy cucumbers. You can apply these top tips to your gardening practice, ensuring your cucumber plants receive the right amount of water, nutrients, and support. By following these guidelines, you will be able to enjoy a bountiful harvest of delicious and refreshing cucumbers from your own garden, and your efforts will be rewarded with a successful growing season.

    FAQ

    Q: What are the ideal growing conditions for healthy cucumbers?

    A: Cucumbers are a warm-season crop and thrive in full sun with well-drained soil that is rich in organic matter. They prefer a slightly acidic to neutral soil pH, ranging from 6.0 to 7.0. Consistent moisture, especially when they are producing fruit, is necessary for healthy growth. Support, such as a trellis, can also be beneficial to keep the vines organized and promote better fruiting.

    Q: How often should I water my cucumber plants?

    A: Cucumber plants need consistent moisture to produce well. It is recommended to water them deeply about 1-2 times a week, depending on weather conditions. The soil should be kept moist but not waterlogged, as this can lead to root rot and other problems. Mulching around the plants can help retain moisture in the soil and suppress weeds that compete for water.

    Q: What are some common pests and diseases that affect cucumber plants, and how can they be managed?

    A: Common pests that affect cucumber plants include aphids, whiteflies, and cucumber beetles. Regularly inspecting the plants and using organic control methods such as neem oil or introducing beneficial insects can help manage these pests. Diseases such as powdery mildew and fungal infections can be managed by ensuring good air circulation, removing infected leaves, and using fungicides as a last resort. Practicing crop rotation and using resistant varieties can also help prevent disease issues.

    Q: How do I optimize fertilizer application for my cucumber plants?

    A: Cucumbers are heavy feeders and benefit from a balanced fertilizer applied at planting time and again when they start to vine. A fertilizer that is high in phosphorus (such as a 10-20-10 NPK formula) can promote fruit production. Side-dressing with a balanced fertilizer when the plants are about 6 inches tall and again when they start to bloom can provide them with necessary nutrients for optimal growth and fruiting.

    Q: Are there any specific pruning or training techniques for cucumber plants to enhance their productivity and health?

    A: Pruning and training cucumber vines can significantly enhance their productivity and health. Removing lower leaves when the plant is about 12 inches tall can help prevent soil-borne diseases from splashing up onto the plant. Training the vines to climb a trellis or other support can improve air circulation, make harvesting easier, and promote even fruiting. Regularly removing any weak or spindly growth can also help direct the plant’s energy into producing more fruit.

The Best Tips for Growing Garlic at Home

As you consider growing your own garlic, you’re likely looking for ways to ensure a successful harvest. You can start by learning from experts and experienced gardeners. For a comprehensive guide, you can visit 6 Top Tips for Growing Garlic to get started. By following the right techniques, you’ll be able to grow delicious and healthy garlic in your own home, and enjoy the numerous benefits that come with it, including fresh flavors and improved health.

Key Takeaways:

To achieve success in growing garlic at home, consider the following points:

  • Choose the right variety of garlic for your climate and desired flavor profile, as different types of garlic have varying hardiness levels and maturity dates.
  • Prepare the soil by adding organic matter and ensuring it has good drainage, as garlic prefers well-draining soil with a pH between 6.0 and 7.0.
  • Plant individual cloves 4-6 inches apart and 2-3 inches deep, with the basal plate facing down, to give the garlic roots room to grow and develop properly.

Preparation

While getting started with growing garlic at home, you’ll want to explore resources to ensure you’re doing it right. Check out discussions like Garlic decided it wanted to grow, can I bury it and maybe get some actual garlic? for insights from experienced gardeners.

Choosing the Right Garlic Variety

About the type of garlic you want to grow, you should consider factors like climate, flavor, and storage life to select the best variety for your needs, allowing you to make an informed decision for your garden.

Preparing the Soil

Preparing the soil for garlic involves testing its pH level and adjusting it if necessary, as garlic prefers a slightly acidic to neutral soil pH, and you should also add organic matter like compost to improve soil structure and fertility, which will help your garlic grow strong and healthy, allowing you to achieve a bountiful harvest.

Planting

If you want to grow garlic at home, you’ll need to start by planting individual cloves. This process is relatively straightforward and can be done in the fall or early spring, depending on your climate.

When to Plant Garlic

For optimal growth, you should plant garlic when the weather is cool, as this will help the cloves establish a strong root system before the heat of summer. Typically, this means planting in late summer or early fall, about 6-8 weeks before the first frost.

How to Plant Garlic

Generally, garlic planting involves separating the individual cloves from the bulb and planting them in well-draining soil, with the pointed end facing upwards. You’ll want to space them about 4-6 inches apart, and plant them at a depth of about 2-3 inches.

Understanding the specifics of how to plant garlic is key to a successful harvest. As you prepare to plant, make sure your soil is loose and well-draining, with a pH between 6.0 and 7.0. You should also consider adding compost or well-rotted manure to the soil to provide your garlic with imperative nutrients. By following these steps, you’ll be well on your way to growing healthy, flavorful garlic that you can enjoy for months to come.

Care and Maintenance

Not much is needed to keep your garlic healthy, but regular care will ensure a bountiful harvest. You’ll need to provide your garlic with the right conditions to thrive.

Watering and Mulching

Betwixt the planting and harvesting seasons, you should maintain a consistent moisture level in your soil, and apply a layer of mulch to retain water and suppress weeds, which will help your garlic grow.

Dealing with Pests and Diseases

Along with proper care, you’ll need to watch out for signs of pests and diseases, such as yellowing leaves or black spots, which can damage your garlic crop if left unchecked.

Indeed, dealing with pests and diseases requires swift action, and you should inspect your garlic plants regularly to catch any issues early, treating them with organic or chemical solutions as needed to prevent the problem from spreading and to protect your harvest.

Harvesting

To ensure a successful garlic harvest, you’ll want to check out expert advice, such as How to Grow Garlic Indoors the Right Way, for valuable insights.

Knowing When to Harvest

One of the most important steps in harvesting garlic is determining when the time is right, typically when the tops of the plants begin to yellow and fall over, indicating that the bulbs are ready to be dug up.

How to Harvest and Store Garlic

The process of harvesting and storing garlic requires care, as you’ll need to gently dig up the bulbs, being careful not to damage them, and then dry them in a cool, dry place to preserve for future use.

Hence, you will be able to enjoy your homegrown garlic for months to come, adding flavor to a variety of dishes, from soups to salads, and you can also share your bounty with friends and family, or store it for later use, allowing you to savor the fruits of your labor.

Common Mistakes to Avoid

Unlike other plants, growing garlic requires attention to detail to achieve a successful harvest. You need to be aware of the common pitfalls that can affect your garlic crop, such as overwatering, underwatering, and inadequate sunlight, to ensure your garlic grows healthy and strong.

Overwatering and Underwatering

Any inconsistency in watering can be detrimental to your garlic plants, so you should aim to find a balance that keeps the soil moist but not waterlogged, as this can lead to rot and poor growth.

Not Providing Enough Sunlight

Between planting and harvesting, your garlic needs sufficient sunlight to photosynthesize and grow, so you should choose a location that receives plenty of direct sunlight for most of the day.

Overwatering can be a problem, but not providing enough sunlight can also stunt the growth of your garlic plants, so you should ensure that your garlic receives at least 6 hours of direct sunlight per day, as this will help to promote healthy growth and development, and you will be rewarded with a bountiful harvest.

Tips for Success

After establishing your garlic garden, you’ll want to ensure its success. Consider the following:

  • Choose the right variety
  • Plant at the right time

. Knowing these tips will help you achieve a bountiful harvest.

Rotating Crops

Around the same time, you’ll need to think about rotating your crops to avoid depleting the soil of nutrients. This will help maintain the health of your garlic plants and prevent disease.

Composting and Fertilizing

Often, you’ll find that composting and fertilizing are necessary for promoting healthy growth. You can use natural fertilizers to enrich the soil and support your garlic plants.

Even if you’re new to gardening, you can easily start composting and fertilizing your garlic plants. You can create your own compost using kitchen scraps and yard waste, or purchase organic fertilizers from a gardening store. As you add these nutrients to the soil, you’ll begin to notice improvements in your garlic plants’ growth and flavor, and you’ll be able to enjoy a successful harvest from your home garden.

Summing up

On the whole, you now have the necessary knowledge to grow garlic at home. You can successfully cultivate your own garlic by following the tips outlined, from selecting the right variety to harvesting at the optimal time. With your newfound understanding, you will be able to enjoy your homegrown garlic and appreciate the benefits of having this flavorful ingredient in your kitchen, enhancing your cooking with your own fresh produce.

FAQ

Q: What are the best conditions for growing garlic at home?

A: Garlic prefers well-draining soil and full sun to partial shade. It thrives in areas with rich, fertile soil that has a pH between 6.0 and 7.0. Additionally, garlic needs adequate moisture, especially when the bulbs are forming. Aim to provide about 1 inch of water per week, either through rainfall or irrigation.

Q: How do I prepare the soil for planting garlic?

A: To prepare the soil for planting garlic, start by loosening the soil to a depth of about 12 inches. Then, mix in a 2-inch layer of compost or well-rotted manure to improve soil fertility and drainage. It’s also a good idea to add a balanced fertilizer according to the manufacturer’s instructions. Avoid using fresh manure, as it can burn the garlic’s roots.

Q: When is the best time to plant garlic at home?

A: In most regions, the best time to plant garlic is in the fall, about 6-8 weeks before the first frost. This allows the garlic to establish itself over the winter and produces a larger harvest. If you live in a warmer climate, you can also plant garlic in late winter or early spring, as soon as the soil can be worked. Avoid planting garlic in the summer, as the heat can cause the bulbs to rot.

Q: How do I care for garlic plants as they grow?

A: To care for garlic plants, keep the soil consistently moist during the first few weeks after planting. As the plants grow, you can reduce watering to about 1 inch per week. It’s also crucial to keep the area around the garlic plants weed-free, as weeds can compete for water and nutrients. You can use a layer of mulch to suppress weeds and retain moisture in the soil.

Q: How do I know when my garlic is ready to harvest?

A: Garlic is typically ready to harvest when the tops of the plants begin to yellow and fall over. This usually occurs about 3-4 months after planting, depending on the variety. Check the bulbs by carefully digging around the plant with a fork, being careful not to damage the bulbs. If the bulbs are divided into separate cloves and the necks have started to dry, it’s time to harvest. Use a garden fork to carefully lift the bulbs out of the ground, and then let them dry in a warm, dry place for a few weeks before storing.

The Best Tips for Keeping Your Garden Organic

As you tend to your garden, you nurture a delicate balance between nature and nurture. To cultivate a thriving, chemical-free oasis, you’ll want to adopt practices that prioritize the health of your soil, plants, and the environment. For inspiration, you can explore 11 Organic Gardening Tips to Grow an Incredible Garden, and discover simple, effective methods to create a lush, organic haven that flourishes under your care, reflecting the beauty and wonder of the natural world.

Key Takeaways:

To maintain a healthy and thriving organic garden, consider the following tips:

  • Use natural pest control methods, such as introducing beneficial insects or using homemade pest repellents, to avoid harming the environment and your plants.
  • Incorporate composting into your gardening routine, as it provides crucial nutrients for your plants and helps reduce waste.
  • Choose heirloom seeds or non-GMO varieties to promote biodiversity and ensure your garden remains free from genetically modified organisms.

Planning Your Organic Garden

A well-designed garden begins with careful planning, considering the space, climate, and your needs. As you start, consider visiting what are some organic gardening tips to keep in mind for beginners to guide your decisions.

Choosing the Right Plants

Below the surface of garden planning lies the selection of plants that will thrive in your environment, and you will want to choose those that are suitable for your climate and soil type.

Preparing the Soil

On the path to creating a thriving garden, you must first prepare the soil, nurturing it with organic matter and ensuring its pH balance is suitable for your chosen plants.

Indeed, as you investigate deeper into preparing your soil, you will find that adding compost and well-rotted manure will enrich it, allowing your plants to grow strong and healthy, and your garden to flourish under your care.

Natural Pest Control

While cultivating your garden, you may encounter pests that threaten to destroy your hard work. To maintain an organic approach, consider alternatives to chemical pesticides. You can use natural methods to control pests and keep your garden healthy.

Using Companion Planting

Pests can be deterred by certain plants, so you can use companion planting to your advantage. By placing specific plants alongside your crops, you can naturally repel unwanted insects and maintain a balanced ecosystem in your garden.

Encouraging Beneficial Insects

Companion insects, such as bees and butterflies, can be beneficial to your garden. You can attract these helpful creatures by incorporating plants that provide them with food and shelter, creating a welcoming environment for them to thrive.

In fact, as you encourage beneficial insects to visit your garden, you will notice a decrease in the number of harmful pests. This is because these beneficial insects will help to pollinate your plants and prey on the pests that threaten your garden, creating a natural balance that allows your garden to flourish. By working with nature, you can maintain a healthy and thriving organic garden.

Organic Fertilizers

All gardens benefit from organic fertilizers, which promote healthy growth and sustainability. You can create your own fertilizers using natural materials, reducing your reliance on synthetic products and cultivating a more balanced ecosystem in your garden.

Composting at Home

Beneath the surface of your daily life, you can turn kitchen scraps and yard waste into a valuable resource. You can compost at home, transforming would-be waste into nutrient-rich soil that will nourish your plants and enhance the overall health of your garden.

Using Natural Mulch

Homeward bound, your garden’s beauty and fertility can be enhanced by using natural mulch. You can collect leaves, straw, or wood chips to spread around your plants, retaining moisture and suppressing weeds in a simple, effective way.

Mulch becomes a protective blanket for your soil, shielding it from extreme temperatures and erosion. As you spread it around your garden, you’re not only beautifying the space, but also creating an environment where your plants can thrive, their roots digging deeper into the earth, and their leaves reaching for the sun.

Water Conservation

Keep your garden organic by reducing water waste, a simple yet effective way to promote sustainability. You can achieve this by adopting efficient practices that conserve this precious resource.

Efficient Irrigation Systems

Besides traditional methods, consider installing drip irrigation systems or soaker hoses, which deliver water directly to the roots of your plants, minimizing evaporation and runoff, allowing you to make the most of your water supply.

Collecting Rainwater

Between the rainfall and your garden, lies an opportunity to harvest and store rainwater for later use, reducing your reliance on municipal water supplies and lowering your water bill, as you make use of this free and abundant resource.

With a rainwater collection system in place, you can redirect rainwater from your roof into a storage tank or barrel, providing your garden with a natural and chemical-free source of water, and you can use this stored water for irrigation, reducing the demand on your well or municipal water supply, and helping to maintain your garden’s natural balance.

Maintaining Your Garden

Your garden is a reflection of your dedication to the natural world, and with gentle care, it will flourish. You nurture the soil, and it will nurture you in return. As you tend to your garden, you begin to understand the intricate balance of nature.

Regular Weeding and Pruning

Between the blooms and the harvest, you must attend to the quiet tasks that keep your garden thriving. You will find that regular weeding and pruning allow your plants to grow strong and healthy, their beauty unfolding like a tapestry.

Monitoring for Pests and Diseases

About the time you notice a change in your garden’s harmony, you should inspect your plants for signs of trouble. You look for the subtle signals that something is amiss, and take action to restore balance.

Hence, as you monitor your garden for pests and diseases, you develop a deeper understanding of the interconnectedness of all living things. You learn to observe the subtle signs of distress, and take gentle, effective action to protect your plants, using natural methods that work in harmony with the environment, allowing your garden to become a vibrant, thriving ecosystem that nourishes both body and soul.

Tips for a Thriving Garden

For a resilient garden, consider the following:

  • using compost
  • conserving water

Thou shalt find that your garden flourishes with these simple practices.

Crop Rotation and Diversity

Towards a balanced garden, you’ll want to plant a variety of crops, rotating them seasonally to maintain soil health and prevent pests.

Using Natural Supports

Tricks for supporting your plants include using twine, sticks, and rocks to create a natural trellis.

Crop production can be maximized by using your own natural resources, such as branches and stones, to support plants as they grow, allowing you to tend to your garden with minimal waste and environmental impact, and fostering a deeper connection with the land you cultivate.

Summing up

The path to an organic garden is one you’ve commenceed upon with intention and care. As you tend to your land, you’ve learned to nurture the soil, choosing natural methods to cultivate life. You’ve discovered the harmony that exists between your garden and the world around it, and by embracing this simplicity, your outdoor space has become a thriving oasis, reflecting the beauty of nature and the tranquility of your own spirit.

FAQ

Q: What are the benefits of keeping my garden organic?

A: Keeping your garden organic has numerous benefits, including reducing your exposure to harmful chemicals, creating a healthier environment for your family and pets, and promoting biodiversity. Organic gardening also helps to improve soil quality, conserve water, and support local ecosystems. By choosing organic methods, you can enjoy a more sustainable and environmentally friendly gardening experience.

Q: How do I start an organic garden from scratch?

A: To start an organic garden from scratch, begin by testing your soil to determine its pH level and nutrient content. Next, choose a location that receives plenty of sunlight and has good drainage. Select organic seeds or seedlings that are suitable for your climate and soil type. Prepare your soil by adding compost or well-rotted manure, and then plant your seeds or seedlings. Be sure to water them regularly and maintain a consistent gardening routine. As you begin your organic gardening journey, consider keeping a gardening journal to track your progress and note any challenges you encounter.

Q: What are some effective natural pest control methods for my organic garden?

A: There are several effective natural pest control methods you can use in your organic garden. One approach is to introduce beneficial insects, such as ladybugs or lacewings, which prey on common garden pests. You can also use physical barriers, like fine mesh or fine-netting, to keep pests away from your plants. Additionally, consider spraying your plants with homemade pest control solutions, such as garlic or soap solution, to deter pests. Another option is to use companion planting, where you plant certain species together to deter pests. For example, planting marigolds with tomatoes can help to repel nematodes.

Q: How can I make my own organic fertilizer for my garden?

A: Making your own organic fertilizer is a simple and cost-effective way to provide your plants with imperative nutrients. One method is to create a compost pile using kitchen scraps, leaves, and grass clippings. As the materials break down, they will form a nutrient-rich fertilizer that you can add to your soil. You can also make a liquid fertilizer by steeping comfrey leaves or manure tea in water. Another option is to use worm casting, which is a nutrient-rich fertilizer produced by worms as they break down organic matter. By making your own organic fertilizer, you can reduce your reliance on synthetic fertilizers and create a more sustainable gardening practice.

Q: What are some tips for maintaining soil health in my organic garden?

A: Maintaining soil health is imperative for a thriving organic garden. One tip is to add organic matter, such as compost or well-rotted manure, to your soil regularly. This will help to improve soil structure, increase nutrient availability, and support beneficial microorganisms. Another approach is to use crop rotation, which involves rotating different plants or plant families to avoid depleting the soil of specific nutrients. You should also avoid over-tilling, as this can damage soil structure and disrupt beneficial microorganisms. Finally, consider using mulch to retain moisture, suppress weeds, and regulate soil temperature. By following these tips, you can create a healthy and balanced soil ecosystem that supports the overall health and productivity of your organic garden.

The Top Tips for Growing Mint Without Overgrowth

As you launch on cultivating the fragrant and versatile mint plant, you may find yourself entwined in a delicate dance of nurturing and restraint. Your intentions, no doubt, are to harness the herb’s cooling essence, but its propensity for unbridled growth can be overwhelming. You need not succumb to its invasive tendencies, for with the right approach, you can coax mint into a lush, yet contained, beauty, allowing you to savor its delights without sacrificing your garden’s serenity.

Key Takeaways:

To effectively manage mint growth, consider the following points:

  • Controlling the spread of mint is important to prevent it from overtaking other plants in the garden. This can be achieved by planting mint in containers or boundaries that restrict its root growth.
  • Regular pruning is necessary to maintain the health and shape of mint plants. This involves cutting back stems to encourage new growth and prevent the plant from becoming leggy.
  • Providing the right environment for mint growth, including ample moisture and light, will help to promote healthy growth without leading to overgrowth. This can be balanced by ensuring the soil is not too fertile, as this can cause the plant to grow excessively.

Preparing the Soil

The initial step in growing mint is preparing the soil, and for a comprehensive approach, you can consult A Complete Guide To Growing Your Own Mint for expert advice. As you commence on this journey, you’ll find that the right foundation is necessary for your mint plants to thrive.

Choosing the Right Location

Similarly, selecting a spot with partial shade to full sun is vital, as mint prefers well-drained areas with ample sunlight to flourish, allowing you to make the most of your mint plants.

Soil Requirements for Mint Growth

Among the key factors influencing mint growth, the soil’s pH level and composition play a significant role, and you should aim for a slightly acidic to neutral soil pH, ranging from 6.0 to 7.0, to create an ideal environment for your mint.

Considering the specific needs of mint, you will want to ensure your soil is rich in organic matter, which helps retain moisture and suppress weeds, thereby facilitating healthy growth and minimizing maintenance, as you nurture your mint plants to achieve optimal flavor and aroma, allowing you to fully appreciate the rewards of your careful preparation and attention to detail.

Selecting the Right Mint Variety

You will find that choosing the right mint variety is imperative for a harmonious growth experience, as different types have unique characteristics that may suit your needs and preferences. Consider the intended use of your mint, whether it be for cooking, tea, or ornamental purposes.

Peppermint vs Spearmint

Above all, the decision between peppermint and spearmint often comes down to personal taste, as peppermint has a stronger flavor and spearmint a more delicate one, allowing you to decide which suits your palate and uses.

Other Mint Varieties to Consider

Right from the start, you may want to explore other mint varieties, such as chocolate mint or apple mint, which offer distinct flavors and aromas that can add depth to your recipes and gardens.

Varieties like pineapple mint or ginger mint can also be quite intriguing, and as you examine into the world of mint, you will discover that each type has its own set of advantages, whether it be a more compact growth habit or a unique fragrant oil profile, allowing you to tailor your selection to your specific needs and preferences, and ultimately, to cultivate a mint garden that is truly your own.

Planting and Care

Keep your mint plants thriving by providing them with the right conditions. You will want to tend to their needs with diligence, as they can quickly take over your garden if left unattended.

How to Plant Mint

Along with a container that provides good drainage, you will need to select a location with partial shade to full sun, depending on your climate. You can plant mint in the ground or in a pot, making sure the soil is moist and fertile.

Watering and Sunlight Requirements

Above all, mint requires consistent moisture, so you will need to water your plants regularly, taking care not to overwater. You should also ensure they receive at least four to six hours of direct sunlight per day, which will promote healthy growth.

Further, as you tend to your mint plants’ watering and sunlight needs, you will begin to notice the subtle nuances of their development, and adjust your care accordingly, you will find that the right balance of water and light will yield a lush and fragrant harvest, perfect for adding a burst of freshness to your favorite dishes and drinks, and you will be able to appreciate the simple joys of nurturing your own mint plants.

Preventing Overgrowth

All gardeners know that mint can quickly take over a garden if not properly managed. You will need to take steps to prevent your mint from spreading and overtaking other plants in your garden.

Pruning and Trimming Techniques

Practically speaking, pruning your mint regularly is important to maintaining control. You can trim back your mint plants to encourage bushy growth and prevent them from becoming leggy.

Containing Mint Spread

Preemptively, you should consider containing your mint to prevent it from spreading. You can plant your mint in containers or boundaries to keep it from invading other parts of your garden.

Due to mint’s tendency to spread quickly, you will need to take extra precautions to keep it under control. You can use physical barriers, such as containers or edging, to contain your mint and prevent it from spreading to other parts of your garden, allowing you to enjoy its beauty and fragrance without the hassle of overgrowth.

Common Mistakes to Avoid

Despite your best intentions, growing mint can be a daunting task. You may find yourself struggling to control its spread, and your garden may become overrun. To avoid this, it’s important to be aware of the common pitfalls that can lead to overgrowth.

Overwatering and Underwatering

One of the most significant errors you can make is inconsistent watering. If you water your mint too much or too little, it can lead to weak and leggy growth, making it more prone to spreading.

Not Providing Enough Light

Around the time you plant your mint, you should consider the amount of light it will receive. You need to ensure your mint plant gets enough sunlight to thrive, as lack of light can cause it to become leggy and spread out.

Also, as you plan the lighting for your mint plant, you’ll want to place it in a spot that receives partial shade to full sun, depending on your climate. By doing so, you’ll be able to control the growth of your mint and encourage it to grow lush and healthy, without becoming invasive, allowing you to enjoy its fragrance and beauty in your garden.

Harvesting and Using Mint

Many of the challenges associated with growing mint can be mitigated by adopting a thoughtful approach to harvesting and using this versatile herb. As you tend to your mint plants, you will begin to notice the abundance of leaves and stems, and you will need to consider how to make the most of your bounty.

When to Harvest Mint

Against the tendency to let your mint plants grow unchecked, you should harvest them regularly to encourage new growth and prevent overgrowth. You can start harvesting your mint leaves as soon as the plant has multiple sets of leaves, and you can continue to harvest them throughout the growing season.

Creative Ways to Use Fresh Mint

Fresh from the garden, your mint leaves can be used in a variety of ways, from adding them to salads and drinks to using them in beauty treatments and crafts. You can use your fresh mint to make teas, cocktails, and desserts, and you can also use it to add fragrance to your home and garden.

Considering the many uses of fresh mint, you may find that you want to experiment with different recipes and projects. As you explore the possibilities of using fresh mint, you will discover that it can add a brightness and freshness to many aspects of your life, from your cooking and grooming to your decor and entertainment. You can use your mint to make delicious chutneys and sauces, or to create beautiful arrangements and wreaths, and you can also use it to make thoughtful gifts and favors for your friends and family.

To wrap up

With these considerations, you will be well on your way to cultivating a lush and thriving mint plant, all while maintaining the delicate balance of your garden’s ecosystem. As you tend to your mint, you will find that your efforts yield a bountiful harvest, and your garden becomes a haven of freshness and vitality, with your carefully controlled mint plant adding its unique charm to your outdoor space, allowing you to enjoy its beauty and fragrance, and savor the rewards of your thoughtful gardening approach.

FAQ

Q: What are the benefits of growing mint in containers to prevent overgrowth?

A: Growing mint in containers is an excellent way to control its spread and prevent overgrowth. By containing the roots, you can limit the mint’s ability to spread and take over your garden. This method also allows for better soil quality control, watering, and fertilization, resulting in healthier and more flavorful mint plants. Additionally, container-grown mint is easier to harvest and prune, making it a great option for backyard gardeners.

Q: How often should I water my mint plants to promote healthy growth without overwatering?

A: Mint plants prefer moist soil, but overwatering can lead to root rot and other problems. To avoid this, water your mint plants when the top inch of soil feels dry to the touch. Make sure the pot has good drainage holes to prevent waterlogged soil. In hot weather, you may need to water your mint plants daily, while in cooler weather, watering every other day should suffice. It’s also imperative to avoid getting water on the leaves to prevent fungal diseases.

Q: What are some effective ways to prune mint plants to prevent overgrowth and encourage bushy growth?

A: Pruning is imperative to control mint’s aggressive growth and promote bushy, healthy plants. Pinch off flower buds as they form to encourage leaf growth and prevent the plant from seeding. Regularly trim back long stems to about one-third of their length, and cut back leggy growth to encourage branching. You can also harvest individual leaves or stems as needed to use in cooking and herbal remedies. Prune your mint plants regularly to maintain shape, promote new growth, and prevent them from becoming leggy.

Q: Can I grow mint in shady areas, or does it require full sun to prevent overgrowth?

A: While mint can grow in partial shade, it prefers full sun to partial shade, depending on the variety. If you’re growing mint in a shady area, make sure it receives at least 4-6 hours of direct sunlight per day. However, if you live in a hot climate, providing some afternoon shade can help prevent scorching and promote healthier growth. Keep in mind that mint grown in shady areas may be more prone to overgrowth, so regular pruning is necessary to maintain its shape and size.

Q: Are there any specific mint varieties that are less prone to overgrowth and easier to manage?

A: Yes, some mint varieties are naturally more compact or less aggressive than others. For example, ‘Bowles’ mint, ‘Pineapple’ mint, and ‘Chocolate’ mint are known for their smaller growth habits and are less likely to take over your garden. These varieties are perfect for container gardens or small spaces. Other varieties, like peppermint and spearmint, can be more aggressive and may require more frequent pruning to control their spread. Choose a variety that suits your needs and provides the desired level of maintenance.

The Best Tips for Growing Root Vegetables

As you begin on your journey to cultivate a thriving garden, you’ll discover the joy of growing your own root vegetables. With a little patience and practice, you can harvest a bounty of delicious, nutritious produce right in your own backyard. To get started, you can learn the basics of How to Grow Root Vegetables in Your Garden – 2024, and then explore the simple, yet effective techniques outlined in this article to take your gardening skills to the next level and enjoy the rewards of your labor.

Key Takeaways:

To achieve success in growing root vegetables, consider the following points:

  • Choose a location with full sun to partial shade to promote healthy growth and development of your root vegetables.
  • Prepare the soil with organic matter and ensure it has a loose structure to allow roots to grow deep and evenly.
  • Keep the soil consistently moist but not waterlogged, as this can lead to rot and other problems, and ensure a balanced fertilizer application to support root development.

Choosing the Right Root Vegetables

While selecting the right root vegetables, you’ll want to think about what will thrive in your garden. Consider the space you have and the climate you’re in, as these factors will greatly impact your harvest.

Selecting Varieties for Your Climate

Above all, you should choose varieties that are well-suited to your region’s temperature and moisture levels. This will ensure a healthy and abundant harvest, and make the growing process much easier for you.

Considering factors like Soil and Season

Alike other gardening tasks, you need to think about the specifics of your garden when choosing root vegetables. You should consider:

  • the type of soil you have
  • the time of year you’re planting

Perceiving these factors will help you make informed decisions about which root vegetables to grow.

Factors such as soil quality, sunlight, and water availability will all impact the success of your root vegetable garden. You should consider:

  • the pH level of your soil
  • the amount of sunlight your garden receives
  • the time of year you’re planting

Perceiving these factors will help you create a thriving and diverse garden, full of delicious root vegetables for you to enjoy.

Preparing the Soil

Assuming you want to grow healthy root vegetables, you’ll need to start with well-prepared soil. This involves loosening the soil to a depth of about 12 inches to allow roots to grow freely. You can use a fork or tiller to loosen the soil, and then add organic matter like compost or manure to improve its structure and fertility.

Testing and Amending Soil Quality

Above all, it’s crucial to test your soil to determine its pH level and nutrient content. You can purchase a soil testing kit or send a sample to a lab for analysis. Based on the results, you can amend your soil with lime, fertilizer, or other additives to create a balanced and fertile growing medium.

Creating a Suitable Environment for Root Growth

Across your garden bed, you’ll want to create a smooth, even surface for roots to grow. You can use a rake to remove any debris or stones, and then firm the soil gently to prevent settling. This will help your root vegetables grow straight and true, rather than becoming deformed or forked.

The key to creating a suitable environment for root growth is to pay attention to the details. You’ll want to ensure that your soil is consistently moist, but not waterlogged, as this can lead to rot and other problems. You can also use mulch or cover crops to retain moisture and suppress weeds, giving your root vegetables the best chance to thrive. As you work the soil, think about the roots growing beneath your feet, and take pleasure in providing them with the conditions they need to flourish. By doing so, you’ll be rewarded with a bountiful harvest of delicious and nutritious root vegetables.

Planting and Spacing

After preparing your soil, you’re ready to plant your root vegetables. For a comprehensive guide, check out The Only Root Vegetables Guide You’ll Ever Need to ensure you’re on the right track. By following a few simple steps, you’ll be on your way to a successful harvest.

Techniques for Sowing Seeds and Seedlings

Similar to seedlings, young roots need careful handling when being transplanted into your garden. You’ll want to sow your seeds at the right depth and water them gently to avoid washing away the tiny roots.

Optimal Spacing for Healthy Root Development

Similar to seedlings, your root vegetables will benefit from having enough space to grow. You’ll want to leave enough room between each plant to allow for proper air circulation and growth, giving your roots the best chance to develop.

This optimal spacing will also help prevent disease and pests from spreading, giving you a healthier and more bountiful harvest. As you plant, consider the mature size of your roots and leave enough space for them to reach their full potential, and with a little patience, you’ll be enjoying your delicious homegrown root vegetables in no time.

Watering and Care

Not all root vegetables require the same level of care, but they all need proper watering to thrive. You’ll want to keep the soil consistently moist, especially during the first few weeks after planting.

Providing Adequate Moisture and Nutrients

Among the most important things you can do for your root vegetables is provide them with adequate moisture and nutrients. You can achieve this by watering them deeply and adding organic matter like compost to the soil.

Managing Common Pests and Diseases

Manipulating the environment to prevent pests and diseases is key to growing healthy root vegetables. You can start by rotating your crops and removing any infected plants to prevent the spread of disease.

Pests like aphids and slugs can be a problem for root vegetables, but you can manage them by using natural methods like introducing beneficial insects or spraying soapy water on the affected areas. By taking these steps, you’ll be able to enjoy a bountiful harvest of delicious and healthy root vegetables from your garden.

Mulching and Maintenance

All root vegetables require some level of care to thrive. You will need to mulch and maintain your soil to create an ideal environment for your roots to grow.

Retaining Moisture and Suppressing Weeds

Retaining the right amount of moisture in your soil is vital for healthy root growth. You can achieve this by applying a thick layer of organic mulch, which will also help suppress weeds that compete with your roots for water and nutrients.

Regular Tasks for a Healthy Root Crop

Any gardener knows that regular tasks are necessary to keep your root crop healthy. You should regularly check your soil moisture, remove weeds, and inspect your roots for signs of disease or pests.

Further to these tasks, you will also need to ensure your soil is well-aerated and loose, allowing your roots to grow freely. As you tend to your roots, you will begin to notice the subtle signs of a healthy crop, and with patience and dedication, you will be rewarded with a bountiful harvest of delicious and nutritious root vegetables, all from your own garden, grown with your own care and attention.

Harvesting and Storage

Many root vegetables can be left in the ground until you’re ready to use them, but it’s important to harvest them before they become too old.

Timing and Techniques for Optimal Flavor

Technically, the best time to harvest root vegetables is when they’re at their peak flavor and texture, which is usually in the fall or early spring.

Tips for Storing and Preserving Root Vegetables

By utilizing proper storage methods, you can enjoy your root vegetables year-round:

  • keep them in a cool, dark place
  • store them in a container with good ventilation

After harvesting and storing your root vegetables, you’ll be able to savor their flavor and texture for months to come.

Even with proper storage, root vegetables will eventually go bad, but you can extend their shelf life by following a few simple tips:

  • check on them regularly for signs of spoilage
  • store them in a way that allows for air circulation

After taking the time to properly store and preserve your root vegetables, you’ll be rewarded with a bounty of delicious, homegrown produce.

Final Words

Taking this into account, you now have the knowledge to grow your own delicious root vegetables. You’ve learned the best tips to cultivate a thriving garden, and with patience and practice, your harvest will flourish. As you tend to your garden, you’ll find joy in the simple act of nurturing your own food, and your efforts will be rewarded with a bountiful yield, allowing you to enjoy the fruits of your labor in your own backyard.

FAQ

Q: What are the best conditions for growing root vegetables?

A: Root vegetables such as carrots, beets, and potatoes prefer well-draining, loose soil with a pH between 6.0 and 7.0. They also require full sun to partial shade and consistent moisture, especially when they are producing roots. Additionally, the soil should be free of rocks and debris to allow the roots to grow straight and unobstructed.

Q: How deep should I plant root vegetable seeds?

A: The depth at which you plant root vegetable seeds depends on the type of vegetable. For example, carrot seeds should be planted about ¼ inch deep, while beet seeds can be planted about 1 inch deep. It’s also important to sow the seeds thinly and evenly, as overcrowding can lead to deformities and poor growth. You can check the specific planting depth for each type of root vegetable on the seed package or consult with a gardening expert.

Q: How often should I water root vegetables?

A: Root vegetables need consistent moisture, especially when they are producing roots. The soil should be kept moist but not waterlogged, as this can lead to rot and other problems. Aim to provide about 1-2 inches of water per week, either from rainfall or irrigation. You can also mulch around the plants to help retain moisture and suppress weeds.

Q: Can I grow root vegetables in containers?

A: Yes, you can grow root vegetables in containers, but you’ll need to choose a container that is deep enough to accommodate the roots of the plants. For example, a container that is at least 6-8 inches deep is suitable for growing carrots and beets. Make sure the container has good drainage holes to prevent waterlogged soil, and use a well-draining potting mix to prevent rot. You’ll also need to provide enough space for the plants to grow, so choose a container that is at least 12-18 inches wide.

Q: How do I know when my root vegetables are ready to harvest?

A: The timing of harvest depends on the type of root vegetable and the variety. For example, baby carrots can be harvested as early as 50 days after sowing, while maincrop carrots take around 70 days. You can check the harvest time on the seed package or consult with a gardening expert. You can also check for readiness by gently digging around the plants with a fork, being careful not to damage the roots. For example, if you’re growing beets, you can harvest them when the roots are between 1-3 inches in diameter, depending on the variety.

Opaye Skip to content