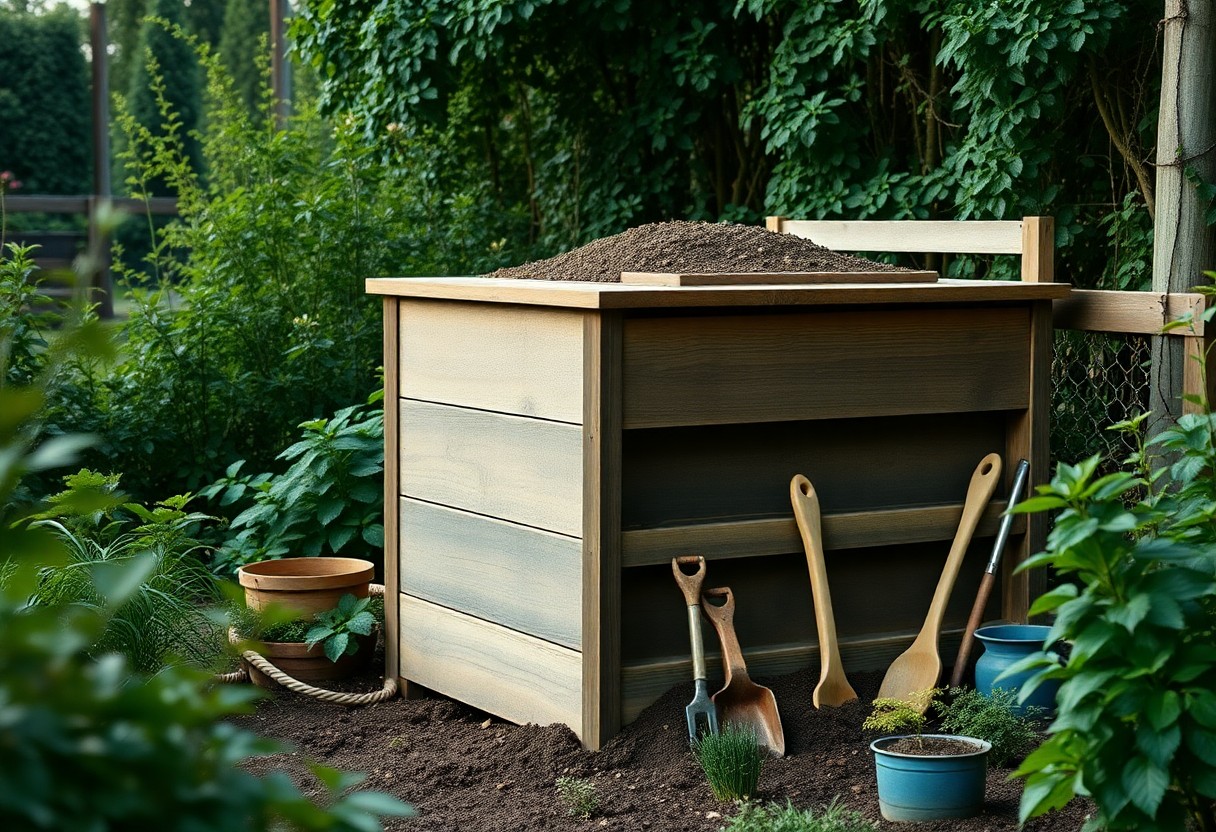
You can create a sustainable and eco-friendly way to manage your food waste by building your own compost bin. With a few simple materials and some basic tools, you can construct a bin that meets your needs and helps your garden thrive. Your compost bin will allow you to turn kitchen scraps and yard waste into a nutrient-rich soil amendment, reducing your environmental impact and creating a healthier garden. You will learn how to do this in the following steps.
Key Takeaways:
To build a DIY compost bin, consider the following points:
- Start by selecting a location for your compost bin that is well-ventilated and accessible, with a drainage system to prevent water accumulation.
- Choose the right materials for your compost bin, such as wood or wire mesh, and ensure they are durable and can withstand outdoor conditions.
- Consider the
Choosing the Right Materials
A well-planned compost bin requires the right materials to ensure effective decomposition and durability. You will need to select materials that are resistant to rot and can withstand outdoor weather conditions.
Selecting the Wood
With a focus on sustainability, you can choose reclaimed or untreated wood for your compost bin, considering the type of wood that will best suit your needs and budget.
Gathering Other Necessary Items
Around your workshop or home, you will find other necessary items such as wires, screws, and a hammer to assemble your compost bin, making it easy to get started on your project.
A closer look at gathering other necessary items reveals that you will also need a saw, drill, and measuring tape to ensure accurate cuts and a sturdy structure, allowing you to build a functional compost bin that meets your needs and complies with your local regulations.
Designing the Compost Bin
Even before you begin building your compost bin, it’s crucial to consider your design options. You’ll want to think about the size, style, and materials you’ll use to ensure your bin is functional and suits your needs.
Determining the Size
To determine the size of your compost bin, you’ll need to consider the amount of waste you generate and the space available in your yard. You should choose a size that is large enough to hold all your compost materials, but not so large that it becomes difficult to manage.
Considering the Style
Against the backdrop of your yard’s aesthetics, you’ll want to choose a style that fits in with your landscape. You can opt for a traditional wooden bin or a more modern plastic one, depending on your personal preference and the style of your outdoor space.
It is worth noting that the style of your compost bin can also impact its functionality. For example, a bin with a lid will help to keep pests out and retain heat, while a bin with aeration holes will improve airflow and speed up the composting process. As you consider the style of your bin, think about how it will affect the overall composting process and choose a design that meets your needs.
Building the Frame
Many DIY enthusiasts find building a compost bin to be a straightforward project, and you can get started by checking out tutorials like Make This Super-Easy DIY Compost Bin in a Flash for inspiration. You’ll need to gather your materials and begin constructing the frame, which will provide the foundation for your compost bin.
Constructing the Base
With your materials in hand, you can start by building the base of your compost bin, using wooden pallets or planks to create a sturdy floor. You will need to ensure the base is level and secure to prevent your compost from spilling over.
Adding the Sides
Adding the sides to your compost bin is the next step, and you can use wooden boards or wire mesh to create the walls. You will need to attach these to the base, making sure they are secure and evenly spaced.
Consequently, as you add the sides, you should consider the size and ventilation of your compost bin, ensuring that it is well-aerated and easy to turn. You can add doors or lids to make it simpler to access and maintain your compost, and you can customize the design to fit your specific needs and available space.
Adding the Walls and Roof
Unlike other DIY projects, building a compost bin requires careful consideration of the materials and design. You will need to choose materials that are durable and can withstand the elements.
Installing the Walls
Beneath the frame, you will start installing the walls of your compost bin, using wooden planks or wire mesh to create a secure enclosure. You will need to ensure that the walls are sturdy and can hold the weight of the compost.
Completing the Roof
Among the final steps in building your compost bin is completing the roof, which will protect the compost from the elements. You can use wooden planks or corrugated metal to create a roof that is both durable and waterproof.
Walls and roof in place, you can now focus on adding the final touches to your compost bin, including a door or lid that allows you to easily add materials and turn the compost. You should also consider adding aeration holes to ensure that your compost gets enough oxygen to break down efficiently, and you can start using your bin to turn food scraps and yard waste into nutrient-rich soil for your garden.
Adding Ventilation and Access
Despite the importance of a solid structure, your compost bin needs openings for airflow and maintenance. You will need to add ventilation and access points to ensure your compost pile gets enough oxygen and can be easily turned.
Creating Vents
Venting your compost bin is vital for aerating the compost pile. You can create vents by drilling holes in the sides and bottom of the bin, allowing air to circulate and speed up the decomposition process.
Installing a Door
Beside the vents, you will need to install a door to access the compost pile. You can use a hinge and a latch to secure the door, making it easy to open and close.
Also, consider adding a door that is large enough to allow you to easily turn the compost pile, and make sure it is securely attached to the bin to prevent it from falling off. This will make maintaining your compost bin much easier and more efficient, allowing you to add new materials and turn the pile as needed.
Finishing Touches
For a polished look, you’ll want to put the final details on your compost bin. This includes adding a lid and applying a finish to protect the wood.
Adding a Lid
Against the elements, a lid will help keep your compost pile moist and warm, so you’ll want to attach it securely to the bin. You can use hinges and a latch to make it easy to open and close.
Applying a Finish
Between the wood and the weather, a finish will provide a barrier to prevent rot and decay, so you’ll want to choose a durable option like a waterproof sealant or a natural oil.
Plus, when applying a finish, you’ll have the opportunity to add a personal touch to your compost bin, such as a stain or paint color that matches your outdoor decor, making it a unique and functional addition to your garden or yard, and you can feel confident that your compost bin will withstand the elements and last for years to come.
Final Words
So, you have now gained the knowledge to build your own DIY compost bin. You can find more details on the process at How to Build a Compost Bin | MU Extension. With your new compost bin, you will be able to turn your food scraps into nutrient-rich soil, reducing your waste and creating a sustainable garden. You will be amazed at the positive impact it has on your garden and the environment.
FAQ
Q: What materials do I need to build a DIY compost bin?
A: To build a DIY compost bin, you will need some basic materials such as wooden pallets, wire mesh, a hammer, nails, and a saw. You can also use an old trash can or a plastic container as an alternative. Additionally, you will need some bedding materials like straw or shredded newspaper, and a mix of “green” materials (like food scraps and grass clippings) and “brown” materials (like dried leaves and twigs) to start the composting process.
Q: What is the ideal size for a DIY compost bin?
A: The ideal size for a DIY compost bin depends on the amount of waste you generate and the space you have available. A good size to start with is a bin that is at least 3x3x3 feet in size, as this will allow for adequate aeration and mixing of the materials. However, you can also build a smaller or larger bin depending on your specific needs and preferences.
Q: How do I assemble the DIY compost bin?
A: Assembling a DIY compost bin is a straightforward process. Start by collecting your materials and cutting the wooden pallets to the desired size. Use wire mesh to cover the sides and bottom of the bin to provide aeration and keep pests out. Use nails to attach the pallets together and form a sturdy structure. Make sure the bin is well-ventilated and has a lid to keep animals out and heat in.
Q: What can I compost in my DIY compost bin?
A: You can compost a wide variety of materials in your DIY compost bin, including food scraps, grass clippings, dried leaves, twigs, and shredded newspaper. Avoid adding meat, dairy, and oily foods as they can attract pests and create unpleasant odors. You can also add coffee grounds, tea bags, and eggshells to your compost pile. It’s also a good idea to balance “green” materials (like food scraps and grass clippings) with “brown” materials (like dried leaves and twigs) to create a healthy mix.
Q: How do I maintain my DIY compost bin?
A: To maintain your DIY compost bin, make sure to add materials regularly and mix them well to ensure aeration and decomposition. Keep the bin moist, like a damp sponge, and avoid overwatering, which can lead to unpleasant odors and pests. Every few weeks, turn the compost pile to aerate it and speed up the decomposition process. After a few months, you should have a rich, earthy compost that you can use to fertilize your plants and improve the soil structure in your garden.
