outdoor

How to Create a Comfortable Outdoor Dining Area

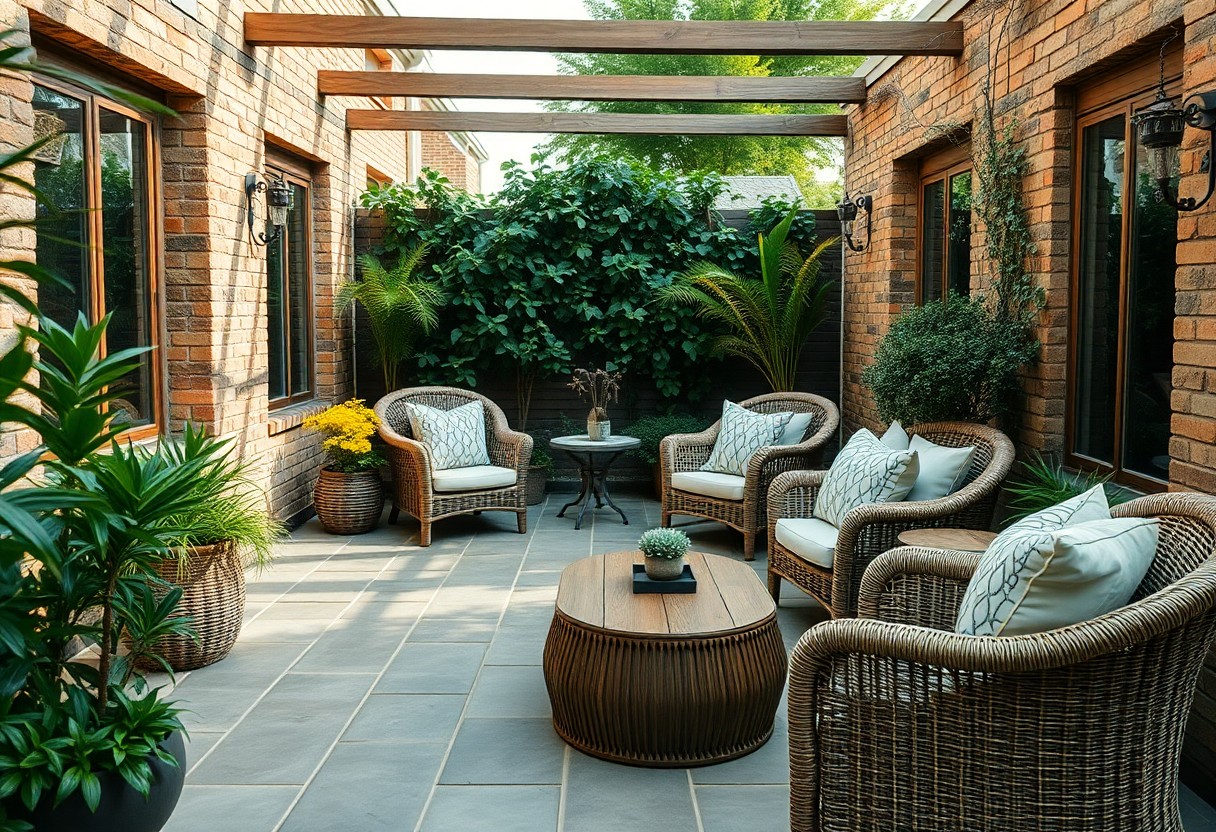
As you consider enhancing your outdoor space, you’ll want to prioritize creating a comfortable outdoor dining area where you can entertain and relax. You deserve a seamless transition from indoors to outdoors, and with the right elements, you can achieve this. Your outdoor dining space should be an extension of your home, reflecting your personal style and providing a welcoming atmosphere for your family and friends to gather and enjoy meals together. You will learn how to achieve this in the following post.
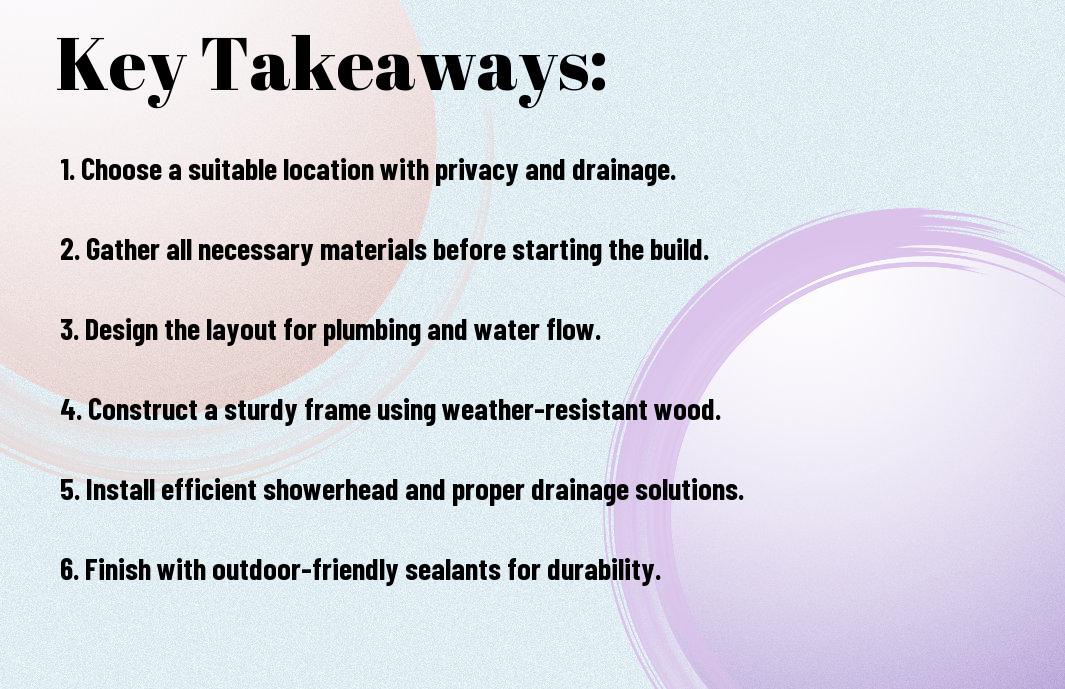
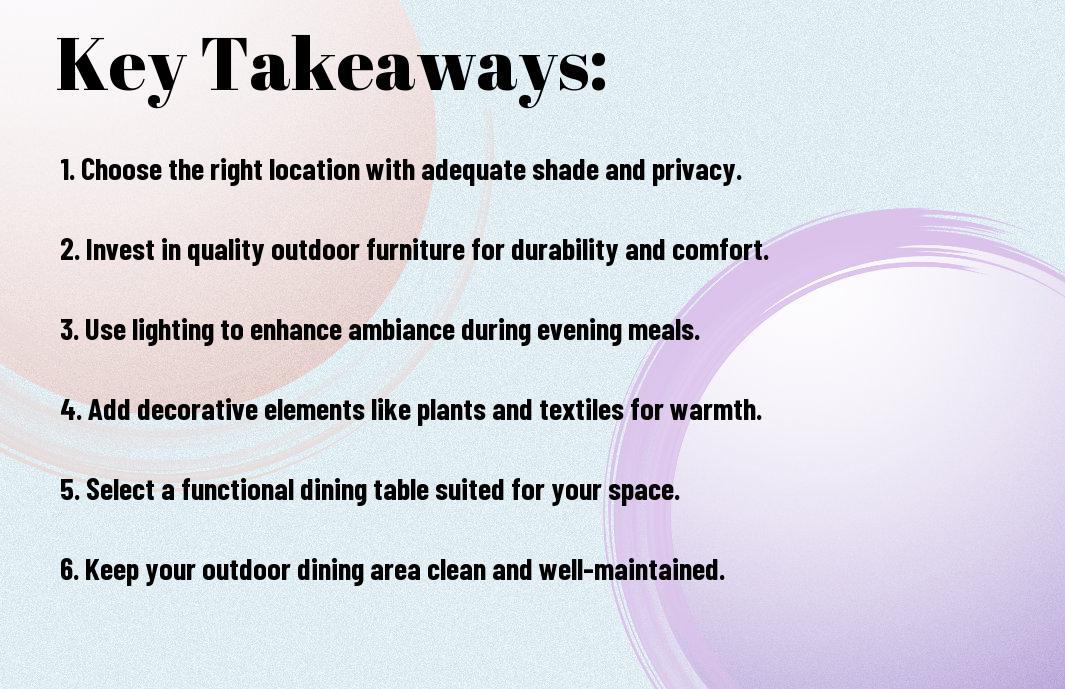
Key Takeaways:

To create a comfortable outdoor dining area, consider the following points:

  • Define the space with Functional Furniture that is suitable for outdoor use and provides ample seating and dining areas for your guests.
  • Use Natural Elements such as plants, flowers, and trees to create a warm and inviting atmosphere, and consider adding Lighting to extend the use of the space into the evening.
  • Incorporate Comfortable Textiles such as pillows, throws, and rugs to add warmth and texture to the space, and consider using Weather-Resistant Materials to ensure the longevity of your outdoor dining area.

Choosing the Right Location

To create a comfortable outdoor dining area, you need to choose a location that meets your needs. Consider the view, privacy, and accessibility when selecting a spot in your yard.

Assessing the Yard

At this stage, you should survey your yard to determine the best location for your outdoor dining area, taking into account the layout and existing features.

Considering the Climate

About the weather conditions in your area, you should think about how they will impact your outdoor dining experience, and plan accordingly to ensure your comfort.

With the climate in mind, you can take steps to mitigate its effects, such as installing a pergola or canopy to provide shade, or using outdoor heating or cooling elements to maintain a comfortable temperature, allowing you to enjoy your outdoor dining area year-round, regardless of the weather, and ensuring that your outdoor space is functional and enjoyable for you and your guests.

Selecting Comfortable Outdoor Furniture

Even when creating an outdoor dining area, you want to ensure that your furniture is comfortable and inviting. For inspiration, you can check out How to Create an Outdoor Dining Space: 5 Easy Tips to get started.

Tables and Chairs

Table settings and chair selections are vital to your outdoor dining experience. You will want to choose pieces that are durable, weather-resistant, and comfortable, allowing you to enjoy your outdoor space with family and friends.

Sectional Sofas and Ottomans

About the type of furniture you choose, consider sectional sofas and ottomans for a cozy and intimate atmosphere. They can add a touch of warmth and comfort to your outdoor dining area.

It is also important to consider the material and design of your sectional sofas and ottomans, as they will be exposed to the elements. You will want to choose pieces that are made from weather-resistant materials, such as wicker or recycled plastic, and that have a sturdy frame to withstand the outdoors, allowing you to enjoy your outdoor dining area for years to come.

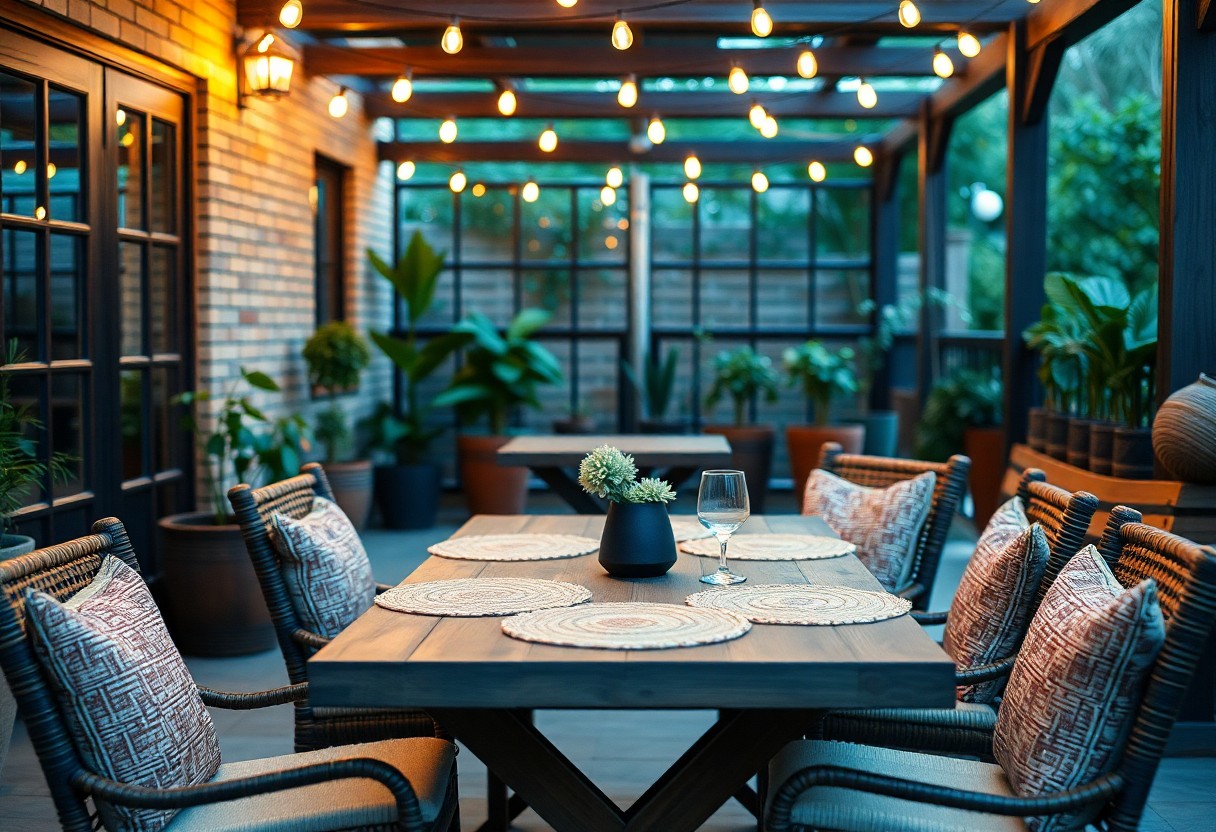
Adding Ambiance with Lighting

All outdoor dining areas benefit from proper lighting, which can greatly enhance the ambiance and overall experience. You can create a warm and inviting atmosphere by selecting the right lighting options for your space.

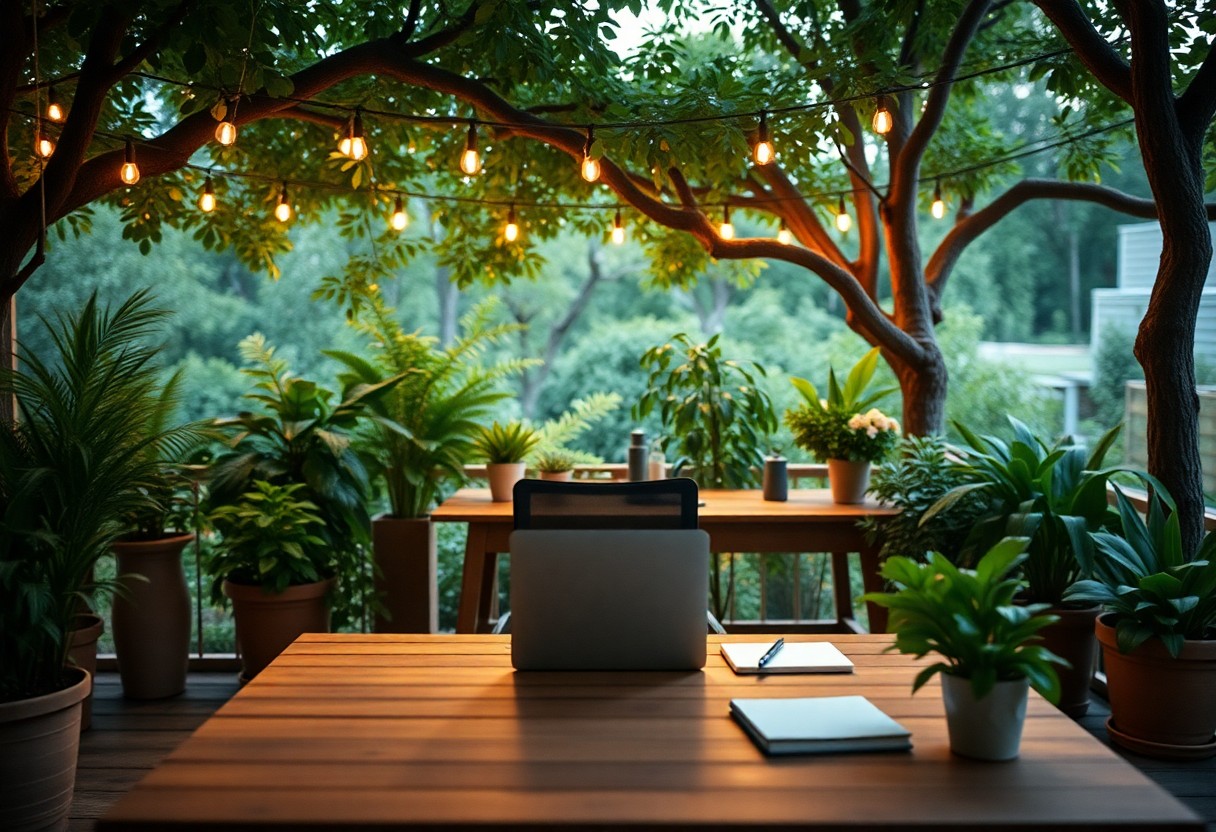
String Lights and Lanterns

Following the initial setup, afterwards, you can add string lights and lanterns to create a cozy and intimate ambiance in your outdoor dining area. You can hang them from trees, pergolas, or gazebos to add a touch of magic to your space.

Tabletop Torches and Candles

With the right lighting, you can set the mood for a lovely dinner party. You can use tabletop torches and candles to create pools of warm, soft light on your dining table, making the space feel more welcoming and intimate.

This type of lighting is especially effective in the evening, as it can create a sense of warmth and coziness, making your outdoor dining area feel like a secluded retreat. You can choose from a variety of styles and designs to match your outdoor decor, and adjust the lighting to suit your mood and the occasion, allowing you to create a unique and memorable experience for your guests.

Creating a Cozy Atmosphere

Now that you have your outdoor dining area set up, it’s time to think about creating a cozy atmosphere. You can draw inspiration from 50 Stylish & Functional Outdoor Dining Rooms to make your space inviting and warm.

Textiles and Rugs

Along with comfortable seating, you’ll want to add textiles and rugs to your outdoor dining area to create a cozy feel. You can choose weather-resistant fabrics and rugs that complement your outdoor decor.

Plants and Greenery

The addition of plants and greenery can greatly enhance the ambiance of your outdoor dining area. You can choose low-maintenance plants that thrive in outdoor conditions.

This will not only purify the air and improve the aesthetic of your space, but it will also create a natural and calming atmosphere, making your outdoor dining area the perfect spot to relax and enjoy your meals. You can place plants around the perimeter of your dining area or even hang them from the ceiling to add a touch of elegance.

Incorporating Functional Elements

After establishing the foundation of your outdoor dining area, you can start thinking about the functional elements that will make it comfortable and inviting. You’ll want to consider the flow of traffic, the placement of furniture, and the types of amenities that will enhance your outdoor dining experience.

Outdoor Kitchen and Bar

Practically, a well-designed outdoor kitchen and bar can be the centerpiece of your outdoor dining area, allowing you to prepare and serve meals with ease. You can install a grill, sink, and refrigerator to create a functional outdoor cooking space that meets your needs.

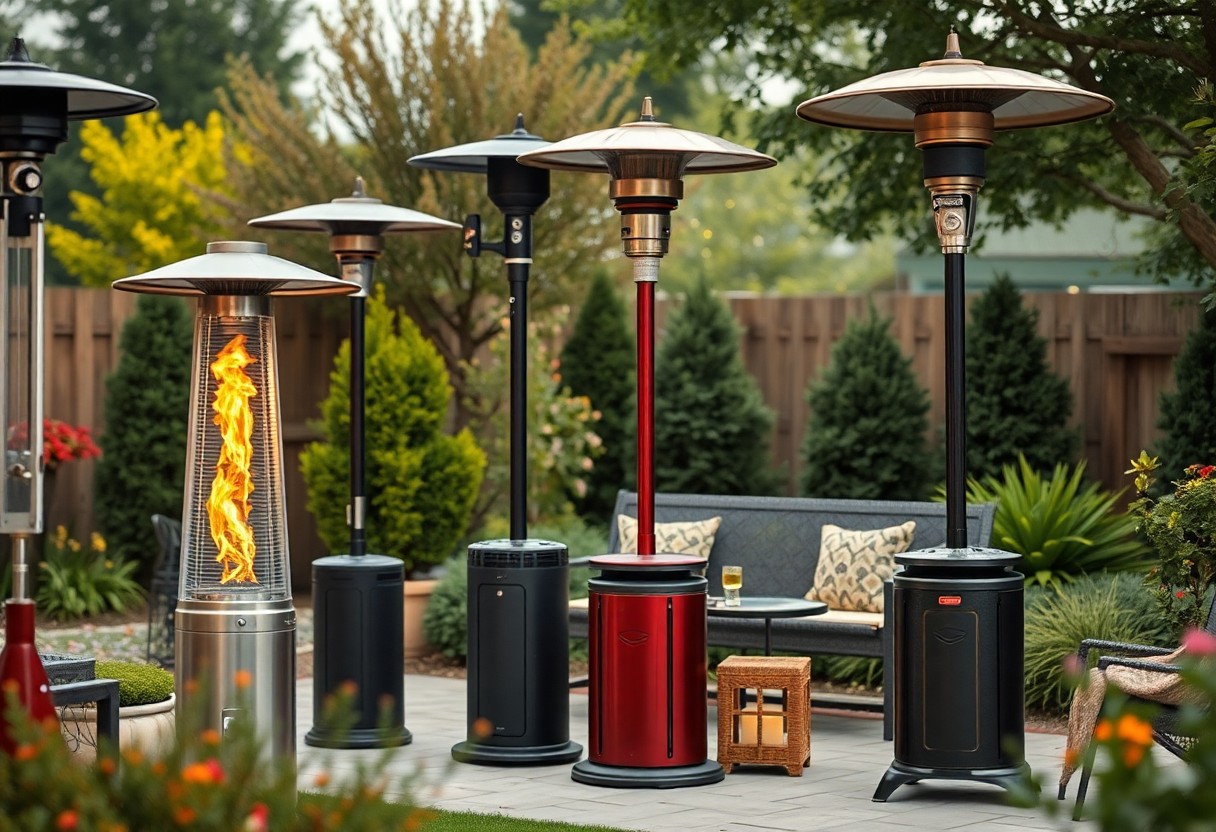
Heating and Cooling Options

Warmly, heating and cooling options can extend the use of your outdoor dining area into cooler or warmer months. You can install patio heaters, fire pits, or misting systems to create a comfortable temperature, allowing you to enjoy your outdoor space year-round.

In fact, heating and cooling options can greatly impact the ambiance of your outdoor dining area. As you consider your options, think about the climate in your area and how you can create a comfortable temperature range for your guests. You can also consider using portable options, such as outdoor heaters or fans, to provide flexibility and convenience.

Decorating the Space

Once again, your outdoor dining area’s ambiance is elevated by the decor you choose, so select items that reflect your personal style and complement the surroundings.

Personalized Decor

Often, outdoor decor that holds sentimental value can make your space truly special, so consider adding items that reflect your interests or hobbies to create a unique atmosphere that you’ll enjoy.

Seasonal Themes

The seasonal themes you choose can greatly impact the ambiance of your outdoor dining area, and selecting decor that matches the current season can create a cozy and inviting atmosphere that you and your guests will appreciate.

Plus, you can switch up your decor with the seasons to keep your outdoor dining area feeling fresh and new, and you can incorporate natural elements like leaves, flowers, or branches to bring in a touch of the outdoors and make your space feel more connected to nature.

Conclusion

So, you have successfully created a comfortable outdoor dining area by considering your space, selecting suitable furniture, and adding decorative elements. You can now enjoy your outdoor space with family and friends, enhancing your dining experience. With your carefully designed area, you will be able to relax and entertain in style, making the most of your outdoor space.

FAQ

Q: What are the necessary elements to consider when creating a comfortable outdoor dining area?

A: When creating a comfortable outdoor dining area, there are several elements to consider. First, choose a location that offers protection from the sun, wind, and rain. Consider the proximity to your kitchen and the view from the area. Next, select furniture that is durable, weather-resistant, and comfortable. Add lighting, such as string lights or table lamps, to create a warm ambiance in the evening. Finally, incorporate decorative elements like plants, flowers, or a fire pit to enhance the overall atmosphere and make the space inviting.

Q: How can I provide shade for my outdoor dining area?

A: Providing shade for your outdoor dining area can be achieved through various means. You can install a permanent structure like a gazebo or a pergola, or use a retractable awning or umbrella to block out the sun. Another option is to use natural shade providers like trees or a trellis with vines. If you’re looking for a more temporary solution, you can use a canopy or a sail shade to create a shaded area. Consider the size of your space and the direction of the sun when choosing a shading solution.

Q: What type of furniture is best suited for an outdoor dining area?

A: The best type of furniture for an outdoor dining area is one that is durable, weather-resistant, and comfortable. Consider using materials like wicker, teak, or recycled plastic, which can withstand various weather conditions. Look for furniture with cushions or pillows made from water-resistant fabrics, and opt for a dining set that includes a table with a sturdy base to prevent it from tipping over. Don’t forget to add decorative elements like throw pillows and blankets to make the space cozy and inviting.

Q: How can I keep my outdoor dining area clean and maintained?

A: Keeping your outdoor dining area clean and maintained is necessary to ensure it remains a comfortable and enjoyable space. Regularly sweep or blow leaves off the floor, and wipe down furniture with a damp cloth to remove dirt and debris. Clean any stains or spills on the furniture or floor immediately, and consider using a outdoor furniture cover to protect your furniture from the elements when not in use. Additionally, trim nearby plants and trees to prevent leaves and branches from falling into the area, and power wash the space periodically to keep it looking its best.

Q: What are some ways to create ambiance in my outdoor dining area?

A: Creating ambiance in your outdoor dining area can be achieved through various means. Add lighting, such as string lights, table lamps, or lanterns, to create a warm and cozy glow. Incorporate music or nature sounds, like a water feature, to create a relaxing atmosphere. Use decorative elements like candles, flowers, or plants to add color and texture to the space. Consider adding a fire pit or a chiminea to create a warm and inviting focal point, and don’t forget to use scented items like necessary oils or herbs to create a pleasant aroma. By incorporating these elements, you can create a comfortable and inviting outdoor dining area that’s perfect for entertaining or relaxing.

How to Build a DIY Outdoor Shower

You can create a refreshing outdoor shower in your own backyard with a few simple steps. As you consider building a DIY outdoor shower, you’ll need to assess your space and determine your water source. You’ll have to choose the right materials and design a system that meets your needs. With some planning and basic construction skills, you can build a functional and enjoyable outdoor shower that enhances your outdoor living experience.

Key Takeaways:

To build a successful DIY outdoor shower, consider the following points:

  • Choose a suitable location for your outdoor shower, taking into account drainage, privacy, and access to a water supply.
  • Select durable and water-resistant materials for the shower enclosure, floor, and walls, such as cedar wood, recycled plastic, or stainless steel.
  • Consider installing a solar-powered or low-flow showerhead to minimize water consumption and reduce your environmental impact while enjoying your outdoor shower.

Planning Your Outdoor Shower

While building a DIY outdoor shower, you’ll want to start by planning and researching different ideas, such as the 24 Beautiful Outdoor Shower Ideas for Your Backyard to get inspiration for your project.

Choosing the Perfect Location

Sheltered from the elements, you’ll want to choose a location for your outdoor shower that is level and well-drained, ensuring a safe and comfortable showering experience.

Considering Plumbing and Drainage

The first step in planning your outdoor shower is to consider the plumbing and drainage needs, taking into account the water source and waste management to ensure a functional and eco-friendly shower.

But as you examine deeper into the plumbing and drainage aspects, you’ll need to think about the type of shower head and handle you’ll use, as well as the drainage system, to ensure that your outdoor shower is not only functional but also efficient and environmentally friendly, and you can enjoy a refreshing shower in the comfort of your own backyard.

Gathering Materials and Tools

Now that you’re ready to start building your DIY outdoor shower, it’s time to gather the necessary materials and tools. You’ll need a list of specific items, including pipes, fixtures, and a water heater, to ensure your shower is functional and safe.

Essential Equipment for the Job

Before you begin, make sure you have the imperative equipment, such as a drill, saw, and wrench, to complete the task efficiently. You’ll also need a level, tape measure, and safety gear to protect yourself during the construction process.

Optional Features for a Luxury Shower

Along with the basic necessities, you may want to consider adding optional features to create a luxury shower experience. You can add a rain showerhead, body sprays, or a heated floor to make your outdoor shower feel like a spa.

Indeed, adding these luxury features can enhance your outdoor shower experience, and you can customize them to fit your personal preferences and budget. You can choose from a variety of materials and designs to create a unique and relaxing outdoor space that you’ll enjoy for years to come.

Building the Shower Base

For a sturdy outdoor shower, you need a solid base. You will be building the foundation, installing drainage, and ensuring the area is level and secure.

Constructing a Stable Foundation

By creating a level surface, you can ensure your shower base is stable and secure. You will be using materials like wood or concrete to create a flat surface, allowing you to build your shower with confidence.

Installing a Drainage System

To prevent water from accumulating, you will be installing a drainage system. You can use a french drain or a slope to direct water away from your shower area, keeping it safe and functional.

Stable drainage is key to a successful outdoor shower. As you install your drainage system, you will want to consider the slope and direction of the water flow, ensuring that it moves away from your shower and does not accumulate in the surrounding area, allowing you to enjoy your outdoor shower without worrying about water damage or accumulation.

Installing Plumbing and Fixtures

Once again, you’ll need to consider your outdoor shower’s specific needs when installing plumbing and fixtures, taking into account the water pressure and drainage system you have in place.

Connecting Water Supply Lines

By following the manufacturer’s instructions, you can connect your water supply lines to the outdoor shower, ensuring a secure and leak-free connection that will withstand the elements and regular use.

Choosing the Right Showerhead

Choosing a showerhead that suits your needs is important, as it will affect your overall showering experience, and you should consider factors such as water pressure, flow rate, and your personal preference for spray patterns.

Plumbing considerations will also play a role in selecting the right showerhead, as you’ll need to ensure it’s compatible with your outdoor shower’s plumbing system, and you may want to consider a showerhead with a built-in filter or other features that enhance your showering experience.

Adding Enclosure and Privacy

Many homeowners prefer to add an enclosure or screen around their outdoor shower to create a sense of seclusion. You can use natural materials like bamboo or wooden panels to create a beautiful and functional enclosure. This will not only provide privacy but also protect your outdoor shower from the elements.

Building a Fence or Screen

Above all, you’ll want to ensure that your enclosure is sturdy and well-constructed. You can use a variety of materials, including wood, metal, or plants, to create a unique and functional screen or fence around your outdoor shower.

Adding Doors or Curtains

Doors or curtains can be a great way to add an extra layer of privacy to your outdoor shower. You can choose from a variety of materials, including waterproof curtains or sliding doors, to create a comfortable and functional entrance to your shower.

Consequently, when choosing doors or curtains for your outdoor shower, you’ll want to consider the style and design of your enclosure. You can select doors or curtains that match your existing decor, or choose a bold and colorful option to add some personality to your outdoor space. As you make your selection, be sure to consider factors like durability, maintenance, and ease of use to ensure that your doors or curtains meet your needs and provide you with a comfortable and enjoyable outdoor shower experience.

Final Touches and Maintenance

Despite the DIY outdoor shower being functional, you’ll want to add some finishing touches to make it more enjoyable and durable, ensuring your outdoor shower remains a pleasant space for years to come.

Adding Decorative Elements

Against a backdrop of natural surroundings, you can add decorative elements like plants, stones, or a shower curtain to enhance the ambiance of your outdoor shower, making it a serene oasis.

Regular Cleaning and Upkeep

Regularly, you should inspect your outdoor shower for any damage or wear, taking care of issues promptly to prevent them from becoming major problems, and keeping your shower clean and safe for use.

Considering the exposure of your outdoor shower to the elements, you will need to establish a routine for cleaning and maintenance, checking for and replacing worn-out parts, and ensuring the water supply and drainage systems are functioning properly, allowing you to enjoy your outdoor shower throughout the seasons without any hassles.

Summing up

Presently, you have all the necessary information to build your own DIY outdoor shower. You can now design and construct a functional and enjoyable outdoor space that meets your needs. With your skills and creativity, you will be able to create a unique shower that enhances your outdoor experience. Your DIY outdoor shower will provide you with a refreshing and invigorating experience, allowing you to relax and unwind in the comfort of your own backyard.

FAQ

Q: What are the basic materials needed to build a DIY outdoor shower?

A: To build a DIY outdoor shower, you will need a few basic materials, including a shower enclosure or stall, a showerhead and faucet, a water heater or access to a hot water supply, a drainage system, and a floor or platform. You may also want to consider adding a roof or canopy, as well as a door or curtain for privacy. Additionally, you will need a variety of tools, such as a drill, saw, and wrench, to assemble and install the various components.

Q: How do I choose the right location for my DIY outdoor shower?

A: When choosing a location for your DIY outdoor shower, consider a spot that is level, well-drained, and protected from the wind. You will also want to ensure that the location is close to a water source and has access to a drainage system. Additionally, consider the proximity to your house and other outdoor living spaces, as well as any local building codes or regulations that may apply. It’s also a good idea to choose a location that receives some shade, especially if you plan to use the shower during the hottest part of the day.

Q: What type of water heater is best for a DIY outdoor shower?

A: There are several types of water heaters that can be used for a DIY outdoor shower, including tankless water heaters, solar water heaters, and propane-powered water heaters. The best type of water heater for your outdoor shower will depend on your budget, the size of the shower, and your access to electricity and other utilities. Tankless water heaters are a popular choice because they are energy-efficient and can provide a continuous supply of hot water. Solar water heaters are also a good option, especially if you live in a sunny climate, as they can provide free hot water and are environmentally friendly.

Q: How do I ensure that my DIY outdoor shower is safe and functional?

A: To ensure that your DIY outdoor shower is safe and functional, make sure to follow all safety guidelines and regulations, including those related to electrical and plumbing installations. Use high-quality materials and components, and follow the manufacturer’s instructions for installation and use. You should also test the shower regularly to ensure that it is working properly and make any necessary repairs. Additionally, consider adding safety features such as non-slip flooring, handrails, and a thermostat to regulate the water temperature.

Q: Can I build a DIY outdoor shower without any plumbing or construction experience?

A: While it is possible to build a DIY outdoor shower without any plumbing or construction experience, it may be more challenging and could potentially lead to safety issues or costly repairs. If you are not experienced in these areas, it’s a good idea to consider hiring a professional or seeking guidance from a knowledgeable friend or family member. You can also find many online resources and tutorials that can provide step-by-step instructions and helpful tips for building a DIY outdoor shower. Additionally, consider starting with a simple design and gradually adding more complex features as you gain experience and confidence in your abilities.

How to Choose the Right Outdoor Heater

You step out into the chill of evening, and your outdoor space beckons. But the cold drives you back. You need a heater that will let you enjoy your patio, deck, or yard on your terms. As you consider your options, you’ll face a array of choices. Your decision will depend on your specific needs, the size of your space, and the type of heat you prefer. You’ll need to weigh these factors to find the heater that’s right for you.

Key Takeaways:

To select the most suitable outdoor heater for your needs, consider the following factors:

  • Assess the space where the heater will be used to determine the required heat output and coverage area.
  • Consider the type of heater, such as electric, gas, or infrared, and evaluate their respective efficiency and safety features.
  • Evaluate the portability and durability of the heater, as well as any additional features like timers or thermostats that may enhance its convenience and energy savings.

Types of Outdoor Heaters

Your outdoor heating needs are unique, and choosing the right type is imperative. Consider the following:

  • Electric heaters
  • Gas heaters

This decision will depend on your specific situation, as seen in the table below:

Type Description
Electric Convenient, low-cost
Gas High-heat, portable
Infrared Energy-efficient, warm
Propane Powerful, versatile
Tabletop Compact, social

Electric Heaters

Any outdoor space can be warmed with electric heaters, a simple and efficient option for you.

Gas Heaters

Outdoor gatherings are perfect for gas heaters, providing a cozy ambiance for you and your guests.

Plus, gas heaters offer a high level of heat output, making them ideal for large outdoor areas, and you can choose from a variety of styles to fit your needs, from permanent installations to portable units that can be easily moved around your outdoor space.

Safety Considerations

Assuming you want to enjoy your outdoor heater without worrying about accidents, consider the risks involved. You need to think about the safety of your family and friends when using an outdoor heater.

Placement and Clearance

Around the area where you plan to put your heater, keep a safe distance from flammable objects. You should place your heater on a stable surface, away from overhanging branches or other hazards.

Fuel and Electrical Safety

Along with the type of heater, you should consider the fuel and electrical safety aspects. You need to handle the fuel and electrical connections with care to avoid any accidents.

Electrical safety is a concern when using outdoor heaters, especially those that are powered by electricity. You should ensure that your heater is certified by a reputable testing organization and follow the manufacturer’s instructions for installation and maintenance. You should also keep an eye on your heater’s electrical cord and avoid overheating, which can cause a fire. Your safety is in your hands, and taking these precautions will help you enjoy your outdoor heater without worrying about accidents.

Climate and Usage

Keep your outdoor space’s climate in mind when choosing a heater. Consider the temperature, humidity, and frequency of use to ensure you get the right one.

Temperature and Humidity

With varying temperatures and humidity levels, you’ll want to choose a heater that can handle your area’s conditions.

Climate Type Heater Features
Low temperatures High BTU output
High humidity Mist-resistant materials

Frequency of Use

One of the key factors to consider is how often you plan to use your outdoor heater. You’ll want to choose a model that meets your needs, whether it’s for occasional gatherings or regular use.

A well-chosen heater will provide efficient and effective heat, allowing you to enjoy your outdoor space comfortably, and you should consider the cost of running the heater, as well as its durability and maintenance requirements, to ensure it fits your lifestyle and budget, so you can get the most out of your outdoor space.

Features and Accessories

After selecting the type of outdoor heater, you’ll need to consider the features and accessories that come with it. You’ll want to think about what you need to get the most out of your heater.

Heating Power and Efficiency

Among the key considerations is the heating power and efficiency of your outdoor heater. You’ll want to choose a heater that can warm your space effectively, while also being energy efficient to save you money.

Additional Features and Options

Features such as timers, thermostats, and remote controls can enhance your outdoor heating experience. You’ll want to think about what features are important to you and your outdoor space.

Features like mobility, durability, and safety certifications are also important to consider when choosing an outdoor heater. You’ll want to look for a heater that is easy to move around, can withstand the elements, and has been certified safe for outdoor use. This will ensure you can enjoy your outdoor space comfortably and safely.

Budget and Cost

Despite the excitement of choosing an outdoor heater, you must consider your budget. Your financial situation will influence your decision, so it’s vital to think about the costs involved.

Initial Purchase Price

Conversely, the initial purchase price is just the beginning. You’ll find that prices vary greatly depending on the type and quality of the heater, so you’ll need to weigh your options carefully to find the best value for your money.

Operating and Maintenance Costs

Prior to making a decision, you should think about the ongoing costs. You’ll want to consider how much it will cost to operate and maintain your outdoor heater, as these costs can add up over time.

Costs can quickly escalate if you choose a heater that is inefficient or requires frequent repairs. You should factor in the cost of fuel, replacement parts, and any necessary maintenance when calculating the total cost of ownership, helping you make a more informed decision about which outdoor heater is right for you.

Maintenance and Upkeep

Not all outdoor heaters are created equal, and you’ll want to consider the maintenance requirements of your chosen model. Check out a Patio Heater Buying Guide: Find the Perfect Fit to learn more about what to look for.

Cleaning and Inspection

Against the elements, your outdoor heater will accumulate dirt and debris, so you’ll need to clean it regularly to ensure it runs efficiently. Check your owner’s manual for specific cleaning instructions.

Troubleshooting and Repair

Behind every well-functioning outdoor heater is a bit of troubleshooting, and you’ll need to identify issues before they become major problems. You’ll need to stay on top of repairs to keep your heater running smoothly.

Repair your outdoor heater as soon as you notice any issues, whether it’s a faulty ignition or a broken heating element. You’ll save yourself time and money in the long run by addressing problems early, and you’ll be able to enjoy your outdoor space year-round with a reliable and efficient heater at your disposal, keeping you warm and cozy.

To wrap up

Drawing together the key points, you now have a solid foundation to choose the right outdoor heater for your needs. You’ve considered your space, climate, and preferences. With this knowledge, you can make an informed decision, selecting a heater that efficiently warms your outdoor area, ensuring your gatherings are cozy and enjoyable, and your outdoor space is warm and inviting, tailored to your lifestyle and budget.

FAQ

Q: What types of outdoor heaters are available, and which one is best for my needs?

A: There are several types of outdoor heaters, including propane, electric, and infrared heaters. The best type for your needs will depend on the size of the area you want to heat, the fuel source you prefer, and the level of heat output you require. Propane heaters are great for large areas and provide a high level of heat, while electric heaters are more energy-efficient and better suited for smaller areas. Infrared heaters, on the other hand, provide a more targeted heat source and are ideal for heating specific areas, such as a patio or deck.

Q: What safety features should I look for when choosing an outdoor heater?

A: When choosing an outdoor heater, there are several safety features you should look for to ensure safe and enjoyable use. These include a sturdy and stable base to prevent tipping, a protective casing to prevent burns, and an automatic shut-off feature in case the heater is tipped over or malfunctioning. You should also look for a heater with a high level of weather resistance, such as a waterproof or rust-resistant coating, to protect against the elements.

Q: How do I determine the right size of outdoor heater for my space?

A: To determine the right size of outdoor heater for your space, you need to calculate the square footage of the area you want to heat. A general rule of thumb is to choose a heater that can produce 10-20 watts of heat per square foot of space. For example, if you have a 100 square foot patio, you will need a heater that can produce 1000-2000 watts of heat. You should also consider the level of insulation in your space, as well as the desired temperature, when selecting a heater.

Q: Are outdoor heaters energy-efficient, and how much will they increase my energy bill?

A: The energy efficiency of outdoor heaters can vary depending on the type and model. Propane heaters tend to be less energy-efficient than electric heaters, but they can provide a higher level of heat output. Infrared heaters, on the other hand, are generally more energy-efficient than traditional space heaters. The cost of running an outdoor heater will depend on the type and model, as well as the frequency and duration of use. However, as a general estimate, you can expect to pay around $0.10-0.20 per hour to run a small outdoor heater, and up to $1.00 per hour to run a larger one.

Q: Can outdoor heaters be used in covered or enclosed areas, such as a gazebo or pergola?

A: While outdoor heaters can be used in covered or enclosed areas, such as a gazebo or pergola, you need to exercise caution to ensure safe use. Make sure the area is well-ventilated to prevent the buildup of carbon monoxide or other fumes, and keep the heater at least 3 feet away from any flammable materials. You should also choose a heater that is specifically designed for use in covered or enclosed areas, as some models may not be suitable for these types of spaces. Always follow the manufacturer’s instructions and take necessary safety precautions to ensure safe and enjoyable use.

How to Create a DIY Outdoor Workspace

Planning

A well-planned outdoor workspace is imperative for a successful DIY project. You’ll want to consider the layout, materials, and purpose of your space to ensure it meets your needs.

Assessing Your Space

On the path to creating your ideal outdoor workspace, you’ll need to evaluate the area where you plan to build. You’ll be looking at the size, shape, and condition of your yard or patio.

Defining Your Needs

Your needs and goals will drive the design of your outdoor workspace. You’ll want to think about what you’ll be using the space for, whether it’s woodworking, gardening, or another activity.

Also, as you define your needs, consider the tools and equipment you’ll require, as well as any storage or seating you’ll need. You’ll be using this space regularly, so make sure it’s functional and comfortable for you.

Key Takeaways:

To create a productive and functional DIY outdoor workspace, consider the following points:

  • Choose a shaded area or create a canopy to protect yourself from the elements, ensuring a comfortable working environment.
  • Invest in durable and weather-resistant materials for your outdoor furniture and decor to withstand various weather conditions.
  • Consider ergonomic and space-saving designs for your workspace to maximize productivity and minimize clutter, allowing you to focus on your work in a peaceful outdoor setting.

    Designing

    Even with a solid plan, designing your outdoor workspace can be a daunting task. You’ll need to consider the space you have available, the type of work you’ll be doing, and the style you’re aiming for. Take your time, and don’t be afraid to get creative and try out different ideas.

    Choosing a Layout

    After you have a sense of your space and style, it’s time to think about the layout. You’ll want to consider the flow of your workspace, where you’ll place your tools and materials, and how you’ll move around the area. Think about your workflow and how you can optimize your space to make your projects easier and more efficient.

    Selecting Materials

    Before you start building, you’ll need to decide on the materials you’ll use. You’ll want to choose materials that are durable, weather-resistant, and suitable for outdoor use. Consider using recycled or reclaimed materials to add some character to your space.

    Layout is everything when it comes to your outdoor workspace, and the materials you choose will play a big role in determining the overall look and feel of your space. You’ll want to think about the type of projects you’ll be working on and choose materials that will withstand the elements and your workflow. Consider using materials like cedar, redwood, or composite materials that are designed to withstand the outdoors, and don’t be afraid to add some personal touches to make your space truly unique and functional for your needs.

    Building

    There’s no denying that building your DIY outdoor workspace is the most exciting part of the process. You get to see your vision come to life, and with the right tools and materials, you’ll be well on your way to creating the perfect spot to tackle your projects.

    Preparing the Site

    Upon arriving at your building site, you’ll need to clear the area of any debris and level the ground to ensure a stable foundation for your workspace. You’ll be surprised at how much of a difference a clean slate can make in the overall quality of your build.

    Constructing the Workspace

    Across the board, the key to a successful build is a solid plan and attention to detail. You’ll want to consider the size and layout of your workspace, as well as the materials you’ll need to bring it all together. As you start constructing, take your time and don’t be afraid to get creative.

    Considering the type of projects you’ll be working on, you may want to add specialty features to your workspace, such as built-in shelving or a workbench. You’ll appreciate the extra storage and functionality as you start tackling your outdoor projects, and your workspace will quickly become your new favorite spot to spend time.

    Furnishing

    Your outdoor workspace needs the right stuff to get the job done. You’ll want to choose furniture that’s durable and comfortable, so you can work outside without a hitch.

    Choosing Outdoor-Friendly Furniture

    About the furniture, consider using recycled plastic or cedar wood, they’re perfect for withstanding the elements. Look for pieces that are sturdy and can handle your work style.

    Adding Lighting and Electronics

    About the illumination, string lights or lanterns can add a nice ambiance, and make sure to get outdoor-rated electronics to keep you working safely and efficiently.

    At this point, you’re probably thinking about how to power all these fancy lights and gadgets. You can use solar panels or outdoor outlets to keep your workspace lit and charged, just make sure to follow safety guidelines to avoid any electrical mishaps.

    Decorating

    Not only does your outdoor workspace need to be functional, but it also needs to be a space that inspires you. You’ll want to add some decorative elements that reflect your personal style and make you feel good about spending time outside.

    Adding Personal Touches

    Against the backdrop of your outdoor setting, you can add personal touches that make your workspace feel truly yours. You can hang artwork, add colorful rugs, or bring in vibrant textiles to create a space that feels like an extension of your indoor office.

    Incorporating Plants and Greenery

    Around your outdoor workspace, you can incorporate plants and greenery to bring in a natural touch. You can choose low-maintenance plants like succulents or herbs that are easy to care for and add a pop of color to your space.

    Also, when incorporating plants and greenery, you’ll want to consider the amount of sunlight and water your outdoor workspace gets. You can choose plants that thrive in shady areas or use self-watering planters to make maintenance a breeze. As you add plants and greenery, you’ll start to feel like your outdoor workspace is a peaceful oasis that inspires your best work.

    Safety and Maintenance

    Once again, you’ll want to prioritize your well-being while working outdoors, so be sure to check out some expert advice on How to Create a Functional Outdoor Workspace to get your project started on the right foot.

    Ensuring Electrical Safety

    To avoid any electrical hazards, you’ll need to take necessary precautions when setting up your outdoor workspace, especially if you’re using power tools or lighting.

    Regular Maintenance Tips

    Maintenance is key to keeping your outdoor workspace in top shape, so you’ll want to:

    • check your tools regularly
    • keep your workspace clean

    The right maintenance routine will help you stay safe and productive.

    With your safety and maintenance plan in place, you can focus on the fun part – creating your DIY outdoor workspace. You’ll want to:

    • oil your tools
    • cover your workspace

    The end result will be a space that’s both functional and enjoyable to work in.

    You’re probably itching to get outside and start building something with your own two hands. Well, you’ve come to the right place. Creating a DIY outdoor workspace is a great way to expand your workshop and take advantage of fresh air and natural light. Your backyard is just waiting to be transformed into a functional and comfortable spot where you can tinker, build, and create to your heart’s content. Get ready to hammer out a space that’s all your own.

    Final Words

    The journey to creating your DIY outdoor workspace is now complete, and you should be proud of your handy work. You’ve transformed your outdoor space into a functional area where you can work and enjoy nature. For more inspiration, check out DIY Outdoor Desk – How to Build projects to take your workspace to the next level, and make your outdoor workspace truly your own.

    FAQ

    Q: What are the necessary materials needed to create a DIY outdoor workspace?

    A: To create a DIY outdoor workspace, you will need a few necessary materials, including a durable and weather-resistant outdoor table or desk, a comfortable and sturdy chair, a reliable source of power, such as a solar-powered generator or an outdoor outlet, and a reliable internet connection, such as a mobile hotspot or a wireless range extender. Additionally, you may also want to consider investing in a waterproof canopy or umbrella to provide shade and protection from the elements.

    Q: How do I choose the perfect location for my DIY outdoor workspace?

    A: Choosing the perfect location for your DIY outdoor workspace is important to ensure that you have a comfortable and productive working environment. Consider a spot that receives plenty of natural light, is protected from harsh weather conditions, and is close to a power source. You should also consider the noise level and distractions in the area, and choose a location that is quiet and private. Additionally, think about the accessibility of the location, and choose a spot that is easy to get to and has enough space to accommodate your outdoor workspace.

    Q: What are some ways to optimize my DIY outdoor workspace for productivity?

    A: There are several ways to optimize your DIY outdoor workspace for productivity, including adding plants and greenery to improve air quality and reduce stress, investing in a comfortable and ergonomic chair and desk, and using a noise-cancelling headset or playing calming music to minimize distractions. You can also use a task management tool or app to stay organized and focused, and consider implementing a schedule or routine to help you stay on track. Additionally, you can also add some decorative elements, such as artwork or inspirational quotes, to create a motivating and creative environment.

    Q: How can I ensure that my DIY outdoor workspace is safe and secure?

    A: Ensuring that your DIY outdoor workspace is safe and secure is important to protect your equipment and prevent accidents. Make sure that your outdoor workspace is well-lit, especially at night, and consider investing in motion-sensitive lights or security cameras to deter intruders. You should also keep your valuables, such as laptops and tools, secure and out of sight, and consider using a lockbox or safe to store sensitive equipment. Additionally, be mindful of weather conditions, such as strong winds or heavy rain, and take necessary precautions to protect your equipment and workspace.

    Q: What are some creative ways to decorate and personalize my DIY outdoor workspace?

    A: There are many creative ways to decorate and personalize your DIY outdoor workspace, including adding colorful rugs, pillows, and throws to create a cozy and inviting atmosphere, using string lights or lanterns to add ambiance and warmth, and incorporating natural elements, such as branches or stones, into your decor. You can also add personal touches, such as family photos or artwork, to make your outdoor workspace feel more like your own. Consider adding a few plants or a small herb garden to bring in some greenery and freshness, and don’t be afraid to experiment and try out new and unique decorating ideas to make your outdoor workspace truly one-of-a-kind.

How to Add Texture to Your Outdoor Space

You step out into your yard, and the space feels flat, like a canvas waiting for brushstrokes of depth. Your outdoor area yearns for dimension, for tactile elements that invite touch and exploration. As you look around, you consider the possibilities: rough-hewn wood, soft grasses, and vibrant flowers. You envision a space that’s richly layered, where your senses come alive with every step, and every glance. Now, you’re ready to add texture, to transform your outdoor space into a sensory haven.

Key Takeaways:

To enhance your outdoor space, consider the following points:

  • Adding planters and greenery can introduce different textures and dimensions to your outdoor area, creating a visually appealing atmosphere.
  • Incorporating hardscapes such as stone or brick can add depth and contrast to your outdoor space, making it more inviting and interesting.
  • Using outdoor furniture with varying materials and patterns, such as wicker or rattan, can bring warmth and character to your outdoor space, making it feel more cozy and inviting.

    Adding Texture with Plants

    The addition of plants to your outdoor space can greatly enhance its texture. You can mix different species to create a unique blend of colors and textures, making your space more inviting.

    Native Plants and Grasses

    Around your yard, native plants and grasses can be used to add texture, providing a natural look that blends with the surroundings, allowing you to create a seamless transition between your outdoor space and the environment.

    Ornamental Plants and Flowers

    Beneath the sun, ornamental plants and flowers can add a pop of color and texture to your outdoor space, giving you the opportunity to express your personal style and create a unique ambiance.

    Grasses and other foliage can be combined with ornamental plants and flowers to create a layered, dimensional look, allowing you to experiment with different textures and colors, making your outdoor space a true reflection of your taste and personality.

    Incorporating Hardscapes

    Clearly, adding texture to your outdoor space can be achieved by incorporating hardscapes, which provide a solid foundation for your design. You can use various materials to create a unique and inviting atmosphere, enhancing your overall outdoor experience.

    Pavers and Stone

    Around every corner, you’ll find opportunities to incorporate pavers and stone, adding depth and visual interest to your outdoor space. You can use them to create pathways, patios, or retaining walls, bringing texture and variation to your landscape.

    Bricks and Concrete

    Behind your design choices, bricks and concrete can provide a solid backbone, offering a range of textures and colors to choose from. You can use them to create a cohesive look or mix and match for a more eclectic feel, adding character to your outdoor space.

    Concrete, in particular, can be molded and textured to fit your design, allowing you to create unique patterns and designs. You can stamp, stain, or etch concrete to add visual interest, making it a versatile choice for your hardscape needs, and allowing you to personalize your outdoor space to fit your style.

    Creating Contrast with Furniture

    Many outdoor spaces lack depth due to uniform furniture. You can add texture by mixing materials, as seen in 13 Ways to Use Color and Texture in Your Landscape Design. This approach creates visual interest and invites conversation.

    Wicker and Rattan

    The natural beauty of wicker and rattan furniture brings warmth to your outdoor space, adding a cozy texture that complements plants and flowers.

    Metal and Wood

    Woven metal and wood furniture offers a sleek, modern contrast, blending industrial and natural elements to create a unique atmosphere in your outdoor space.

    Consequently, as you explore metal and wood combinations, you’ll find that the key to success lies in balancing opposing textures. You can pair rough-hewn wood with smooth metal, or combine reclaimed wood with metallic accents, to create a space that reflects your personal style and invites you to linger.

    Utilizing Outdoor Rugs

    After selecting the perfect outdoor furniture, you can add warmth and texture to your space with outdoor rugs. They define different areas and bring a sense of comfort to your patio or deck.

    Natural Fiber Rugs

    Along with their unique textures, natural fiber rugs like sisal or jute add a touch of earthy charm to your outdoor space, blending seamlessly with the surrounding environment.

    Synthetic Rugs

    For a more durable and low-maintenance option, you can choose synthetic rugs that mimic the look of natural fibers, offering a wide range of styles and colors to complement your outdoor decor.

    And as you explore synthetic rugs, you’ll find they’re often made from recycled materials, resistant to fading, and easy to clean, making them a practical choice for your outdoor space, allowing you to enjoy your area without worrying about upkeep.

    Enhancing with Lighting

    Unlike other design elements, lighting can make or break your outdoor space’s ambiance. You can learn more about enhancing your space by checking out How To Integrate Texture, Color, And Dimension Into Your Outdoor Living Space to create a cohesive look.

    String Lights

    Lights that are strung up around your patio or deck can add a warm glow to your outdoor space, making it feel more inviting and cozy, allowing you to enjoy your evenings outdoors.

    Lanterns and Sconces

    Strings of lanterns or sconces can add a touch of elegance to your outdoor space, providing soft, warm lighting that highlights your textures and colors.

    Plus, lanterns and sconces come in a variety of styles and materials, allowing you to choose the perfect fit for your space, and with the right placement, you can create a warm and welcoming atmosphere that you’ll enjoy spending time in.

    Combining Elements

    Keep your outdoor space engaging by mixing different elements. You’ll create a unique atmosphere that invites relaxation and conversation.

    Mixing Materials

    Any combination of natural and synthetic materials will add depth to your space. You can pair wood with metal or stone with fabric to create a layered look.

    Balancing Texture and Color

    For a cohesive look, balance your textures with a thoughtful color palette. You’ll want to select colors that complement your textures, creating a visually appealing outdoor space.

    Considering the interplay between texture and color, you’ll find that certain textures pop against specific hues. You can use bold colors to accentuate smooth textures or mute bright colors with rougher textures, allowing you to experiment and find the perfect balance for your outdoor space.

    Summing up

    Considering all points, you’ve learned how to add texture to your outdoor space. You can now enhance your area with different elements. For more information, visit Adding Texture and Color to Outdoor Spaces to create a unique ambiance in your yard, making it your own haven. Your outdoor space will become a reflection of your style, inviting you to relax and enjoy nature.

    FAQ

    Q: What are the benefits of adding texture to my outdoor space?

    A: Adding texture to your outdoor space can enhance the aesthetic appeal and create a more inviting atmosphere. Texture can add depth, visual interest, and tactile experience to your outdoor area, making it more engaging and comfortable for relaxation and entertainment. By incorporating different textures, you can create a unique and personalized outdoor space that reflects your style and personality.

    Q: What are some ways to add texture to my outdoor space?

    A: There are several ways to add texture to your outdoor space, including incorporating natural elements like stone, brick, or wood, using outdoor rugs and mats, adding plants and greenery with varying foliage, and installing water features or fire pits. You can also use decorative elements like throw pillows, blankets, and wall hangings to add texture and visual interest to your outdoor furniture and decor.

    Q: How can I choose the right textures for my outdoor space?

    A: To choose the right textures for your outdoor space, consider the style and theme you want to achieve, as well as the climate and surroundings. For example, if you live in a coastal area, you may want to incorporate natural textures like driftwood or sea grass, while a desert landscape might call for more rustic textures like terra cotta or sandstone. You should also think about the functionality and durability of the textures you choose, as well as how they will withstand the elements.

    Q: Can I add texture to my outdoor space on a budget?

    A: Yes, you can add texture to your outdoor space without breaking the bank. Consider repurposing or upcycling items you already have, like old pallets or containers, to create unique textured elements. You can also shop for second-hand or discounted outdoor decor, or DIY your own textured elements using natural materials like pinecones, branches, or stones. Additionally, start small and focus on one area or element at a time to make the project more manageable and affordable.

    Q: How can I maintain and protect the textures in my outdoor space?

    A: To maintain and protect the textures in your outdoor space, make sure to clean and inspect them regularly, especially after harsh weather conditions. Use protective sealants or coatings to shield natural elements like wood or stone from the elements, and apply fabric protectants to outdoor textiles like rugs and upholstery. You should also consider storing fragile or sensitive textured elements during extreme weather conditions, like heavy rain or intense sunlight, to prevent damage and extend their lifespan.

Skip to content