Home and Garden

How to Create a DIY Outdoor Bar Area

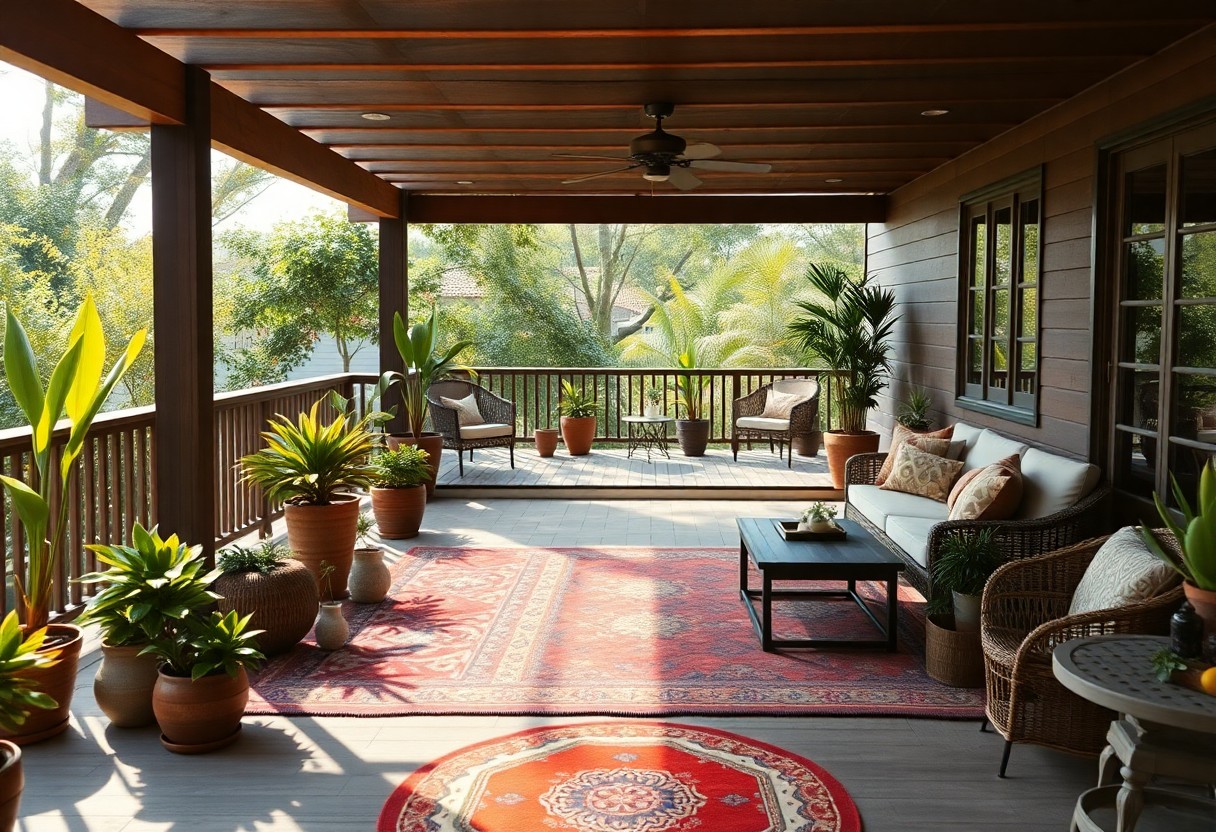
You stand in your backyard, envisioning a space to gather and share drinks with friends. Your outdoor bar area starts with a plan, and you’re about to build it yourself. With a few simple steps, you’ll transform your yard into a welcoming spot. You’ll choose materials, design the layout, and construct your bar, creating a space that’s uniquely yours.
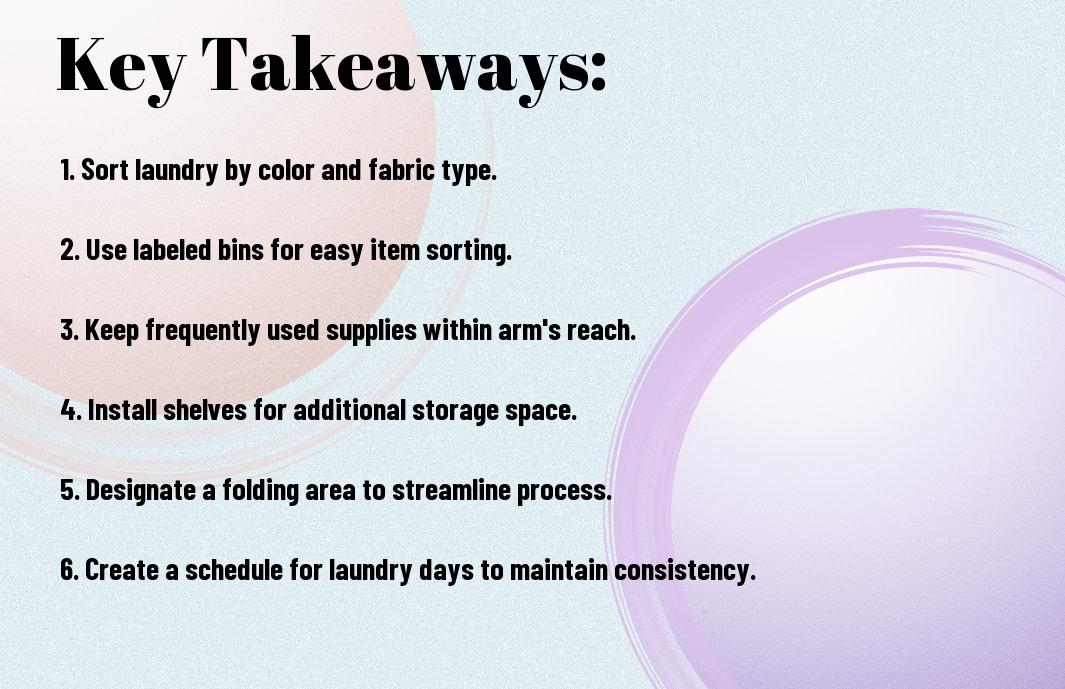
Key Takeaways:

To create a functional and enjoyable DIY outdoor bar area, consider the following points:

  • Define your space and budget to determine the size and features of your bar area, ensuring it fits your needs and lifestyle.
  • Choose the right materials and furniture, such as durable wood or metal frames, and weather-resistant fabrics, to withstand outdoor conditions and provide comfortable seating.
  • Combine lighting, decor, and entertainment elements, like string lights, plants, and a sound system, to create a warm and inviting atmosphere that enhances your outdoor entertaining experience.

Planning Your Outdoor Bar Area

Before you start building, consider your space and needs. Check out a Weekend DIY: Building an Outdoor Bar for inspiration.

Assessing Your Space

Plotting your yard’s layout, you’ll determine the best spot for your bar. Consider the sunlight, shade, and foot traffic.

Defining Your Style

By thinking about your entertaining style, you’ll choose the right design and features for your bar.

And as you envision your outdoor bar, think about the materials and decor that reflect your taste, from rustic to modern, and the activities you’ll be doing there, like cocktail-making or dining.

Choosing the Right Materials

It is imperative to select materials that can withstand the elements when creating your DIY outdoor bar area. You need to consider the climate and weather conditions in your area to ensure your bar area remains functional and aesthetically pleasing.

Durable Fabrics and Surfaces

Along with the frame and structure, you should choose durable fabrics and surfaces for your outdoor bar area, such as waterproof fabrics, stainless steel, and recycled plastic.

Weather-Resistant Equipment

With the right equipment, your outdoor bar area will be able to withstand various weather conditions. You should opt for weather-resistant equipment, such as a balcony bar or an outdoor refrigerator, to keep your drinks cold and fresh.

Choosing the right weather-resistant equipment for your outdoor bar area can make all the difference in its durability and functionality. You will want to select equipment that is designed to withstand extreme temperatures, humidity, and exposure to the sun, ensuring your outdoor bar area remains functional and enjoyable for years to come. You should look for equipment with features such as rust-proof coating, waterproof seals, and UV-resistant materials to protect your investment.

Building the Bar Structure

Keep your outdoor bar design simple, using durable materials like wood or metal. You’ll need to construct a solid frame to support your bar top and any additional features. Consider the space you have available and the style you’re aiming for.

Framing and Support

Around this time, you’ll start thinking about the framing and support for your bar. You’ll need to ensure it’s sturdy enough to hold the weight of the bar top, shelves, and any appliances or decor you plan to add.

Adding Shelves and Countertops

Among the final touches, you’ll add shelves and countertops to your bar. You can choose from a variety of materials, such as wood, stone, or stainless steel, depending on your budget and the look you want to achieve.

Plus, when adding shelves and countertops, you’ll want to think about the functionality of your bar. You’ll need to decide how much storage space you need, and what type of countertops will be easiest to clean and maintain. You can also add features like a sink, fridge, or ice maker to make your outdoor bar a fully functional entertaining space.

Installing Essential Features

To create a functional outdoor bar area, you’ll need to install the necessary features. This includes lighting, electrical outlets, and plumbing fixtures. You’ll want to ensure that your bar area is well-lit and has access to power and water.

Lighting and Electrical

Features like string lights or lanterns can add ambiance to your outdoor bar. You can also install electrical outlets to power your appliances and decorations. Make sure to follow safety guidelines when working with electricity.

Plumbing and Fixtures

Installing a sink or a kegerator requires plumbing and fixtures. You’ll need to connect water and drain lines, and ensure that your fixtures are durable and weather-resistant. Choose materials that can withstand the elements.

In addition, you’ll want to consider the size and layout of your plumbing and fixtures. You should place them in a way that creates a functional and efficient workflow, making it easy for you to mix drinks and serve guests. This will help you to create a bar area that is both functional and enjoyable to use.

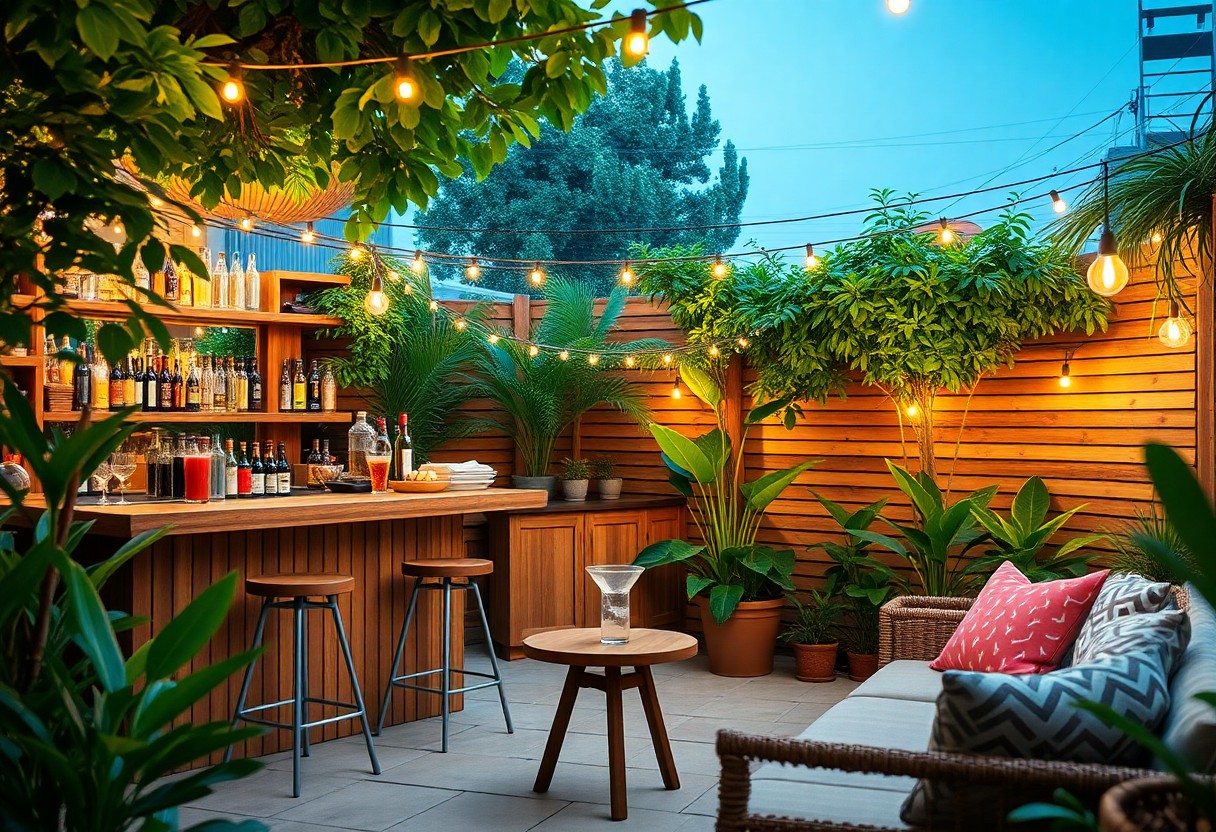
Adding Decor and Ambiance

After setting up your outdoor bar, focus on decor and ambiance. You’ll transform your space into a welcoming oasis with a few simple touches.

Furniture and Textiles

At this stage, you’ll choose furniture and textiles that fit your style. You’ll pick sturdy, weather-resistant pieces that reflect your taste and create a cohesive look.

Landscaping and Accessories

Adding some greenery and accessories will elevate your outdoor bar. You’ll select plants, lighting, and decor that enhance the ambiance and create a unique atmosphere.

It is here that you can let your personality shine through. You’ll arrange your plants, hang lanterns, and add decorative elements that make your outdoor bar area feel like your own private retreat, a place where you can unwind and entertain friends.

Safety and Maintenance

Now that your DIY outdoor bar area is set up, consider checking out expert advice on How to Build an Outdoor Bar for additional tips. You’ll want to ensure your bar is stable and secure.

Ensuring Stability and Security

Stability is key when it comes to your outdoor bar. You’ll want to make sure it’s anchored firmly to the ground to prevent it from toppling over.

Regular Upkeep and Repairs

In fact, keeping your outdoor bar clean and well-maintained will not only ensure your safety but also make your gatherings more enjoyable. You’ll be able to focus on socializing with your guests instead of worrying about your bar’s condition.

Conclusion

Summing up, you’ve got your DIY outdoor bar area coming together. You’ve picked your spot, built your bar, and added your touches. Your outdoor space is now a place where you can pour a drink, sit back, and enjoy the fresh air. You’ve done it yourself, with your own hands, and that’s something to be proud of. Now, grab a drink and take a seat at your new bar, you’ve earned it.

FAQ

Q: What are the imperative components to consider when creating a DIY outdoor bar area?

A: When creating a DIY outdoor bar area, there are several imperative components to consider. First, you’ll need a sturdy base, such as a wooden or metal frame, to support your bar. Next, you’ll want to choose a durable and weather-resistant countertop material, such as granite, marble, or recycled plastic. Additionally, you’ll need to consider the type of seating and lighting you want to include, as well as any electrical or plumbing components, such as a sink or refrigerator. Finally, think about the style and ambiance you want to create, and choose decorative elements, such as plants, string lights, or a fire pit, to enhance the space.

Q: How do I choose the perfect location for my DIY outdoor bar area?

A: Choosing the perfect location for your DIY outdoor bar area depends on several factors, including the layout of your yard, the amount of sunlight and shade, and the proximity to your home and other outdoor living spaces. Consider a spot that is easily accessible and visible from the house, yet far enough away to create a sense of separation and relaxation. You’ll also want to think about the wind direction, noise levels, and any potential obstacles, such as trees or slopes. Ideally, your DIY outdoor bar area should be located in a spot that receives partial shade, especially during the hottest part of the day, to ensure comfort and safety for your guests.

Q: What type of materials should I use to build my DIY outdoor bar area?

A: The type of materials you use to build your DIY outdoor bar area will depend on your budget, style preferences, and the level of durability you need. Some popular materials for outdoor bars include pressure-treated wood, cedar, and reclaimed wood, which can add a rustic touch to your space. You can also consider using metal or aluminum frames, which are durable and low-maintenance. For the countertop, choose a material that is resistant to heat, moisture, and UV light, such as stone, concrete, or recycled plastic. Don’t forget to add a waterproof sealant to protect your bar from the elements and ensure it withstands the test of time.

Q: How can I add electrical and plumbing components to my DIY outdoor bar area?

A: Adding electrical and plumbing components to your DIY outdoor bar area can enhance the functionality and convenience of your space. For electrical components, such as lighting, outlets, and appliances, be sure to hire a licensed electrician to ensure safe and proper installation. For plumbing components, such as a sink or refrigerator, you’ll need to connect to a water source and install a drainage system. Make sure to check local building codes and regulations before starting your project, and consider hiring a professional if you’re not experienced with electrical or plumbing work. It’s also a good idea to install GFCI outlets and use weather-resistant materials to protect your components from the elements.

Q: How can I decorate and furnish my DIY outdoor bar area to create a unique and inviting atmosphere?

A: Decorating and furnishing your DIY outdoor bar area is where you can get creative and add your personal touch. Start by choosing a color scheme and style that reflects your personality and complements your outdoor living space. Add some comfortable seating, such as bar stools or a sectional sofa, and consider incorporating decorative elements, such as plants, artwork, or sculptures. String lights, lanterns, or a fire pit can add warmth and ambiance to your space, while a few well-placed throw pillows and blankets can create a cozy and inviting atmosphere. Don’t forget to add some functional elements, such as a cooler, ice bucket, or wine rack, to make your DIY outdoor bar area a fun and functional space for entertaining friends and family.

The Best Outdoor Rugs for Patios and Decks

As you look to enhance your outdoor living space, you’ll want to consider adding an outdoor rug to your patio or deck. You deserve a beautiful and functional space that reflects your personal style. Your outdoor rug will not only add warmth and texture, but also help define different areas of your space. With so many options available, you’ll want to choose a rug that’s durable, easy to clean, and suitable for your climate, ensuring your outdoor space is enjoyable for years to come.

Key Takeaways:

To enhance your outdoor living space with the right rugs, consider the following points:

  • When identifying the best outdoor rugs for patios and decks, look for materials that are durable, water-resistant, and UV-stable to ensure they can withstand various weather conditions.
  • The size and shape of the outdoor rug should be chosen based on the specific area where it will be placed, taking into account the furniture layout and walkway paths to create a cohesive and safe space.
  • For low-maintenance and easy cleaning, opt for outdoor rugs made from synthetic materials, such as polypropylene or polyester, which can be easily hosed down and dried quickly, making them perfect for high-traffic areas.

Choosing the Right Material

Your outdoor rug’s material will greatly impact its durability and appearance, so consider your needs and preferences when making a decision.

Natural Fibers

Behind the beauty of natural fibers like sisal and jute lies a world of texture and warmth, perfect for adding a cozy touch to your patio or deck.

Synthetic Options

On the other hand, synthetic options such as polyester and polypropylene offer easy maintenance and resistance to fading, making them ideal for high-traffic areas.

But as you explore synthetic options, you’ll find that they come in a wide range of styles and qualities, from budget-friendly basics to high-end designs that mimic the look of natural fibers, allowing you to achieve the perfect balance of form and function for your outdoor space.

Size and Shape Considerations

If you’re looking for the perfect outdoor rug, consider the size and shape of your patio or deck. You can find a wide variety of options at Best Rated – Water Resistant – Outdoor Rugs to match your space.

Measuring Your Space

Along with considering the size and shape, take precise measurements of your patio or deck to ensure the perfect fit. You’ll want to measure the length, width, and any obstacles, such as stairs or furniture, to determine the ideal rug size for your space.

Selecting the Perfect Fit

Selecting the right size and shape of outdoor rug can make or break the ambiance of your patio or deck. You’ll want to choose a rug that complements your furniture and leaves enough space to move around comfortably.

To achieve the perfect fit, consider the shape of your patio or deck and the style of your furniture. You can choose from a variety of shapes, such as rectangular, round, or square, to match your space. By selecting the right size and shape, you can create a cohesive and inviting outdoor space that you’ll enjoy for years to come.

Durability and Maintenance

Keep in mind that a durable outdoor rug can withstand various weather conditions and heavy foot traffic, ensuring your patio or deck remains beautiful and functional for years to come.

Weather Resistance

Among the key factors to consider when choosing an outdoor rug is its ability to resist UV rays, moisture, and extreme temperatures, so you can enjoy your outdoor space regardless of the weather.

Cleaning and Upkeep

By selecting a rug with a waterproof coating and mold-resistant materials, you can minimize the risk of damage and make maintenance a breeze, allowing you to focus on enjoying your outdoor space.

A good cleaning routine is imperative to extend the life of your outdoor rug, and you can achieve this by regularly sweeping or vacuuming the rug, and spot-cleaning any stains or spills as soon as they happen, ensuring your rug remains in great condition and continues to enhance your patio or deck’s beauty.

Style and Design

Once again, you’ll want to consider your personal taste and the overall aesthetic of your outdoor space when selecting an outdoor rug. You’ll find a wide range of styles and designs to choose from, making it easy to find the perfect fit for your patio or deck.

Patterns and Colors

Across the various outdoor rug options, you’ll discover a plethora of patterns and colors to match your unique style. You can opt for bold and bright colors to add a pop of personality to your space or choose more subdued tones to blend in with your surroundings.

Texture and Weave

Designed to withstand the elements, outdoor rugs come in a variety of textures and weaves. You can choose from smooth, flat-weave rugs or more plush, chunky options, depending on your desired level of comfort and durability.

Hence, as you consider the texture and weave of your outdoor rug, think about how you plan to use the space. If you’ll be lounging or dining outdoors frequently, a softer, more textured rug may be the best choice, while a smoother, more durable option may be better suited for high-traffic areas or spaces with heavy furniture.

Safety and Slip Resistance

All outdoor rugs for patios and decks should prioritize safety and slip resistance to prevent accidents. You want to ensure that your outdoor space is secure for family and friends to enjoy.

Slip-Resistant Backing

Among the key features to look for in an outdoor rug is a slip-resistant backing that provides traction and stability. You can choose from a variety of materials that offer this feature, giving you peace of mind.

Secure Installation

Across different types of outdoor rugs, secure installation is crucial to prevent them from slipping or moving around. You should follow the manufacturer’s instructions to ensure your rug is properly secured.

This involves using the right tools and techniques to fasten your outdoor rug to the patio or deck, taking into account the specific material and size of your rug. You should also consider factors like foot traffic and weather conditions to determine the best installation method for your outdoor space, ensuring your rug stays in place and provides a safe surface for you and your guests.

Top Picks and Recommendations

Many outdoor rug options are available, but you can find the best ones at Outdoor Rugs, Patio Rugs & Outdoor Area Rugs, offering a wide selection to suit your needs.

Budget-Friendly Options

Affter considering your options, you’ll find that budget-friendly outdoor rugs are perfect for adding a decorative touch to your patio or deck without breaking the bank, with prices starting from under $50.

High-End Choices

Before making a final decision, consider high-end outdoor rugs, which offer superior quality, durability, and style, making them a worthwhile investment for your outdoor space.

Plus, these high-end choices often come with advanced features such as water resistance, UV protection, and stain resistance, ensuring your outdoor rug remains looking its best for years to come, and you can enjoy your outdoor space with peace of mind, knowing you’ve made a smart investment in your home’s exterior.

Final Words

Presently, you have all the information needed to choose the best outdoor rugs for your patios and decks. You can now select the perfect rug that suits your style and budget. Your outdoor space will be transformed into a cozy and inviting area with the right rug. You will enjoy spending time with family and friends in your newly decorated patio or deck, making lasting memories with your loved ones.

FAQ

Q: What are the key factors to consider when selecting the best outdoor rug for my patio or deck?

A: When choosing an outdoor rug for your patio or deck, consider the size of the space, the material and durability of the rug, the color and style that complements your outdoor decor, and the level of maintenance required. You should also think about the amount of foot traffic the rug will endure and whether it will be exposed to direct sunlight or moisture. Additionally, consider the rug’s slip-resistance, mildew-resistance, and UV-resistance to ensure it can withstand the elements.

Q: What types of materials are outdoor rugs for patios and decks typically made of?

A: Outdoor rugs for patios and decks are often made from synthetic materials such as polypropylene, polyester, or nylon, which are durable, water-resistant, and easy to clean. Some outdoor rugs may also be made from natural fibers like sisal, jute, or seagrass, which provide a more organic look and feel. Additionally, some rugs may feature a combination of materials, such as a polypropylene pile with a rubber backing for added stability and slip-resistance.

Q: How do I clean and maintain my outdoor rug to ensure it lasts long?

A: To keep your outdoor rug looking its best, regularly sweep or blow leaves and debris off the surface. For more thorough cleaning, use a mild detergent and water to gently scrub the rug, and then rinse with a hose. Allow the rug to air dry completely to prevent moisture buildup. You can also use a outdoor rug cleaner or a solution of equal parts water and white vinegar to help maintain the rug’s color and texture. Avoid using harsh chemicals or abrasive cleaners, which can damage the rug’s material.

Q: Can I use an outdoor rug on a deck with a lot of direct sunlight, and if so, what precautions should I take?

A: Yes, you can use an outdoor rug on a deck with direct sunlight, but it’s important to choose a rug that is specifically designed to withstand UV rays. Look for rugs with built-in UV protection or treatments that prevent fading and discoloration. You can also take precautions like rotating the rug regularly to ensure even fading, using a UV-blocking rug pad underneath, and avoiding placing the rug in areas with intense sunlight for extended periods. Additionally, consider using a rug with a natural fiber like sisal or jute, which can help to filter the sun’s rays.

Q: Are outdoor rugs for patios and decks slip-resistant, and what features should I look for to ensure safety?

A: Many outdoor rugs for patios and decks feature slip-resistant backing or surfaces to prevent slipping and falling. Look for rugs with rubber or latex backing, which provide traction and stability on smooth surfaces. You can also consider rugs with textured or woven surfaces, which can help to improve grip. Additionally, look for rugs with a non-slip coating or treatment, such as a silicone-based material, which can provide extra traction. It’s also important to ensure the rug is properly secured to the deck or patio surface to prevent it from slipping or shifting.

How to Organize Your Laundry Room for Efficiency

You tackle laundry day with a sense of duty. Your laundry room can be a hub of efficiency. Start by streamlining your space. Check out tips on How to Deep Clean and Organize Your Laundry Room to get started. You will be on your way to a more organized laundry room, making the chore less daunting.

Key Takeaways:

To organize your laundry room for efficiency, consider the following points:

  • Sort and purge items in your laundry room to get rid of unnecessary clutter and create a more streamlined space.
  • Use vertical storage solutions such as shelves and cabinets to maximize your laundry room’s storage capacity and keep frequently used items within easy reach.
  • Implement a labeling system to categorize and organize your laundry supplies, making it easier to find what you need and maintain a tidy environment.

    Assessing Your Laundry Room

    The first step in organizing your laundry room is to take a hard look at the space you have. You need to understand how you use the room and what you want to achieve with your organization system.

    Evaluating the Space

    Rooms like yours can be optimized with a few simple changes. You’ll start by measuring the dimensions of your laundry room and noting the location of doors, windows, and any plumbing or electrical fixtures.

    Identifying Inefficient Areas

    An honest assessment of your laundry room will help you identify areas that are not working for you. You’ll look for cluttered corners, inadequate storage, and workflows that waste time and energy.

    Areas that are poorly lit or have inadequate ventilation can also hinder your productivity. You’ll want to take note of these issues and think about how you can address them as you plan your organization system, making your laundry room a more functional and efficient space for you to work in.

    Sorting and Purging

    It starts with sorting and purging your laundry room. You can learn more about How to Organize a Laundry System for your Family to improve efficiency.

    Categorizing Laundry Supplies

    Classifying your laundry supplies by type and frequency of use helps you prioritize what you need. You will find it easier to manage your laundry room when your supplies are organized.

    Removing Unnecessary Items

    At this stage, you get rid of items that are no longer needed or useful. You will declutter your laundry room and make space for vital items.

    Another step in removing unnecessary items is to assess each item’s condition and usefulness. You should consider whether you have used an item in the past year and if it still serves a purpose in your laundry room. If not, you should consider donating or discarding it to free up space and make your laundry process more efficient. You will be amazed at how much more manageable your laundry room becomes once you have purged your unwanted items.

    Optimizing Storage

    Keep your laundry room clutter-free by maximizing storage. You’ll work more efficiently with a clear space.

    Using Vertical Space

    Prior to installing shelves, assess your ceiling height. You can install shelves or storage units that go up to the ceiling to store less frequently used items.

    Implementing Shelving and Cabinets

    Behind the doors, you can store cleaning supplies, detergent, and other imperatives. You’ll have easy access to what you need.

    Further, consider installing cabinets with doors to hide clutter and keep your laundry room looking tidy. You can label the cabinets so you can quickly find what you need, making your laundry process more efficient.

    Creating a Workflow

    After establishing your laundry room’s layout, you’ll want to create a workflow that suits your needs. You’ll be moving from one task to the next, so it’s imperative to design a path that’s efficient and easy to follow.

    Designing a Sorting Station

    By placing your sorting station near the entrance of your laundry room, you’ll be able to separate clothes as soon as you bring them in, making the process more manageable. You’ll be able to categorize items quickly and get started on your laundry right away.

    Streamlining Ironing and Folding

    Folding into your workflow, ironing and folding stations should be positioned to minimize unnecessary movement. You’ll find that having an ironing board and folding table nearby will save you time and effort in the long run.

    In fact, with your ironing and folding stations in close proximity, you’ll be able to quickly move from ironing a garment to folding and putting it away, keeping your laundry room clutter-free and making the entire process more efficient, allowing you to get on with your day.

    Implementing Maintenance Routines

    Not only will a well-organized laundry room save you time, but it will also make your life easier. You can find more tips on Organizing Your Laundry Room for Efficiency to help you get started.

    Scheduling Regular Cleaning

    Synchronizing your cleaning schedule with your laundry routine will help you stay on top of things. You should set aside time each week to wipe down surfaces and tidy up your laundry room.

    Performing Routine Checks

    Around the same time each month, you should perform routine checks on your laundry equipment to ensure it’s working properly. You can check for worn-out parts and replace them as needed.

    The key to performing routine checks is to be thorough and consistent. You will need to check your washing machine and dryer for any signs of wear and tear, and make sure all filters are clean and functioning properly. This will help prevent breakdowns and keep your laundry room running smoothly. By following these simple steps, you can maintain your laundry room’s efficiency and keep it organized.

    Leveraging Laundry Room Technology

    Once again, you’ll find that a well-organized laundry room relies on smart solutions. You can streamline your laundry process with modern technology, making it faster and more efficient.

    Investing in Energy-Efficient Appliances

    Technological advancements have led to energy-efficient appliances that save you money and reduce your environmental impact. You can invest in these appliances to optimize your laundry room.

    Utilizing Laundry Management Tools

    Leveraging digital tools, you can track and manage your laundry cycles, ensuring you never miss a load. You can also monitor your energy consumption and adjust your habits accordingly.

    Appliances and tools work together to make your laundry room more efficient. You can use apps to control your washer and dryer, schedule cycles, and even monitor your detergent levels, allowing you to focus on other tasks while your laundry gets done.

    Summing up

    From above, you’ve learned to optimize your laundry room. You’ve purged unnecessary items, assigned a home for each thing, and set up a functional layout. You’ve made your laundry room efficient. Now, you can tackle dirty clothes with ease, saving time and energy. Your new system will make doing laundry less of a chore, and more of a routine task.

    FAQ

    Q: What are the benefits of organizing my laundry room for efficiency?

    A: Organizing your laundry room can help you save time, reduce stress, and make the chore of doing laundry more manageable. A well-organized laundry room can also help prevent lost socks, missing matching items, and damaged clothing due to overcrowding or poor storage. Additionally, a clutter-free laundry room can improve safety by reducing the risk of tripping hazards and making it easier to navigate the space.

    Q: How do I start organizing my laundry room for efficiency?

    A: To start organizing your laundry room, begin by purging any unnecessary items, such as empty detergent bottles or broken laundry baskets. Next, sort items into categories, like laundry supplies, cleaning products, and accessories. Then, assign a home for each item, using storage bins, baskets, or shelves to keep everything tidy and within reach. Consider the workflow of your laundry room and place items in a logical order, such as having detergent and fabric softener near the washing machine.

    Q: What are some space-saving storage solutions for my laundry room?

    A: There are several space-saving storage solutions you can use in your laundry room, including wall-mounted shelves, foldable drying racks, and stackable storage bins. You can also use over-the-door storage organizers for accessories like laundry bags, ironing boards, and cleaning supplies. Consider installing a slide-out shelf or a fold-down ironing board to maximize your space and keep frequently used items accessible.

    Q: How can I optimize my laundry room’s workflow for efficiency?

    A: To optimize your laundry room’s workflow, consider the path you take when doing laundry, from sorting to folding and putting away. Place your sorting station, washing machine, and dryer in a logical order to minimize walking distance and reduce the risk of errors. You can also use a laundry sorter with separate compartments for lights, darks, and delicates to streamline the sorting process. Additionally, consider investing in a laundry cart or island with built-in storage and a countertop for folding and ironing.

    Q: How often should I maintain and clean my organized laundry room?

    A: To keep your laundry room organized and efficient, it’s imperative to maintain and clean it regularly. Set aside time each week to wipe down surfaces, tidy up storage areas, and check for any clutter or mess. You should also deep clean your laundry room every few months, including cleaning the washing machine and dryer, dusting and vacuuming, and reorganizing storage areas as needed. By maintaining your laundry room regularly, you can ensure it continues to function efficiently and remains a comfortable and safe space to work in.

How to Create a Garden That Changes With the Seasons

You can create a dynamic outdoor space that evolves with the passage of time. As you plan your garden, consider the changing seasons and how your outdoor space can transform with them. Your garden can be a vibrant and engaging reflection of the time of year, with blooms and foliage that shift and change as the seasons come and go, offering you a unique and exciting experience throughout the year.

Key Takeaways:

To create a garden that evolves with the seasons, consider the following points:

  • Choose plants with different bloom times to ensure year-round color and interest in your garden, such as spring bulbs, summer flowers, and fall foliage.
  • Select shrubs and trees with varying growth habits and texture to add depth and dimension to your garden throughout the seasons, including deciduous and evergreen species.
  • Incorporate seasonal elements, such as ornamental grasses, pumpkins, or winter berries, to create a dynamic garden that changes with the seasons and reflects the unique character of each time of year.

Planning for Seasonal Change

The key to creating a garden that changes with the seasons is to plan ahead. You need to consider the different times of year and how your garden will look during each one. This involves thinking about the types of plants you want to include and how they will grow and change throughout the year.

Choosing the Right Plants

Plant selection is vital when it comes to creating a seasonal garden. You should choose plants that thrive during different times of year, ensuring your garden always looks its best. By selecting a variety of plants, you can enjoy a dynamic and interesting garden that changes with the seasons.

Considering Climate and Soil

Above all, you must consider your local climate and soil type when planning your garden. You need to choose plants that are suitable for your area and can thrive in the conditions you have. This will help you create a beautiful and thriving garden that changes with the seasons.

In addition, you should take into account the amount of sunlight and rainfall your garden receives, as well as the temperature and soil pH. By understanding these factors, you can make informed decisions about the plants you choose and create a garden that flourishes throughout the year, with your careful planning and attention to detail, you will be able to enjoy a stunning seasonal garden.

Spring Gardens

Any gardener knows that spring is the perfect time to create a vibrant and dynamic garden. You can find inspiration for your spring garden design by visiting All Season Flower Gardens – Designing Year Round Beauty to get ideas for your own outdoor space.

Planting Bulbs and Seeds

Around this time, you’ll want to start planting bulbs and seeds to ensure a lush garden in the spring. You can choose from a variety of flowers, such as tulips, daffodils, and hyacinths, to add color and texture to your garden.

Creating a Colorful Landscape

For a stunning spring garden, you’ll want to focus on creating a colorful landscape that will bloom throughout the season. You can achieve this by selecting a mix of early-blooming flowers, such as crocuses and pansies, and later-blooming flowers, like peonies and roses.

Planting a mix of annuals and perennials will also help you achieve a dynamic and ever-changing garden. You can plant cool-season annuals like snapdragons and petunias, and perennials like daylilies and coneflowers, to create a vibrant and colorful landscape that will change with the seasons, keeping your garden interesting and beautiful all year round.

Summer Bloom

All your hard work in the spring will pay off as your garden bursts into bloom during the summer months. You’ll enjoy vibrant colors and lush textures, and your outdoor space will be perfect for relaxation and entertainment.

Managing Growth and Pruning

Following a regular pruning schedule, you’ll be able to keep your plants healthy and thriving, and prevent overgrowth from taking over your garden. You’ll need to deadhead flowers and trim back foliage to maintain shape and promote new growth.

Incorporating Summer Flowers

Mastering the art of combining summer flowers, you’ll create a stunning display of color and texture in your garden. You can choose from a wide range of blooms, such as sunflowers, zinnias, and cosmos, to add vibrancy to your outdoor space.

In addition, as you select summer flowers, consider their growth habits, bloom times, and soil requirements to ensure that they thrive in your garden. You can also incorporate summer-blooming shrubs and trees to add depth and structure to your landscape, and provide a beautiful backdrop for your summer flowers.

Autumn Harvest

Many gardeners look forward to the autumn season, as it brings a new wave of colorful blooms and fruitful harvests. You can create a beautiful and thriving garden during this time by preparing your soil, planting seasonal flowers, and maintaining your garden’s health.

Preparing for the Fall Season

About this time, you should start cleaning up your garden, removing dead plants and debris, and adding a layer of compost to your soil. You will be preparing your garden for the upcoming season, and setting it up for success.

Planting Autumnal Blooms

Around autumn, you can start planting flowers that thrive in cooler temperatures, such as pansies, asters, and chrysanthemums. You can choose from a variety of colors and textures to add depth and interest to your garden.

Autumnal blooms can add a pop of color to your garden, and you can enjoy them well into the fall season. You can plant them in containers or directly in the ground, and with proper care, they will bloom for weeks, providing you with a beautiful display of color and a sense of accomplishment in your gardening endeavors.

Winter Wonderland

Despite the cold temperatures, your garden can still be a beautiful and inviting space during the winter months. With a little planning, you can create a winter wonderland that showcases the season’s unique charm.

Creating Interest in Snowy Landscapes

Conceptualizing a snowy landscape can be a fun and creative process. You can add interest to your winter garden by incorporating elements like snow-covered sculptures, frosted berries, and bare tree branches that create a beautiful silhouette against the sky.

Planting Evergreens and Winter Flowers

Before you start planting, consider the types of evergreens and winter flowers that thrive in your climate. You can choose from a variety of plants like holly, boxwood, and winter heather to add some color and texture to your garden.

Understanding how to care for your evergreen and winter flower plantings is key to keeping them healthy and thriving. You’ll want to make sure to water them regularly, but avoid overwatering, which can be detrimental to their health. By choosing the right plants and providing proper care, you can enjoy a beautiful and vibrant garden even in the dead of winter, and your garden will be a beautiful reflection of your personal style and creativity.

Maintenance and Care

For a garden that changes with the seasons, you’ll need to stay on top of maintenance and care tasks to ensure your outdoor space remains beautiful and thriving.

Seasonal Cleanup and Preparation

Around the changing of the seasons, take time to clean up your garden, removing dead plants and debris, and prepare for the upcoming season by planting new flowers, shrubs, or trees that will bloom during that time.

Tips for Year-Round Garden Health

Genuinely, you can keep your garden healthy year-round by following a few simple tips:

  • watering plants regularly
  • mulching to retain moisture
  • pruning to promote growth

, Recognizing the unique needs of your garden will help you create a space that flourishes in every season.

YearRound garden health is your goal, and you can achieve it by staying on top of tasks such as:

  • monitoring temperature and weather changes
  • adjusting your watering schedule accordingly
  • adding fertilizers or soil conditioners as needed

, Recognizing the importance of adaptability and flexibility in your gardening routine will help you create a thriving and dynamic outdoor space.

Conclusion

Ultimately, you now have the tools to create a garden that changes with the seasons. You can design and plant your garden to showcase vibrant colors and textures throughout the year. By choosing the right plants and incorporating seasonal elements, you will enjoy your outdoor space in every season, and your garden will be a dynamic reflection of your personal style and connection to nature.

FAQ

Q: What are the key elements to consider when creating a garden that changes with the seasons?

A: To create a garden that changes with the seasons, consider the climate, soil type, and the amount of sunlight your garden receives. Choose a mix of plants that bloom or change color during different times of the year, such as spring bulbs, summer flowers, autumn foliage, and winter berries. Incorporate decorative elements like seasonal decor, lighting, and furniture to enhance the garden’s ambiance throughout the year.

Q: How can I select plants that will provide year-round interest in my garden?

A: Selecting a variety of plants with different growth habits, textures, and bloom times is crucial for a garden that changes with the seasons. Consider plants with interesting foliage, such as ornamental grasses, or those with attractive bark, like deciduous trees. Incorporate plants that produce showy flowers, berries, or seeds, and include a mix of evergreen and deciduous plants to provide year-round structure and interest.

Q: What role does maintenance play in keeping my seasonal garden looking its best?

A: Regular maintenance is necessary to keep your garden looking its best throughout the year. This includes tasks like pruning, deadheading, and dividing plants as needed. Add a layer of mulch or compost to retain moisture, suppress weeds, and regulate soil temperature. Stay on top of seasonal tasks like planting spring bulbs, trimming summer growth, and protecting plants from harsh winter weather to ensure your garden continues to thrive.

Q: How can I incorporate seasonal decor and furniture into my garden design?

A: Incorporating seasonal decor and furniture can add an extra layer of interest to your garden. Consider adding seasonal-themed planters, garden ornaments, and outdoor lighting to create ambiance and highlight your plants. Use outdoor furniture like benches, tables, and chairs to create inviting spaces for relaxation and entertainment during different times of the year. Switch out decorative elements seasonally to keep your garden looking fresh and updated.

Q: Are there any specific design principles I should follow when creating a garden that changes with the seasons?

A: When designing a garden that changes with the seasons, consider the principles of layering, texture, and movement. Create layers of plants with different heights, textures, and growth habits to add depth and interest. Incorporate a variety of textures, from smooth to rough, to create visual appeal. Use plants with movement, like grasses or perennials with flowing foliage, to add dynamic energy to your garden. Balance these elements with resting spaces, like a quiet seating area, to create a harmonious and engaging outdoor space.

The Top Tips for Growing Healthy Cucumbers

If you’re looking to add a refreshing twist to your garden, growing cucumbers is a great idea. As you initiate on this journey, you’ll want to ensure your cucumbers are healthy and thriving. You can start by checking out a comprehensive guide on How to Grow Cucumbers: Beginner’s Starter Guide to get the basics right. With the right techniques, you’ll be enjoying your homegrown cucumbers in no time, and your harvest will be plentiful and delicious.

Key Takeaways:

To achieve success in growing healthy cucumbers, consider the following points:

  • Provide your cucumbers with adequate sunlight and water to promote healthy growth and development.
  • Use well-draining soil and a trellis to support the cucumber plants as they grow, keeping them off the ground to prevent disease.
  • Keep an eye out for pests and diseases, and take action promptly if you notice any issues to prevent them from spreading and damaging your crop.

    Soil Preparation

    A key factor in growing healthy cucumbers is preparing the right soil, you can learn more about it at How To Grow Cucumbers: Tips on Planting And Caring.

    Choosing the Right Soil

    Beneath the surface, you’ll find that well-draining soil with a pH between 6.0 and 7.0 is ideal for cucumbers, allowing your plants to thrive.

    Preparing the Soil for Planting

    By loosening the soil to a depth of 12-18 inches, you’ll be able to create a suitable environment for your cucumber seeds to grow.

    Soil preparation is an necessary step in the process, as it allows you to create a fertile ground for your cucumbers to develop, you can add organic matter like compost to improve soil structure and fertility, which will help your plants grow strong and healthy.

    Selecting the Right Variety

    Any gardener looking to grow healthy cucumbers should consider the type of variety that suits their needs.

    Types of Cucumbers

    You can choose from:

    • Slicing cucumbers
    • Pickling cucumbers

    Any variety you choose will have its unique characteristics.

    Variety Characteristics
    Slicing Long, thin, and dark green
    Pickling Short, stout, and light green
    English Long, thin, and seedless
    Persian Short, thin, and sweet

    Considerations for Climate and Space

    One of the key factors in selecting a cucumber variety is considering your climate and available space. You should think about the temperature, humidity, and sunlight your garden receives.

    Plus, you need to ensure that your cucumber plants have enough space to spread out and grow, taking into consideration the mature size of the plant and its watering needs, so you can provide your cucumbers with the best conditions for optimal growth.

    Sowing and Germination

    After preparing your soil, you can start sowing your cucumber seeds, and for more information, you can visit How to Grow Cucumber Plants: The Complete Guide to get the best results.

    Sowing Seeds

    Adept gardeners know that sowing seeds at the right depth and spacing is crucial for healthy growth, and you should sow your seeds about 1 inch deep and 6-8 inches apart.

    Providing Adequate Water and Light

    By ensuring your cucumber plants receive sufficient water and light, you will be able to promote healthy growth and development, and your plants will thrive in a sunny location with well-drained soil.

    Indeed, providing adequate water and light is vital for your cucumber plants, and you should water them deeply once or twice a week, depending on weather conditions, and ensure they receive full sun to partial shade, which will help them grow strong and produce plenty of fruit.

    Supporting and Training

    Many cucumber plants need support as they grow, and providing the right structure can help you maximize your harvest. You can use a variety of methods to train your cucumbers, from simple stakes to more complex trellises and cages.

    Using Trellises and Cages

    Previously, gardeners had to rely on makeshift supports, but now you have access to a wide range of trellises and cages specifically designed for cucumbers, allowing you to provide your plants with the support they need to thrive.

    Pruning and Training Vines

    Teaching your cucumber vines to climb can be a simple process, and you can start by gently twining the stems around the support, encouraging them to grow upwards and outwards, making the most of your space.

    Trellises can be especially useful when pruning and training vines, as they provide a clear structure for you to follow, allowing you to trim back any stray growth and encourage your cucumbers to focus their energy on producing fruit, resulting in a healthier and more productive plant, and a better harvest for you.

    Pest and Disease Management

    To ensure your cucumbers grow healthy, you need to manage pests and diseases effectively. This involves monitoring your plants regularly and taking action at the first sign of trouble.

    Common Pests and Diseases

    Besides regular inspections, you should be aware of common pests and diseases that can affect your cucumber plants, such as aphids, whiteflies, and powdery mildew.

    Organic and Integrated Pest Management

    Behind every successful cucumber crop is a well-planned pest management strategy, which includes using organic methods to control pests and diseases, such as introducing beneficial insects or using physical barriers.

    Pests can quickly destroy your cucumber crop if left unchecked, so you will want to use a combination of techniques, including crop rotation, biological control, and organic pesticides, to keep them under control and maintain a healthy balance in your garden, allowing your cucumbers to thrive.

    Harvesting and Enjoying

    Unlike other vegetables, cucumbers are ready to harvest when they are dark green and around 6-8 inches long. You can enjoy your cucumbers in a variety of ways, from slicing them up for a refreshing snack to incorporating them into your favorite recipes.

    When to Harvest

    Beneath the vine, you’ll find your cucumbers ready to be picked when they reach the desired size. You can check on them daily, as they can quickly become too large and seedy.

    Using Cucumbers in Recipes

    Beyond the classic salad, you can use your cucumbers in a wide range of dishes, from sandwiches and wraps to yogurts and smoothies. You can also pickle or ferment them for a tangy snack.

    Hence, as you explore the various ways to use your cucumbers, you’ll discover that they can add a cool and refreshing touch to many of your favorite recipes. You can slice them thinly and add them to sandwiches, or dice them up and toss them into a salad. Your cucumbers will be a versatile and delicious addition to your kitchen, and you’ll enjoy finding new ways to incorporate them into your meals.

    To wrap up

    Summing up, you now have the imperative knowledge to grow healthy cucumbers. You can apply these top tips to your gardening practice, ensuring your cucumber plants receive the right amount of water, nutrients, and support. By following these guidelines, you will be able to enjoy a bountiful harvest of delicious and refreshing cucumbers from your own garden, and your efforts will be rewarded with a successful growing season.

    FAQ

    Q: What are the ideal growing conditions for healthy cucumbers?

    A: Cucumbers are a warm-season crop and thrive in full sun with well-drained soil that is rich in organic matter. They prefer a slightly acidic to neutral soil pH, ranging from 6.0 to 7.0. Consistent moisture, especially when they are producing fruit, is necessary for healthy growth. Support, such as a trellis, can also be beneficial to keep the vines organized and promote better fruiting.

    Q: How often should I water my cucumber plants?

    A: Cucumber plants need consistent moisture to produce well. It is recommended to water them deeply about 1-2 times a week, depending on weather conditions. The soil should be kept moist but not waterlogged, as this can lead to root rot and other problems. Mulching around the plants can help retain moisture in the soil and suppress weeds that compete for water.

    Q: What are some common pests and diseases that affect cucumber plants, and how can they be managed?

    A: Common pests that affect cucumber plants include aphids, whiteflies, and cucumber beetles. Regularly inspecting the plants and using organic control methods such as neem oil or introducing beneficial insects can help manage these pests. Diseases such as powdery mildew and fungal infections can be managed by ensuring good air circulation, removing infected leaves, and using fungicides as a last resort. Practicing crop rotation and using resistant varieties can also help prevent disease issues.

    Q: How do I optimize fertilizer application for my cucumber plants?

    A: Cucumbers are heavy feeders and benefit from a balanced fertilizer applied at planting time and again when they start to vine. A fertilizer that is high in phosphorus (such as a 10-20-10 NPK formula) can promote fruit production. Side-dressing with a balanced fertilizer when the plants are about 6 inches tall and again when they start to bloom can provide them with necessary nutrients for optimal growth and fruiting.

    Q: Are there any specific pruning or training techniques for cucumber plants to enhance their productivity and health?

    A: Pruning and training cucumber vines can significantly enhance their productivity and health. Removing lower leaves when the plant is about 12 inches tall can help prevent soil-borne diseases from splashing up onto the plant. Training the vines to climb a trellis or other support can improve air circulation, make harvesting easier, and promote even fruiting. Regularly removing any weak or spindly growth can also help direct the plant’s energy into producing more fruit.

Opaye Skip to content